In this course, Rachel McCollin will guide you through creating a series of practical call-to-action WordPress plugins. You'll create:
a call-to-action plugin that can be activated with a hook from within a theme
a plugin to output a call to action from a shortcode that users can embed in their content
a call-to-action widget that users can edit and add to their sites with the WordPress Customizer or Widget admin screen
You can take this course straight away with a subscription to Envato Elements. For a single low monthly fee, you get access not only to this course, but also to our growing library of over 1,250 video courses and industry-leading eBooks on Envato Tuts+.
Plus you can download unlimited items from the huge Envato Elements library of more than 1.3 million creative assets. Create with unique fonts, photos, graphics and templates, and deliver better projects faster.
There are a lot of reasons why you might want to add a music or audio player to your WordPress website. You can use it to allow users to play the audio version of the article they are reading or you can use it to simply add some nice background music to the website. If you are running a small news website, another useful way of using an audio player to improve user experience would be to provide audio versions of all news headlines with a brief summary.
There are a lot of free and paid plugins available to add an audio player to your WordPress website. We have already created a tutorial which discusses how to add a free music player to your WordPress website. In this tutorial, we will move our focus to the Sticky HTML5 Music Player WordPress plugin available on CodeCanyon. As you will see, the paid plugin offers a lot of important and useful functions missing in the free plugin. You also get free support for six months and free updates for lifetime.
Why Use the Sticky HTML5 Music Player WordPress Plugin?
The plugin that you choose to use on your website will depend on your own requirements. In the case of the Sticky HTML5 Music Player WordPress plugin, some of the features can significantly improve the user experience.
It gives you the ability to control all the basic settings like autoplay, volume, looping, or shuffling the music. You can also change the color of different UI elements like the previous, pause, shuffle, and next buttons. You can also hide these buttons if they are not needed.
One very useful feature of the plugin is continuous playback. This means that whenever you navigate to a new page, the plugin will continue playing the audio from the previous minute. The audio level and everything else also remains the same.
Another useful feature of the plugin is its ability to read the contents from a folder of MP3 files in order to automatically generate the playlist. This way, you don't have to manually add each audio file to the playlist.
The plugin creates a sticky player—that means it sticks to the bottom of the screen and does not interfere with all other content on the website. It also allows you to set a bunch of options to load the player in minimized or maximized state.
In this tutorial, we will use all these features of the plugin to create a music player that sticks to the bottom left corner of the screen. It will also automatically generate a playlist based on audio files located in a certain folder.
Creating Your Music Player
Once you have purchased and installed the plugin, it is very easy to add a music player to your website. You just have to choose the Add New option from the WordPress dashboard under LBG AUDIO3 HTML5.
On the next screen, you can give your player any appropriate name. This name is only used to help you identify the player, so you can change it later.
You can now change the appearance of the player and many other options by going to Manage Players and then clicking on Player Settings.
On the next page, you will see a lot of settings which can be changed individually for each audio player that you create with this plugin. There are two skins available for all the controls in the audio player: blackControllers and whiteControllers. They will determine the color of different buttons like previous, next, play, pause, and shuffle.
The color of other UI elements like the volume control or the buffer indicators can be set using a color picker. You can change the colors to any value you want in order to match them to the overall theme of the website.
There are many other settings at the bottom of the same page. They allow you to show or hide different playback buttons. You can also control the spacing between the player and the playlist by tweaking the value of the player margin.
If you want your users to enjoy continuous playback when they are visiting different pages on your website, you should consider setting an appropriate value for the Cookie Expiration Time setting. It is set to 1 by default. This means that any user who visits the website multiple times within a single day will be able to continue the audio playback from the same position at which they left.
Adding Songs to a Playlist
There are two ways to specify the path of audio files in your music player and add them to its playlist.
The first method requires you to click on the Playlist button of the corresponding music player on the Manage Players screen. On the next page, you will see all the existing audio files already added to the current playlist. You can drag them around to change the order in which they are played.
Click on the Add new button to add an audio file to the playlist. Now, you just have to specify the path to an MP3 file and set a title for it. Everything else is optional. The title of the file is what will appear in the playlist. Click the Add Record button and the changes will be reflected immediately in the music player UI.
This process can be very tedious if you want to add 20 or 30 audio files to a single playlist. Luckily, the Sticky HTML5 Music Player will generate a playlist for you if you simply specify the path to the folder where all your files are located.
To do this, you have to select Generate Playlist From Folder under LBG AUDIO3 HTML5 in the WordPress dashboard. Now specify the path to the folder where all the audio files are located. Remember that this path is relative to the WordPress installation directory, so you don't need to add any leading or trailing slashes. For example, if the audio files are located in a folder called favorite_music in the root directory, simply specify the path as favorite_music instead of favorite_music/ or /favorite_music/.
Once you click on Generate Playlist, the plugin will automatically fill in the title and other information for each audio file based on its metadata. You will still be able to manually change the title or author name later if you want.
Customizing the Playlist Appearance
You can also change the spacing and color of the playlist that appears below the music player. The settings for that are available below General Settings on the same page.
The setting titled Number of Items Per Screen will determine how many songs in the playlist are listed at once under the player. The player starts showing a scrollbar on the right side of the playlist if there are additional songs that could not be displayed on a single screen. This is very helpful if the playlist has a lot of songs or audio files and you don't want the player to take up a lot of space on the screen when maximized.
Once you have changed all the values to suit your own project needs, you can click on the Preview Player button at the top to see how the music player finally looks.
Once you are fully satisfied with the UI and other aspects of the music player, you can add it to any webpage you want using shortcodes.
Adding the Music Player to Your Website
This is the last step of the tutorial. You can add the Sticky HTML5 Music Player WordPress plugin to any post or page you like by copying the shortcode shown on the Manage Players page in the plugin's Dashboard menu. In our case, the shortcode is [lbg_audio3_html5 settings_id='4'].
If you want to show the shortcode on every page of your website, a better option to add it would be to simply set the Activate For Footer option to true under Player Settings. This will add the music player to the footer of every page on your website without the use of any shortcode.
One more thing that you should remember is that the code for the music player is added in the location where you paste the shortcode. However, visually the player will always stick to a fixed position on the webpage—the bottom left corner in our case.
Final Thoughts
In this tutorial, we learned how to add a music player to any WordPress website using the Sticky HTML5 Music Player WordPress plugin from CodeCanyon. The plugin offers some nice features like auto-generation of playlists from the contents of a folder and continuous playback when users load different webpages. It is also very easy to change the UI of different music players so that they blend in perfectly with the rest of the website.
There are a couple of situations where using the continuous playback feature could be useful, like playing all the important news headlines of the day or narrating an event or a story. Similarly, you could also use the playlist auto-generation feature to quickly create different playlists for different users and occasions.
How do you plan on using this music player on your website? Let us know in the comments.
WordPress calendar plugins let users make bookings, schedule events, pay for appointments and more.
Calendars help organize and keep track of things so they don’t get out of hand. For example, they help us plan and schedule seminars, webinars, workshops, events, appointments, automatic payments, follow up on leads, check availability, remind us of important meetings and so on.
If you’re a blogger or content manager, calendars help you schedule assignments, plan how to release and publishing content and so on.
If your website does any of these things, you need a calendar plugin to help you create calendars that visitors to your website can interact with.
In this article we’ll look at calendar plugins available on CodeCanyon.
The sheers quantity of things one needs to juggle when running a business is overwhelming. Without a calendar your business can fall into disarray. And that quickly translates into unsatisfactory user experiences. This means significant losses not only in income but also customers and potential customers.
This is why you need a calendar plugin for your website.
What is a Calendar Plugin?
A calendar plugin is a piece of code that helps you incorporate a calendar tool into your WordPress website so you can display dates, events, schedules and so on neatly in one place on your website.
Calendars are added to the front-end of your website. Simple calendars allow you to display things like dates and availability. Advanced calendar plugins come with comprehensive solutions for booking and scheduling, including features like purchase and payment integration.
Why Do You Need a Calendar Plugin?
Calendars help us organize and keep track of things so they don’t get out of hand.
Calendar plugins can be used in the following ways:
To help with planning, organizing, and publicizing.
Showing the time, date, and locations of events.
Creating, managing and showing events on your website.
Scheduling appointments online or taking bookings online.
In practical everyday use, calendars can help you plan and schedule seminars, webinars, workshops, events, or appointments. They can also make automatic payments, follow up on leads, check availability, remind us of important meetings and so on.
Not only that, but if you're a bloger of content manager, a calendar plugin helps you manage your editorial calendar. It also allows you to schedule posts through different channels, be it website, blog, or social media.
Some Features You Will Find in Calendar Plugins
A great calendar plugin will provide the following:
templates you can customize to reflect your style.
drag-and-drop builder so you can create your calendar easily.
recurring events to automate events that occur regularly
ability to import and export data for back up and recovery.
Things to Consider When Choosing an Calendar Plugin
Ease of Use: Using a calendar plugin should be straight-forward. Expect little or no learning curves for the best plugins.
Responsiveness and Mobile Readiness: This is a no-brainer because over 70% of anything that happens online is through a mobile mobile device.
Cross-Browser Compatibility: Not everyone uses Firefox or Safari.
Social Sharing: Users should be able to share your calendar with other users on social media.
Rating and Reviews: Check what others say about the calendar plugin you are considering.
Integration: Seamless integration with popular calendars like Google Calendar or iCal is a feature to look for, and so is integration with popular payment and marketing gateways.
WordPress Calendar Plugins on CodeCanyon
On CodeCanyon you will find the best premium calendar plugins that will help you offer a satisfying user experience to your website visitors. These plugins offer a wide range of solutions from very simple to advanced.
All-Purpose Calendars
If you need lots of flexibility and a variety of functions, the following calendar plugins are your best choice.
Finally, it is important to note that while a calendar by itself allows you to do some things, not incorporating it with other extensions limits what you can do online and what you can earn. Booking and Reservation Plugins are built around calendars. They offer the most extensive and advanced calendar solutions that combine calendars with the ability to make reservations and pay for booking and appointments.
Google's Material Design is one of the few design languages that have managed to stand the test of time. It's been around for over five years now, and still continues to enjoy widespread popularity among Android users. The Android platform's SystemUI adheres to the guidelines of this design language, as do most popular apps available on Google Play today.
Although Material Design's guidelines are well-documented and easy to understand, implementing them correctly using the Android SDK and AndroidX requires lots of careful coding and testing, primarily because you need to support multiple pixel densities, screen sizes, device orientations, and Android versions. By using MaterialX, however, you can save all that time and effort.
Developed by Envato Elite author Dream Space, MaterialX is a premium Material Design UI components library available on CodeCanyon. In addition to basic UI components such as buttons, cards, and sliders, it offers hundreds of unique, hand-crafted Material Design layouts you can directly start using in your apps. As such, while working with these layouts, you won't have to worry about tasks such as positioning UI components, adjusting their margins and paddings, or even animating them.
Let us now take a closer look at what MaterialX has to offer.
1. Navigation Components
It is very important that you have an attractive interface that allows users to move from one screen of your app to another. Material Design lists several components you can use to build such an interface, and MaterialX has implementations for all of them.
The most popular of such components these days is the bottom navigation bar. MaterialX currently offers eight beautiful bottom navigation bars for you to choose from. Here are two such bars:
If you prefer using sliding drawers instead, this template gives you several options, all of which are geared towards different types of apps. For instance, if you're building a news app, you can use the Drawer News component. Similarly, if you're creating a mail-related app, you can use the Drawer Mail component.
Tabs, which usually complement top app bars, are also widely used in Android apps. MaterialX has a variety of tab views, which look good in both light and dark themes. As you might expect, all of them support the horizontal swipe gesture.
2. Lists and Grids
Lists are an integral part of Android apps, and a well-designed list can dramatically improve your app's user experience. MaterialX offers nearly a dozen different types of lists, including sectioned, animated, and multi-select lists. It also offers a few app-specific lists, such as lists for news apps.
If you need to show more than one item in a row though, you'll have to use one of the six different grids this template has. In addition to the commonly-used basic and sectioned grids, MaterialX has grids for gallery apps and caller apps.
Cards are often used with both lists and grids. Because MaterialX has card templates for handling most use cases, you can now avoid creating your own cards from scratch. Some of the card templates can be used to create introductory or tutorial screens too.
It's worth noting that MaterialX has separate components to display smaller lists, such as lists of tags and preferences lists.
3. Forms
Creating forms is hard. Convincing users to fill and submit forms is harder still. Fortunately, MaterialX comes with a large number of beautiful templates for forms, which your users are going to enjoy filling in.
While creating forms, you are free to choose from either the generic form templates, such as those for sign in and sign up forms, or from the domain-specific templates, such as those for eCommerce.
To make your life easier, MaterialX also has entire layouts dedicated to specific types of forms. Because these attractive layouts serve as full-fledged containers for the forms, while using them, you won't have to add any other UI components to your layout. Currently, there are layouts for login forms, phone number verification forms, and payment forms.
Note that many of the form templates have dark-themed alternatives too.
4. Form Elements
If you're interested in creating forms yourself, instead of directly using Android's default form elements, you could try using the elements available in MaterialX. They are usually better-looking and provide a more interesting user experience.
The template has a variety of buttons, pickers, and sliders, as you can see in the screenshots below:
To facilitate displaying form-related messages, the template has several custom implementations for toasts, alert dialogs, and snackbars too.
5. Dashboards
An intuitive dashboard displaying lots of timely and context-sensitive data can be the ideal home screen for many kinds of apps, such as fitness apps, travel apps, and apps related to cryptocurrencies. MaterialX currently has eleven dashboards, each targeting a different domain. For example, here are two dashboard layouts, one for eCommerce apps, and one for travel apps:
All the available dashboards are comprehensive, well thought out, and visually pleasing. Therefore, you can usually start using them without having to make any customizations.
6. Social Screens
Adding simple social features to your app is a great way to improve user retention. Typically, all you need to do is allow your users to create profiles for themselves and share content with friends or followers. MaterialX has dozens of components that can help you save time while implementing both these features.
This template has nearly two dozen layouts for profile pages, each with a unique look and feel. While some are generic, most are designed to target certain user groups, such as photographers, freelancers, and job seekers.
Additionally, MaterialX has layouts for displaying user feeds and timelines. If you're trying to implement Twitter-like functionality in your app, you're going to find these layouts extremely helpful.
Lastly, if you want to allow your users to communicate among themselves or with your your team in realtime, MaterialX offers layouts that are very similar to those you see in apps like WhatsApp and Telegram.
7. Screens for Blogs
Do you have a WordPress blog already? With MaterialX, you can create an Android app for it effortlessly.
The template has a large variety of layouts you can use for displaying your posts. These pleasant layouts can smoothly render both text and images.
Additionally, there are many layouts for "about us" pages, which you can use to talk about yourself or your company, and "search" pages, which you can use while adding search functionality to your app.
Because blogs these days aren't limited to just text and images, MaterialX has layouts for handling audio and video content too. The template has two layouts for video players and several for audio players, which support both independent sound files and playlists.
Conclusion
MaterialX is one of the most comprehensive Android app templates available on CodeCanyon. With over 2250 sales and mostly five-star reviews, it's also one of the most popular templates there. In my opinion, it's a must-have for Android developers who want to dramatically improve the looks of their apps.
When you purchase a license for MaterialX, in addition to its source code, you'll get access to all its documentation. You can refer to it to learn more about the template.
If you found this article useful, do take a look at the following articles too:
To run a successful business or blog on your WordPress website, you will need to have a growing email subscription list. This email list will allow you to market to your target audience and will become a trusted source of revenue and traffic if used correctly.
If you're looking for fresh and interesting ways to encourage visitors to opt in to your email subscribers list, this awesome list of over 20 WordPress popup...
In this tutorial, we are going to make a newsletter popup using the ConvertPlus plugin available on CodeCanyon. With MailChimp support, this is a great...
But how do we collect emails from our target audience?
Thankfully, there are plenty of WordPress plugins that we can choose from to collect these emails. One of the best plugins to collect emails is the Opt-In Panda plugin. Opt-In Panda collects emails by locking specific content on your pages and posts until a user has signed up. This is a very effective way to collect emails from your target audience that you can market to in your email newsletters.
In this article, we’ll go over how you can collect emails on your website with the Opt-In Panda plugin.
What We Will Be Building
This tutorial will cover how to build an email locker and place it on a webpage to blur out your page's text. We are using this email locker to collect email addresses from viewers of our webpage so we can market to them in the future. This email locker will blur out the entire webpage's content, and an email sign-up popup will be displayed over the blurred-out content. This popup will require the user to enter their email address in order to view the content on the webpage.
We are creating this email locker because it is a very effective way of marketing and building your audience. The people who view your webpage and enter their email into your email locker are interested in your website's content. From a marketing perspective, this is key. If the page's content is aligned with what you are selling, then you will have identified a targeted audience that has already shown interest in what you are selling, and this will give you a much higher conversion rate for sales. Below is an image of the email locker that we will be creating.
Creating a New Locker
To collect emails from your website visitors, Opt-In Panda locks a portion of the content on a webpage and asks the visitor to enter their email. This gives visitors a reason to subscribe right there and get instant access to your website's valuable content.
To create this locker, we are going to head on over to WP Dashboard > Opt-In Panda > + New Locker. Next, click on + Create Item in the Email Locker section. This will take us to the email locker editor. We are going to first name the locker "Email Locker" at the top of the editor.
Now we are going to change the Basic Options of the locker to have the locker function the way we want it to. Under Basic Options, we want to change the default locker header to be more descriptive for the website visitor. We will change it to say This Content Is Only For Email Subscribers.
Next, we are going to change the locker message. We want to make it clear to the website viewer that they need to have a valid email address in order to access the content so we will make a minor change to the text to say: Please subscribe to unlock this content. To subscribe, enter a valid email address below.
Now we are going to change the theme of the locker. There are three themes to choose from. Choose the one that fits best with the color scheme and design of your website. In our case, the Dark Theme will fit the best.
Right below the Theme and Overlap Mode settings, you will be able to see a preview of the actual locker, which will help you make your theme choices. Next, we will change the Overlap Mode. The overlap mode is how website visitors will see the locked content.
We want the locked content to be blurred out so website visitors cannot see the actual content on the page, so we will select the Blurring option. You can see the changes reflected in the preview section of the editor.
The next settings we are going to change are in the Subscription Options part of the editor. To ensure that the user is not putting in a fake email address just to view the content, we are going to choose the Full Double Opt-In setting.
Once the user enters their email address, they will receive a confirmation email. Once they confirm the subscription in the email, the content on the website will be unlocked. If the user puts in a fake email address, they will not be able to confirm the subscription and won't be allowed to see the content.
By default, the email confirmation email will be sent through WordPress. We will let WordPress send these emails, but you can have your email service provider send out these emails instead.
Next, we are going to go to the right-hand side of the locker editor and adjust the Terms & Policies settings. We are going to turn the consent checkbox on. In the preview, you will see that a consent checkbox has been added to the bottom of the locker.
This is a very important feature to turn on. As of 2018, the European Union implemented a new data protection law that covers processing personal data. Turning this feature on will ensure that the locker is compatible with GDPR. If your website interacts with EU citizens, you need to have this active.
That is it! Your locker has now been created and is ready to add to your website. Check out the video below to watch the email locker creation process that we just went over.
Adding the Locker to Your Website
Like most WordPress plugins, Opt-In Panda makes use of shortcodes to add the locker to your website. First, we will need to find and copy the shortcode to our computer's clipboard. Head up to the top right of the locker editor and locate the Manual Locking section. In this section, you will see a shortcode. Copy this shortcode and then head on over to a page or post that you would like to put your newly created email lock on.
Once you are on this page, you are going to paste the shortcode right before the page or post content in the WordPress text editor. We are going to cut the second half of the shortcode as this will signal to the plugin to lock the content between the shortcode. The second half of the shortcode starts with [/emaillocker...]. Once you have cut the second part of the shortcode, head on over to the last piece of website content that you want to be locked and paste this shortcode.
Congratulations! Your content will now be email locked, and you are ready to start growing your email list. Watch the video below to see how to add the locker to your website.
Getting the Most Out of Opt-In Panda
In this article, we covered just one possible use of the email locker. There are many other uses of the email locker than just blurring out the text on your webpages. Here are a few ways that you utilize the Opt-In Panda plugin to help you grow your email list and marketing campaigns.
Lock Free Download Links
By locking just the download links on your webpage, you give the user a chance to read through the content of the page and then entice them to enter their email address to receive the free download. This works most effectively when you place the download and the email locker at the bottom of the webpage and use the content placed before the download to convince the reader that they must have the free download.
Lock Images and Videos
Blocking specific images is another useful way to encourage users. In today's video and image-driven world, users would rather look at images and watch videos than do any reading. Putting an email locker on any important videos and images on your website will give your users a good reason to sign up!
Lock Specific Sections of Your Website
The email locker allows you to lock as many webpages as you would like. This is very handy if you have sections of your website that you don't want users to have instant access to. Areas of your website that you could lock include free download sections, blogs, galleries, or any area of your site that you don't want to give away for "free."
Conclusion
The Opt-In Panda WordPress plugin gives you the ability to create an email locker that prevents your website viewers from viewing a page's content unless they enter their email address. This locker is incredibly helpful for building an email list for your website. In this tutorial, you learned one way to create this email locker using the plugin.
Displaying a calendar on your website is a must for many business owners. Calendars are the best way to share all the upcoming events that your business has with your audience. However, the various calendar plugins available on the market often have too few features, expensive add-ons, or are too complicated to set up.
In the digital age, users are online 24/7. Everyone prefers to check availability and make appointments, reservations, or bookings online. They want to do...
Whether you need an event calendar plugin, a booking system with payments, or a Google Calendar widget, this list of plugins will have something to improve...
Regardless of niche, adding a calendar plugin to your WordPress site is a great way to improve user engagement and retention. In this tutorial, I'll show you...
In this post, we will review some of the most popular free WordPress calendar plugins that you can start using in your projects.
The Pro Event Calendar plugin makes adding an affordable, professional, and sleek calendar to your posts and pages easy. In this tutorial, I will go over how to create events, how to create the actual calendar, how to style the calendar, and how to add the calendar to your website so all your visitors can stay up to date with your business.
What We Will Be Building
For this tutorial, we are going to be the owners of a yoga studio. We would like to let our customers and potential customers know when we run our Monday morning yoga class called "Monday Mood Lifter," so we are going to build a calendar to display on our webpage. This calendar will be a dark-skinned calendar that all our website viewers can see and interact with.
Creating Events
Before we can create our calendar, we need to create some specific events so we can display these events on the calendar. To add an event, head on over to the Event Calendar in your WordPress dashboard and click All Events. Next to the title, Pro Event Calendar, click Add New. Youwill then be taken to the event editor, where we are going to title this event Monday Mood Lifter.
Next, we are going to go over to the right-hand side of the editor and adjust the date of the event as well as the start and end time. We want this event to be a weekly event that starts on the first Monday of August and ends at the end of the month. In the date section, enter 2019, 8, and 5. This will set the date to start on 5 August.
Our start time is going to be 10 am, and our end time is going to be 11 am, so we are going to type those in the appropriate fields under the date section. Since we want to have this event occur every Monday, we are going to head over to the Select a frequency sectionand choose Weekly from the drop-down menu. Then select the Mon option from the new menu that is displayed below the drop-down menu. To set the end date, head over to the End Date section. We are going to type in 2019, 8, 26.
Finally, we are going to change the color of the event that will appear on the calendar. We are going to do this so our website viewers will easily be able to spot that there is an event on a particular day.
Scroll down on the event editor page until you come to the Event Data section and find the Color option. To add a color to this particular event, you will first need to create a color for it to be displayed in the drop-down menu. To do this, click the special events link. This will take you to the special dates and event color menu, where you will click the Add New Special / Event Color button. Add the text Blue in the Title field and choose the color blue in the Color field.
Click the Submit button, and the blue color will now be available. Now head back over to the Event Data section. Click the drop-down menu next to Color and select the blue color that you just created.
We are done creating our event, so click the Publish button on the right-hand side of the editor. Check out the video below to watch the event creation process in action:
Creating the Calendar
Now that we've created the event that we would like displayed on the calendar, it is time to create the calendar itself. On the left-hand side of your WordPress dashboard, click Calendars under the Event Calendar section. This will pull up the calendars list, where you will then click the Add New Calendar button. Under General Settings > Title, we are going to type in Yoga Schedule.
Next, we are going to change around a few of the display settings. We are going to change theskin and show the time.In the drop-down menu next to skin, choose Dark, which will change the interface of the calendar to be a darker color. Next, check the Show Time box, which will show the event time on the calendar. At the bottom of the editor, click Save, and your calendar will be created and shown in the calendars list. You can view the video below to watch how to create a calendar.
Adding the Calendar to Your Website
The WordPress Pro Event Calendar plugin makes use of shortcodes to add the calendar to your website. Once you have created your calendar, it will appear in the Calendars List. You will see that there is a Default Shortcode column in the calendar list.
Next to your calendar, you will see a custom shortcode. Copy this shortcode to your clipboard. From there, you will then create a new page or post. Under the visual editor for the page or post, paste the shortcode. Click the Preview button on the right-hand side of the editor, and your calendar will now be shown on your page or post. To see how to add the calendar to your website, watch the video below.
Getting the Most Out of Pro Event Calendar
This calendar creation tutorial only scratches the surface of what this plugin can do. This calendar plugin is rich with features that can be added to your calendars to make them more useful to your audience and your business. Here are a few features that this plugin offers that will take your calendar to the next level.
Bookings
The booking option allows you to have your website viewers book a specific event. This allows you to know who will be attending your events so you can plan accordingly. You can also set the maximum number of people able to book an event, so your specific event does not get overbooked.
In the plugin settings in the back-end of your WordPress site, you will be able to see who has booked a specific event, and you will be able to export this list to an Excel spreadsheet.
Subscribe to a Calendar
This is an incredibly useful feature. The subscribe to calendar feature allows your website viewers to subscribe to any calendar that you create. When a user subscribes to a calendar, they will get notified anytime there is a new event. Having this email reminder sent to your audience's mailbox will make sure that they do not forget your event, so make sure you turn on this option in the Edit section of your Calendars.
Google Map Support
If you are running an event that requires people to come to a specific location, then this feature should definitely be enabled. This makes it much more convenient for your customers to plan their trip to your event. They can see the calendar and get directions to your event all in one place instead of having to browse around to find your event's location.
Conclusion
The Pro Event Calendar plugin will give you the tools necessary to create a custom calendar for your WordPress website. In this article, I showed you how to create an event, add it to a calendar, and display it on your WordPress website with the Pro Event Calendar plugin.
If you are interested in purchasing this calendar plugin, visit CodeCanyon to download it. Also, feel free to search through the various other calendar plugins on CodeCanyon if this one isn't quite right for you.
What do Yelp, Angie’s List, Craigslist, TripAdvisor, and Amazon have in common, apart from being very popular?
They are directory websites and mobile apps where you can buy products and services from the convenience of your mobile devices!
Directories are among the most popular and most profitable websites. They list thousands of products and services for users to browse. They also deliver information based on location and category.
Many directories have their own mobile apps, and this is why:
75% of users have mobile devices as their primary way to get online.
80% of local searches conducted on mobile devices result in a sale.
90% of mobile users spend more time in apps than on the web.
These are important statistics to keep in mind if you are thinking about starting a directory website and mobile app of your own.
However, building a custom directory mobile app can be a massive and expensive undertaking. Here is where mobile directory app templates come in. They are the best and cheapest option for creating a mobile directory map. The template developers have thought of just about anything a directory website will need, so you don't have to code it yourself.
In this article, we’ll focus on mobile directory app templates for iOS, an operating system developed and supported by Apple which only works with Apple devices: iPhones and iPads.
I’ll show you some premium mobile directory templates for iOS available on CodeCanyon.
Understanding Directories and Mobile Directory App Templates
Starting your own online business has never been easier. There are many resources to help you succeed. You have built-in technical and information infrastructure to help your idea get off the ground as quickly as possible. You also have a built-in audience that is easy to reach. In addition, the starting costs are very low. You just need to invest your time.
If you’re looking to start an online business, directories are popular and profitable.
What Is an Online Directory?
An online directory lists products and services for users to browse. It is a database that delivers information based on location and category.
Here are some common characteristics of directories:
Directories contain a large number of listings under different categories.
Directories provide tools like searching, filtering, pictures, location information with maps, product information, contact details, and more.
Directories are curated listings.
Directories are community driven.
Directories are built on user-generated content.
Directories generate a lot of traffic!
Some directories are public: for example, to help customers find store or business locations, or to list the names of doctors and their specialties. On the other hand, some directories are private, for the internal use of a business or organization.
Types of Directories
Directories come in all sizes and shapes: complex, simple, local, national, global, or niche. If you want to start a mobile directory app, the best place to begin is identifying a niche in your local area. These examples should give you some ideas:
You can build a mobile app for any of these directories. Through the mobile app you can also earn money by:
displaying advertisements
charging listing fees—normal listings and featured listings
membership subscriptions
booking and reservation (because users trust directories and prefer to do the booking and reservation through them)
Why Do You Need Mobile Directory iOS App Templates?
People spend much more time online on mobile apps than on the web. Because of this, most successful directory businesses have taken advantage of apps to reach vast audiences where they are. A mobile directory app template allows you to build your own directory app.
Developing a mobile directory app from scratch is a costly and time-consuming process. Not every business has the deep pockets to foot the bill for such a lengthy and involved process that includes discovery, design, development, testing and deployment, and marketing. Here are the advantages of using an app template:
Mobile directory app templates are affordable—much of the code is already written for you.
The templates come with all the features you need to create your own mobile app.
The heavy lifting has been done, so you can focus on creating the app you want by customizing and adding elements that will make your app unique.
The templates come with documentation—all you need to do is follow the instructions.
How to Pick a Mobile Directory iOS Template
When you're choosing an app template, keep the following factors in mind:
Ease of use: It has to be so simple that someone with no coding expertise can easily learn and use it. The documentation should be clear.
Design: Since directories are huge databases, simplicity is key. The design of the directory template should be intuitive, uncluttered, and consistent from screen to screen.
Responsiveness: So your app will work on all mobile devices.
Cost: Compare the prices of other templates and see what fits your budget.
Customization: The template should be easy to customize, so that the finished app can reflect your unique style and branding. Customization should not take a lot of time.
Social sharability: Make it easy for users to spread the word about your directory app by sharing it with others through social media.
Monetization: Look for the ability to take payments through different payment gateways, ability to earn through regular and featured listings, advertising, subscriptions and so on.
Back-end tools—for analytics, generating reports, etc.
Integration with email marketing platforms like Mailchimp.
Location-based searches with integrated maps: any directory that deals with physical locations, stores, or services will need location-based search and maps.
Ratings and reviews: Tools for customers to rate and review businesses. This is user-generated content that makes it easier for people to find your business online, and lets them know they can trust your product or service.
Downloads: The number of downloads of a particular app template is proof of its popularity among users. It shows they trust the provider.
Security and frequent updates: Bugs make your app vulnerable to attacks. Regular updates are an indicator of the trustworthiness of the provider. Your choice of an app template should factor this in.
Support: Once you buy the app template, you may run into some issues. Make sure that the seller offers support. While reading ratings and reviews, be sure to check what other users say about the quality of support from the provider.
Another very important thing to keep in mind is that directories generate a lot of activity. High activity has the potential to slow down access to your content. This can turn off your visitors. Your hosting provider should have the capacity to handle it.
Best Mobile Directory App Templates for iOS Available on CodeCanyon
There are a wide variety of premium mobile directory iOS templates you can find in the CodeCanyon marketplace. The app templates I've chosen for this list are among the best and will make it easy to create mobile directory apps.
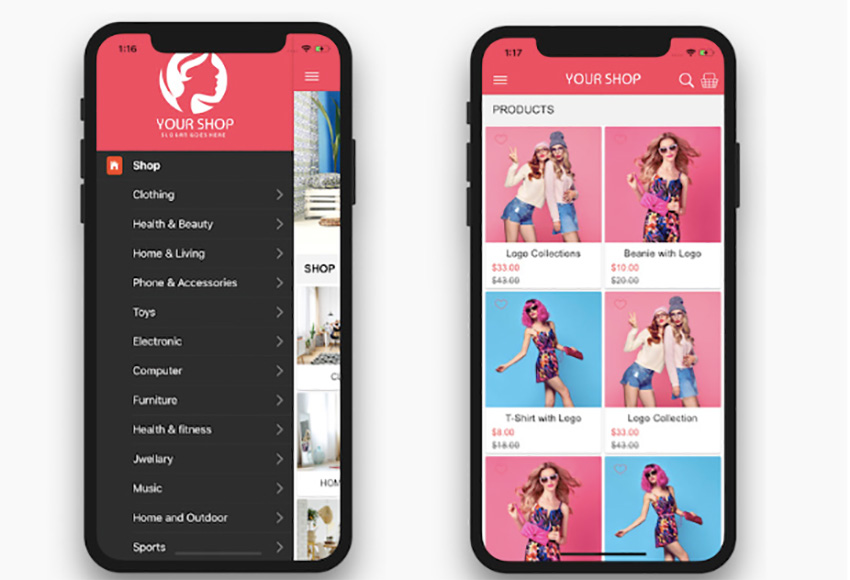
With AdForest, building and managing your classified ad listings directory has never been easier. Once you install the template and customize it, your app is ready to use. You can upload it to the iOS App Store with your own business brand name.
Some of the excellent features of this app include:
multi-currency support for ads
social login and register
ad status and ad expiry limits
Google map integration
location or price-based search
user can contact seller or buyer with a messaging system
AdMob and Google Analytics support
Check out the live preview and give it a test drive.
With the iOS Recipe App template, you can build a recipe app that lists recipes according to category—including a favorites category that users will create themselves.
In addition to push notifications and social sharing, more features of this beautiful app template include:
screen supports multiple images
transition between screens
Google AdMob integration
a sliding menu on the left side of the app
data is stored in XML and can be easily edited or replaced with data loaded from a server
Events is an app template that allows you to create your own event directory mobile iOS app. Users can submit new events and you can approve them by changing the status of the submitted event from Pending to Approved.
Here are some features of this fantastic app:
abilityto automatically add an event on your native iOS Calendar app
ability to open its address in Maps (to get directions)
share events on Facebook, Twitter, or other apps installed on your device
informs users if events are current or they have passed
ListApp is a listing directory mobile template that runs as a native app. It allows you to create directory listing apps. It has many elements and features to help you do so. ListApp is built with the very popular React Native mobile app development platform.
Features of this awesome app template include:
a map to help find listing locations
easy reservation by tapping on the calendar
social login supporting Facebook login
monetization and advertising: AdMob and Facebook ads
Have a look at the live preview demo and see if it suits your needs.
The Business Directory template allows developers to create store or business listing apps. This template has very clean code and a clean user interface. It also comes with a powerful back-end that can supply data updates.
Users can browse through businesses and stores by category, name, or distance. Store and business owners can display and promote their products, services, news, contact information, and more.
This template was created with the very popular Ionic cross-platform mobile platform.
Conclusion
These iOS directory app templates stood out for me, but there are many more templates you will find on CodeCanyon.
If you’ve enjoyed this article, here are more posts to help you find an app template that suits your needs.
In this post, we’re going to review the Slider Revolution Responsive WordPress plugin which allows you to create rich and dynamic content on your WordPress websites. nd not just sliders: it allows you to build carousels, content modules and full fledged websites by using the rich built-in editor!
Nowadays, sliders and carousels are important building blocks of any website. Specifically, when it comes to pitching a new idea or a campaign, sliders are one of the best ways to highlight it and attract new visitors. As a WordPress site owner, you would like to have a plugin which allows you to create high quality sliders and carousels without much hassle.
There are thousands of extensions and scripts available for creating sliders and carousels on your WordPress website. And of course, you’ll also find commercial options that provide ready-to-use features and extended support. In the case of commercial options, you should also expect quality code, bug fixes, and new enhancements.
Whether you want to show off customer testimonials, your latest blog posts, your best images, or just celebrate the members of your team, there is a...
When used properly, sliders can help make a website appear more dynamic and lively while at the same time providing more information in a limited space. In...
In a crowded online space, just placing images, text, and videos on your website is not enough to build a web presence. How you tell your story matters....
Looking to add an image slider to your WordPress site? Check out some of the best free, paid, and custom solutions for your project here.
Today, we’re going to discuss the Slider Revolution Responsive WordPress Plugin, available at CodeCanyon for purchase at a very reasonable price—especially considering the number of features it provides. It allows you to create a very high quality web content: sliders, carousels, hero headers and a lot more. It also comes with a built-in powerful visual editor which allows you to create full fledged websites in no-time. Considering the features it provides, it’s a must-have tool for site builders!
Let’s quickly go through the important features Slider Revolution brings:
new visual editor
media asset library
more than 200+ templates
more than of 20+ add-ons
sliders, carousals, hero headers and content modules
special FX support by add-ons
supports customization
and many more
The Slider Revolution Responsive WordPress plugin provides a plethora of useful features that allow you to set up modern designs on your WordPress websites quickly and effortlessly. Throughout the course of this tutorial, we’ll explore the different features provided by this tool. We'll also go through the process of creating a new slider from scratch.
In a crowded online space, just placing images, text, and videos on your website is not enough to build a web presence. How you tell your story matters....
In this section, we’ll see how to install and configure the Slider Revolution Responsive WordPress plugin once you have purchased and downloaded it from CodeCanyon. For this post, I’ve used WordPress 5.2.3, and the Slider Revolution Responsive WordPress plugin version is 6.1.2. I would recommend that you install it if you want to follow along with this post.
As soon as you purchase this plugin, you’ll be able to download the revslider.zip file. It’s the WordPress plugin file which you could use to install this plugin from the WordPress admin side. So go ahead and follow the standard WordPress plugin installation process and you’re almost done.
Next, we need to register the plugin’s purchase code and that should unlock access to:
200+ premium templates
25+ add-on plugins
2500+ free images, videos and icons
100+ pre-made layers & animations
instant plugin updates
premium ticket support
Firstly, you need to retrieve your purchase code from the codecanyon.net/downloads section. Click on the Download -> License Certificate link and that should get you a text file which should contain the item purchase code.
Once you get the purchase code, click on the Slider Revolution link in the left sidebar on the admin side of your WordPress site and it should display the plugin dashboard page. On this page, click on the Activation link and enter and register your code. With that, you have unlocked the full power of Slider Revolution.
How Do I Use the Slider Revolution Responsive WordPress Plugin?
In this section, we’ll briefly discuss the possible ways one could use this plugin. The Slider Revolution Responsive WordPress plugin is mainly used to create three types of content on your WordPress site: sliders, scenes and carousels.
Let’s quickly go through each type to understand difference between them.
Slider
Generally, a slider consists of multiple images or slides. Each slide has its own content and user can navigate between different slides by using the navigation elements.
In the context of this plugin, a slide is not just an image, but it could be anything: text, image, video, audio, or something else. In fact, Slider Revolution allows you to create different layers in your slide to add different elements. If you have used Adobe Photoshop or similar software, you know how important and useful this feature is. In fact, when you open the slide editing UI, it’s hard to believe that it’s a web based UI. It feels like creating content in professional image editing software!
Scene
In the terminology of this plugin, a scene is just another type of slider, but with a single slide. Thus, it won’t have navigation elements like in the case of a slider, which allows user to navigate between different slides.
The main purpose of the scene type is to create rich content modules that you could embed at different places on your page. You’ll have the same set of customization options available while editing a scene that you get while creating a slider. Thus, you could set up your scene content with many kinds of media and layers.
Carousel
The carousel type allows you to create content in the same way as that of the slider, but it allows multiple slides to be visible at the same time. This is really useful when you want to combine more than one slide in a single frame.
How to Set Up a Slider
In this section, we’ll build a real-world example to demonstrate how to use the Slider Revolution Responsive WordPress plugin to create sliders on your WordPress site.
Before we proceed, make sure that you have installed this plugin in your WordPress site if you want to follow along.
Go ahead and access the Slider Revolution link in the left sidebar on the back-end. That should present you the different options as shown in the following screenshot.
In the terminology of the Slider Revolution plugin, everything is a module, whether it’s a slider, a carousel or a scene. You could create a new module from scratch, reuse an existing template module, or import one from a file. In our case, we’ll create a new module from scratch, so click on the New Blank Module link.
In the next screen, it should ask you if you want to go through the help guide or straight away start editing. In our case, we want to start editing right away, so click on Quit Guide. That should present you the following UI to create a slider.
As you can see, it’s a pretty rich interface and provides plenty of customization options—just like professional image editing software!
By default, it already creates the first slide for you. As discussed earlier, you can add any time of content to the slide. In our case, we’ll add image and text to the slide. Go ahead and access the Image > WordPress Library menu and add an image from the WordPress library as shown in the following screenshot.
Once the image is added, you can use the configuration options in the right sidebar to adjust image related settings. You can add different types of content in the same slide by adding layers to it. So for example, if you want to add text along with the image, you need to add it as shown in the following screenshot.
You can use the drag-and-drop feature to position your layers and adjust it.
Once you’re done with the slide configuration, click on the Save button at the bottom right.
To add a new slide, click on the Add Slide(s) > Blank slide as shown in the following screenshot.
Go ahead and add as many slides as you want to add and configure it. Finally, when you’re done with the slider, you’ll need the embed code to integrate it in one of your pages. On the main plugin page, you can click on the Embed button in your slider to get the embed code as shown in the following screenshot.
And that should present you different options you could choose from to embed the slider:
In my case, the preview looks like this!
So that’s how you can create sliders. The process is pretty much similar
even if you creating carousels or scenes. Although, we’ve just
discussed sliders, this plugin is capable of doing a lot of amazing
things. The more you explore it the more you’ll love it!
The Next Step: A Quick Look at a Couple of Other Slider Scripts
If you're looking for more advanced slider scripts that you could use right away, I recommend that you check out the following post, which summarize some excellent scripts that are available for a reasonable cost.
Today, we reviewed the Slider Revolution Responsive WordPress plugin available at CodeCanyon. It allows you to create dynamic and rich content on-the-fly in your WordPress site. In this post, we’ve barely scratched the surface of features this plugin provides.
I’m sure you’re convinced that the Slider Revolution Responsive WordPress plugin is a powerful plugin to create dynamic and rich content on your website. Although it’s a commercial plugin, I believe it’s fairly reasonably priced considering the plethora of features it provides.
If you have any suggestions or comments, feel free to use the feed below and I’ll be happy to engage in a conversation!
Web technologies are always changing, and React is no exception. In the last several releases of React, we have been introduced to a new way of writing components: hooks. Learn how to use them in our new course, Next-Level React Apps With Hooks.
What You’ll Learn
Hooks are the new way to add features like state, lifecycle events,
and refs to your components, without using the object-oriented syntax.
In
this course, Derek Jensen will take you through the process of creating
a brand new guest book app, from scratch, using React. As you follow
along, you'll code your entire app with functional components, and in
the process you'll learn not just what hooks are, but also how and when
to use them.
Here are some free lessons from this course, as a preview of what you can expect:
Basic App Component Structure
In this video, you'll discover a good component structure to use while building React applications. You will also see how to create the basic structure for the app to be built in the rest of the course.
Introducing the useState Hook
In this video, you will learn how to take advantage of the useState hook, which will allow you to maintain state in a functional component.
Introducing the useRef Hook
In this video, you'll learn about the useRef hook. It will help provide a better user experience by setting the focus on an input in your AddGuestForm when the app loads.
Take the Course
You can take our new course straight away with a subscription to Envato Elements. For a single low monthly fee, you get access not only to this course, but also to our growing library of over 1,250 video courses and industry-leading eBooks on Envato Tuts+.
Plus you can download unlimited items from the huge Envato Elements library of more than 1.5 million creative assets. Create with unique fonts, photos, graphics and templates, and deliver better projects faster.
If you're looking to build a WordPress site but are nervous about beginning because you're not a coder, this article is for you. It will introduce you to a super useful tool, the WordPress page builder, and help you identify the best available on CodeCanyon today.
What Is a Page Builder?
A WordPress page builder is a plugin that allows you to create, customise and edit the pages on your WordPress site using a drag-and-drop editor. It requires no knowledge of code, making it a simple way for beginners and professionals alike to build a WordPress site.
Why You Need a WordPress Page Builder
The truth is that WordPress website builders are useful for professionals and everyday users alike because they make it easy to implement complex web designs quickly.
For everyday users, a WordPress website builder means that you don't need to know code and can create high-quality, good-looking pages that suit your specific needs in no time.
For professionals, using a WordPress page builder means that you can build your client sites faster, and best of all, because the site you deliver to your client will contain drag-and-drop functionality, you will empower them to make the little changes they'll need to from time to time without having to come back to you.
Qualities to Look for in a WordPress Page Builder
There are a number of high-quality WordPress website builder plugins on the market today. They all offer different approaches to page building, so here are a few of the qualities you should look out for:
Speed
Speed is all about efficiency, so when choosing a WordPress website builder, it is essential to choose a plugin that won't bloat your site and make it run more slowly. This is particularly critical because Google and other search engines penalise websites that load slower than the current benchmark.
Responsiveness
Responsiveness is the cousin of loading speed. No one wants to visit a website that doesn't show consistently and accurately on their computer and mobile device, so you need to make sure that the page builder you select allows you to create responsive, mobile-friendly layouts.
Features
When it comes to page builders, one size doesn't fit all, because some websites are complex and others are quite simple. That's why it's important to think about the features you need and invest in a plugin that will deliver those.
For example, if you don't intend to do eCommerce on your site, a plugin that offers extensive eCommerce functionality is unnecessary. At the same time, if you think there's a possibility that you may add eCommerce functionality to your site in the future, then a page builder with a healthy set of eCommerce add-ons would be a good option.
Compatibility
Before you purchase a plugin, it's critical that you make sure that it is compatible with your chosen WordPress theme, otherwise you'll either need to ditch the theme or the plugin. On a similar note, you may want to ensure that you invest in a plugin that won't sink your site if you deactivate it and chose another one.
SEO
SEO is super important to every website owner, so you need to ensure that your WordPress website builder is creating SEO-friendly layouts.
Templates and Demos
Look for a page builder that contains tons of demos so you have a good idea of what a page could look like. It's also useful to have some pre-made templates to save you time creating certain pages like landing pages from scratch.
Now, let’s take a look at the best drag-and-drop page builder plugins for WordPress.
WPBakery Page Builder for WordPress is one of the most highly rated and popular WordPress website builders on the market for good reason. This feature-rich drag-and-drop plugin is easy to use, fast, responsive, SEO friendly, and offers unlimited design options and tons of features.
What's more, with WPBakery Page Builder you can work on new or existing websites as it will recognise your existing content and adapt to any WordPress website. You also don't need to worry about theme compatibility as WPBakery Page Builder works with any WordPress theme.
Other Stand-Out Features
over 100 predefined layouts
over 50+ predefined content elements
over 40 unique templates
drag elements around your page
adjust element settings via intuitive controls and options
It's easy to get started with WPBakery—just follow one of our simple guides:
WPBakery Page Builder is the most flexible and feature-rich WordPress page-builder plugin you can get in 2019. In this tutorial, I'll show you how to add it...
With WPBakery Page Builder (formerly Visual Composer), building custom pages for your WordPress site is fun and easy. In this tutorial, you'll discover how...
Not only that, but the WPBakery page builder has an entire ecosystem of add-ons to make it even more powerful.
Parallax One Page Builder Wordpress Plugin is, as the name suggests, a one-page builder for those looking to create simple yet sophisticated websites or landing pages with or without parallax effect. The landing page offers all the important features we've outlined above, like speed, responsiveness, and compatibility with a wide range of themes, and it's SEO friendly and feature rich.
Intense: Shortcodes and Site Builder for WordPress allows users to create beautiful WordPress websites quickly and easily, using over 110 shortcodes with everything from the most basic to the most advanced features. Among these shortcodes are a number of gorgeous layouts that you can tweak as needed. The builder is fast and responsive and integrates seamlessly with WPBakery Page Builder for WordPress if you prefer its drag-and-drop functionality.
Other Stand-Out Features
19 custom post types
over 140 animations
create code snippets that you can reuse
parallax content sections and images
over 5,000 default icons
Choose the Best WordPress Website Builder for Your Needs
These WordPress page builder plugins are among the best currently available at CodeCanyon. Obviously, the one you choose for your site will depend on your specific needs. Check them out, and do let us know in the comments below which ones you prefer.
And if you want to know more about WPBakery Page Builder, check out these ever so useful articles below:
Wordpress plugin developers have seen the need for fast and cost-efficient ways to build websites and have developed tools that can help you build your...
WPBakery Page Builder is the most flexible and feature-rich WordPress page-builder plugin you can get in 2019. In this tutorial, I'll show you how to add it...
Sliders are very popular design elements. They are the most dynamic way to display visual media on your website. You can use them in hundreds of ways to engage visitors on your website.
There are hundreds of slider plugins available for WordPress to help you build, organize, and manage your sliders.
A slideshow on a webpage is called a slider. Sliders display images horizontally or vertically, one image at a time, and produce a feeling of momentum. Sliders can function in many ways: image sliders, video sliders, product sliders, text sliders, and so on.
A carousel is an advanced slider. It rotates and displays several images at a time by bringing multiple sliders into focus at once. Carousels rotate images radially and sometimes have a 3D feel.
Keep in mind that the definitions of sliders and carousels are now used interchangeably. You can look at "slider" as an umbrella term that encompasses both sliders and carousels.
What Are Sliders Used For?
Here is how sliders are commonly used:
Photos drive purchasing decisions. Users have come to expect that sellers will show them multiple-angle photos of every product they browse on eCommerce sites. Sliders are perfect for this purpose.
A slider focuses attention on specific information and products you want visitors to engage with. It drives them to click and find out more about the featured content.
Sliders are the perfect medium for artists, designers, developers, and architects to showcase work, demonstrating their range and their versatility.
Sliders are perfect for creating text-accompanied visual demonstrations of how to use a product like an electronic gadget or industrial machine.
You can use sliders to display dynamic content like testimonials or timelines.
Why Use Sliders?
Sliders save space by consolidating content.
Sliders consolidate images for easy viewing.
Reading a long page of text is a daunting task. Sliders provide mental breaks and pacing that make engaging with long content on your page a pleasant experience.
When sliders are done right, they give users control of how fast or slow they want to engage with slider content.
What Is a Slider Plugin?
A slider plugin is a piece of code that helps you add slideshow functionality to your WordPress website. It allows you to create your own sliders and add them to a webpage, blog post, eCommerce store, and so on.
How to Choose a Slider Plugin
WordPress slider plugins from CodeCanyon offer a variety of affordable and easy-to-use templates you can choose from in order to build your sliders. Things to consider when choosing a slider plugin include:
Speed: Sliders contain a lot of scripts that can make your website load slowly. This affects performance, user satisfaction, and SEO ranking. So make sure to compare the loading times of plugins you’re considering. Also make sure your hosting service has fast servers.
Ease of Use: Slider plugins with user-friendly interfaces don’t eat up your time or divert your focus from running your business.
Mobile Responsiveness: Make sure the slider plugin you choose is mobile responsive. The ability of a plugin to scale to small-screen handheld mobile devices is of utmost importance. 80% of traffic now comes from mobile phones and tablets.
Pricing: Compare the prices of plugins and see what fits your budget. Are you also getting the most important features for the money you plan on spending?
Regular Updates & Security: Regular audits and updates patch security weaknesses. Make sure the seller still supports the plugin.
Reviews & Ratings: Read reviews by other users. This is the most reliable way of knowing whether a plugin is useful and lives up to users’ expectations.
Best Practices When Creating Sliders & Carousels
1. Aesthetics Are Important
Make your sliders visually pleasing. Adopt a consistent tone that blends in with your website. Keep the text short and clear.
2. A Clear Purpose for Each Slider
Each slider must have a clear and specific purpose—for example, directing attention to a specific article or product on your website.
3. Prominent Positioning
Make sure to strategically place your slider where it can be easily noticed. Don’t bury it in the middle of other content. The best position is at the top.
4. Get to the Point!
Visitors don’t have all the time in the world. Your slide selection and arrangement should get straight to the point, and fast. Your first and last slide should be memorable.
5. But Slow It Down
Avoid autoplay. Slow down rotation times so visitors can engage with your slides.
6. Put the Visitor in Control
Give users control by including interactive navigation options like pause, skip, and back. Also make slides easily clickable—especially for mobile users.
7. Avoid Gimmicks
Avoid advertisers' gimmicks. Advertisers use carousels in intrusive and aggressive ways that turn off visitors to websites. Your aim is to engage visitors to your website, not to grab them by the collars.
8. Use Proper HTML
Finally, don’t use H1 tags on your slider or carousel. Search engines treat H1 tags like the page titles. You can’t have multiple page titles representing a single page. So you can imagine the confusion for search engines and page readers if you use H1 tags for your sliders or carousels.
Gauging the Effectiveness of Sliders on Your Website
You can find out if sliders are effective by tracking how visitors are interacting with them on your website. This will help you experiment with different strategies for making your sliders more engaging.
For example, if you see user engagement is high at the beginning of the sliders but tapers off in the middle and there is no engagement at the end of the sliders, then you need to figure out a way of making your middle to final slides more engaging.
WordPress Sliders on CodeCanyon
You can find a wide variety of slider plugins on CodeCanyon. The categories below should help make your choice easy.
All-Purpose Sliders
These are some of the most versatile and feature-loaded slider plugins on CodeCanyon.
Carousels display sliders with multiple images visible at the same time. In practice, most slider plugins also have carousel modes, and the terms are used interchangeably.
Before and after sliders are perfect for artists and designers who want to showcase their skills. For example, a designer may want to show before and after photos of something they have transformed from average to excellent.
Customers trust what other customers say. This means customer testimonials are a stamp of approval for your business. These sliders are perfect for showing visitors to your website that you have a proven track record with customers.
Videos have become a key part of websites and online businesses. This is mainly due to the fact that people in general are getting faster (and in most cases cheaper) internet data plans on mobile devices. Another factor that comes into play is the higher engagement with video content. People are more likely to watch and remember a well-made interesting video than they are to read a lot of text.
Whether you're a YouTube creator, aspiring film director, or web developer, these 15 best HTML5 video players will help you build a video-centric website.
CodeCanyon has a wide range of best-selling WordPress audio and video players. No matter what your vision for your audio or video content, there is a player...
If you’ve been thinking of adding a video background to your WordPress site, here are the eight best plugins available at CodeCanyon.
If you are serious about getting more people to talk and know about your business, it's high time that you get serious about video. In this tutorial, we will help you get started right away with a step-by-step guide to using the Easy Video Player script from CodeCanyon. You can use this JavaScript library to add videos to your webpages.
Why Use Easy Video Player?
You might be wondering why you should use Easy Video Player instead of a free alternative or any other paid script.
One of the biggest reasons to choose this player is that it is feature packed. First of all, it is responsive. This means that it will look nice of devices of all sizes. It has been optimized for playing videos on both mobile devices as well as desktops.
It has support for multiple video qualities so that users can switch between SD, HD or Full HD versions of a video similar to YouTube. You can also control the playback speed of the video at runtime. It is also possible to add subtitles for multiple languages to a single video. Users can then choose the subtitles they want to display at runtime.
You can also allow the viewers to download the video with an optional download button. It is possible to show the button either globally or on individual videos.
Easy Video Player can also play videos from a variety of sources. You can use it to play local videos, stream videos from a server or to embed YouTube or Vimeo videos.
You can monetize these videos using pre-roll, mid-roll or post-roll ads. It is also possible to add popup ads to the videos and control their show and hide time. Easy Video Player also allows you to show advertisements whenever users pause the video.
It is also possible to encrypt the video paths in order to make sure that users can't steal a video by simply crawling the page source. You can also password protect the videos in order to limit access to specific set of users.
The list of features does not end here. My suggestion would be that you visit the script description page in order to read about all the features of Easy Video Player.
What We'll Be Building
Once you have completed this tutorial, you will have a fully functional video player that supports annotations. The final version of the video player will look like the image below.
We will be using a video of a robin from Pixabay for this tutorial.
Getting Started
After reading that the Easy Video Player comes with so many features, you might think that it would be hard to configure or use. However, as you will see in the tutorial, getting up and running with the script is not complicated at all.
One thing that I should point out before we get started is that any local videos on your server that you play using the Easy Video Player should be located inside a folder titled content. This way you can be sure that all the features of the player will work as expected.
After you purchase the Easy Video Player from CodeCanyon, you will be able to download the script as well as the documentation. The documentation contains a lot of working examples that can be added directly to your website by simply changing the source path or URL for the videos. The fastest and easiest way for you to quickly embed videos in your webpage using this player is to use parts from the working examples themselves. Just make appropriate changes to suit your own needs.
The first step would be to include the CSS and JavaScript files in your webpage.
<!DOCTYPE html><html lang="en"><head><title> Easy Video Player - TutsPlus Example </title><meta charset="utf-8"><meta name="viewport" content="width=device-width, initial-scale=1"><link rel="stylesheet" href="content/global.css"><script type="text/javascript" src="java/FWDEVPlayer.js"></script> </head><body><!-- WE WILL ADD OUR VIDEO PLAYER HERE --></body></html>
By default, the player keeps CSS file in the content folder and JavaScript file in the java folder. If you change the location of these files, make sure that you update their path in the webpage as well.
Now, you have to specify a container for the video player. This container div will have a unique id which is passed to the constructor of Easy Video Player. You can set the CSS property margin to auto for this div in order to center it horizontally on the webpage but that is optional.
Add the following HTML inside the body of the webpage where you want the video player to appear.
<div id="topVideo"></div>
While it is not necessary, you can add some CSS in order to make the video player look even nicer or to position it properly on the webpage. Here is the CSS that we would use for this purpose.
Now, you simply need to initialize the Easy Video Player by passing a bunch of parameters to the constructor. These parameters control all aspects of the video player so you should read the documentation to understand how each of them works. In this tutorial, I will give you a brief overview of the options that we will modify in our own player.
This is the code that you have to put in your webpage for initializing the player. It might look very long and complicated but the parameters have self-explanatory names and they will have the same value from one player instance to another. Most of the times, you will be able to directly take the initialization parameters from the examples in documentation and make changes as needed.
Two parameters that have to be unique every time are instanceName and parentId. The parentId parameter is the id of the container for your video. The value of instanceName parameter is used to identify the player when calling methods like play().
The videoSource parameter is used to specify the path to different versions of the same video so that users can play it in SD, HD or Full HD format. The posterPath parameter specifies the path of image file that shows up before the video starts playing.
A lot of other parameters are used to control the spacing, color or background of different UI elements used in the player. If you load the webpage in a browser now, you should see something similar to the image below.
Adding Annotations to Your Video
There are many situations where you will want to give the viewers some additional information while they are watching a video. Annotations are very helpful in that situation. Luckily, Easy Video Player provides a convenient way of adding annotations to your videos
You just need to use a little HTML with special data attributes. In our case, we will use annotations to tell readers a fact about robins and then link to Wikipedia if they want to read more about the bird. Here is the markup that you have to add to the webpage. It might be better to add it right below the video player container.
<ul id="vidAnnotations" style="display:none"><li data-start-time="00:00:01" data-end-time="00:00:05" data-left="600" data-top="100" data-normal-state-class="EVPAnnotationNormal"><p>The robin was declared Britain’s National Bird on December 15th, 1960.</p></li><li data-start-time="00:00:15" data-end-time="00:00:20" data-left="40" data-top="400" data-show-close-button="yes" data-click-source="https://en.wikipedia.org/wiki/European_robin" data-click-source-target="_blank" data-normal-state-class="EVPAnnotationLinkNormal"><p>You can learn more about this bird on the Wikipedia page about <strong>European Robins</strong>.</p></li> </ul>
Setting display to none for the annotations will hide them from appearing the webpage. The attributes specified with each annotation will determine when and where they appear in the video. The distance of the annotations from the left and top side can be specified using the data-top and data-left attributes. The data-start-time and data-end-time attributes determine when the annotations will show up and disappear. You can also give users the option to close the annotations manually by setting the data-show-close-button attribute to true. You can read about all other attributes in the documentation available with the download.
Keep in mind that the annotations don't start working as soon as you add them to the webpage. Right now, the video player does not know about their existence. So, you have to specify a couple of parameters in its constructor to help it determine where to find the annotations.
If someone plays the video now, they will see the annotations after the specified time as in the image below.
Final Thoughts
In this tutorial, we have created a feature-rich fully functional responsive video player which supports annotations using the Easy Video Player script from CodeCanyon. This is just one of the ways of using the plugin. The plugin also offers a lot of other features which increase its usefulness. For example, the script allows you to integrate different kinds of ads in your video to help you monetize your content. You can also use it to play videos inside a lightbox.
Once you purchase this script, you will get 6 months of free support and life time free updates. The plugin is well worth its price due to all the features it offers.
Modern websites have to be visually appealing in order to draw in a retain an audience. Whether you are running a business or just using your site as a blog, you will need to include enticing visual content to your audience.
Simply throwing your images into your website pages is not enough. People are now more accustomed to viewing images and videos in a more structured and attractive way. This is where the WordPress slider plugins come in.
Sliders are used to display content in a slideshow format. They allow you to create and customize your own slides and place them anywhere on your website.
There are many WordPress Sliders on the market right now, but few can match the comprehensive and easy to use plugin, Layer Slider. With this WordPress slider plugin, Layer Slider, you will be able to show images, slideshows, and galleries with visually appealing effects. The drag and drop visual editor makes this plugin easy to use with no coding or technical skills required. In this article, I will go over how to create an interactive slider with the Layer Slider plugin for WordPress.
What We Will Be Building
We will be creating a slide show gallery with the Layer Slider plugin to be displayed on a webpage. In our example, we are going to be creating this slider for the website of a gym. Since the layer slider makes the images and videos the center of attention on webpages, the slider is going to serve as an advertisement to draw people into joining the gym. The slider will contain three different photos of the gym and the first photo is going to have a call to action button that will take the user to the gym sign up page. To make the layer slider the center of attention on our webpage, we are going to make the slider full width, so the user will immediately notice it.
Creating a Slider
Once you have installed the Layer Slider plugin, head on over to Wordpress Dashboard > Layer Slider WP > Sliders. You will then be taken to the slider manager page where you can view all your existing sliders, import sliders, and create a new slider.
To create a new slider click the add new slider button with a plus (+) sign. You will then be asked to name your slider. Since we are going to be using this slider to be and advertisement on our gym website, we are going to name our slider, "Gym Ad".
After you have named your slider, click the Add Slider button. You have now created your first slider.
Adjusting the Slider Settings
After we have created our slider, we are now going to adjust the settings of the slider. The default layout and mobile settings of a responsive layout will suit our needs here so we won't need to adjust them. We will, however, want to adjust a slideshow setting.
Click on the slideshow menu option and find the pause on hover section under slideshow behavior. Currently, when a user pauses their cursor over the slideshow, the slideshow will pause. We do not want the slideshow to pause here so from the drop-down menu, select Do Nothing.
Next, we are going to head on over to the Navigation Area settings. In the Slideshow Timers section, we are going to click on the show bar timer option. We want to show this timer so the viewer can see the progression of the slideshow. The last setting we are going to adjust is in the Appearance. We would like to change the current skin to one that will fit better with our website design. Click on the drop-down menu next to skin and choose v5. You can view how to adjust the settings described above in the video below.
Creating the Slides
Now that we have changed around the settings of the slider, it is time to add the actual slides. At the top of the Layer Slider editor, click Slides. You will be brought to the slide editor. In this example, we are going to create three different slides and the first slide will contain a button.
By default, our first slide is already loaded up. We can now begin editing the first slide. Layer slider makes use of layers to add content to your slides. Scroll down to the bottom of the page and on the left-hand side, you will see a section to add in these layers. Click Add New > Image. We will then be taken to the WordPress Media library where we are going to choose the picture of two people working out.
Our image will now present in the preview section of the slide editor. As mentioned, we would like to add a button to this first slide to entice viewers to join the gym. To add this button, scroll back down to the bottom left of the editor and click Add New > Button. The button will now be displayed in the preview.
We are now going to change the text on the button and the link that will open when the button is clicked. To change the text, find the content tab in the layer editor. In the field that has the text "Button Label" we can change the text of the button. We are going to change the text to say "Join Now." To change the link, click on the tab called Link & Attributes in the layer editor. In the Enter URL field, we are going to type in samsgym.com/join.
Next, we need to reposition the button to be more in the center of the image. Simply drag over the button with your mouse and set the button to the center.
We are now going to add one more slide. At the top of the slide editor, click the Add New button. This will create a new slide. We are going to scroll back down to the bottom of the page editor and click Add New > Image. We will now add our second image from the media library. Once we have added in this second image, it is now time to add the slider to our website. To view the steps outlined above, watch the video demo below.
Adding Layer Slider to your Website
The Layer Slider plugin uses shortcodes to add the slider to your site. To receive the specific shortcode for the slider you created, you must first save all the changes you made at the bottom of the slides page. You will see a Save Changes button there that you will click.
After you have saved your slider, you will see a Use Shortcode section next to the Save Changes button. Copy this shortcode to your clipboard and head on over to the WordPress page or post that you want the slider on. Then insert the shortcode into the text area of your website.
That is it! You have added the slider to your website and are now ready to show your audience this slider. View how to add the slider to your website in the video below.
Getting the Most Out of the Layer Slider Plugin
In this tutorial, we just scratched the surface of what this powerful plugin can do. This feature-rich plugin has many functions that can be used to enhance the user experience on your website. Here are of few of the most notable features of this plugin that can be added to your layer slider.
Transitions: The transitions in your layer slider can add a great deal of interest to your slideshow and can keep your viewers interested in the images that you present. Layer Slider offers four different types of transitions: 2D, 3D, custom 2D & 3D, and special effects. The type of effects you use will depend on the content you are trying to present and exactly what page it is on.
Layering Your Slides: It says it in the plugins name. This gallery slider plugin was meant for customization. Layering is one of the best ways to create an interactive slider that your audience will find compelling. Layer Slider gives you the option to add images, video, links, HTML, text, and buttons to a single slide on your slider. With a little bit of creativity and designing, you can create a stunning and interactive slider that features a combination of the features the plugin offers that fits your website's pages.
Now that you have an idea of how to build a layer slider and a glimpse into its most notable features, you can see that this plugin really is a powerhouse. Just because you know how to create an eye-catching slider for your website does not mean your website's viewers are going to see it and interact with it. You have to know where to place the layer slider in order for it to gain the most attention possible. Here is a list of few areas of your website that would benefit from having a layer slider on it.
Homepage: Slideshows perform very well on a website's homepage. Placing your slide show on the top of the homepage ensures that your website viewers will view it. With the layering options that you have available to you, you can create a slide show for your homepage that invites your viewers to view more of your website.
Product Page: If you are selling a product, images and videos are a must. Highlighting your products in an interactive slide show will give your audience a reason to explore your product further. Again, place the layer slider towards the top of the page to increase the chances that the user will see it and interact with it.
Conclusion
Slider plugins are an absolute must-have on your website if you are going to draw in and retain an audience. The Layer Slider WordPress plugin will allow you to create a visually appealing slideshow on your website that your website visitors will love.
Android commands an 88% share of the world market of mobile devices. It’s used by many device manufacturers. Having an Android app gives a business an incredibly wide audience.
In this article we’ll focus on mobile directory app templates for Android. I’ll show you some premium mobile directory templates for Android available on CodeCanyon.
Understanding Directories and Mobile Directory App Templates
Starting your own online business has never been easier. There are many resources to help you succeed. You have built-in technical and information infrastructure to help your idea off the ground as fast as possible. You also have a built-in audience that is easy to reach. In addition, starting costs are very low. You just need to invest your time.
If you’re looking to start an online business, directories are popular and profitable.
What is an Online Directory?
An online directory lists products and services for users to browse. It is a database that delivers information based on location and category.
Here are some common characteristics of directories:
Directories contain a large number of listings under different categories.
Directories provide tools like searching, filtering, pictures, location information with maps, product information, contact details, and more.
Directories are curated listings.
Directories are community driven.
Directories are built on user-generated content.
Directories generate a lot of traffic!
Some directories are public: for example to help customers find store or business locations, or to list the names of doctors and their specialties. On the other hand, some directories are private for the internal use of a business or organization.
Types of Directories
Directories come in all sizes and shapes: complex, simple, local, national, global, or niche. If you want to start a mobile directory app, the best place to begin is identifying a niche in your local area. These examples should give you some ideas:
You can build a mobile app for any of these directories. Through the mobile app you can also earn money by:
displaying advertisements
charging listing fees—normal listings and featured listings
membership subscriptions
booking and reservation (because users trust directories and prefer to do the booking and reservation through them)
Why Do You Need Mobile Directory Android App Templates?
People spend much more time online on mobile apps than on the web. Because of this, most successful directory businesses have taken advantage of apps to reach vast audiences where they are. A mobile directory app template allows you to build your own directory app.
Developing a mobile directory app from scratch is a costly and time-consuming process. Not every business has the deep pockets to foot the bill for such a lengthy and involved process that includes discovery, design, development, testing and deployment, and marketing.
Mobile directory app templates are affordable—much of the code is already written for you.
The templates come with all the features you need to create your own mobile app.
The heavy lifting has been done so you can focus on creating the app you want by customizing and adding elements that will make your app unique.
The templates come with documentation—all you need to do is follow the instructions.
How to Pick a Mobile Directory iOS Templates?
Ease of use: It has to be so simple that someone with no coding expertise can easily learn and use it. The documentation should be clear.
Design: Since directories are huge databases, simplicity is key. The design of the directory template should be intuitive, uncluttered, and consistent from screen to screen.
Responsiveness to all browsers and mobile devices
Cost: Compare the prices of other templates and see what fits your budget.
Customization: The template should be easy to customize, so that the finished app can reflect your unique style and branding. Customization should not take a lot of time.
Social share ability: Make it easy for users to spread the word about your directory app by sharing it with others through social media.
Monetization: Look for the ability to take payments through different payment gateways, ability to earn through regular and featured listings, advertising, subscriptions and so on.
Back-end tools—for analytics, generating reports, and to aid with decision making.
Integration with email marketing platforms like MailChimp.
Location-based searches with integrated maps: any directory that deals with physical locations, stores, or services will need location-based search and maps.
Ratings and reviews: Tools for customers to rate and review businesses.
Downloads: The number of downloads of a particular app template is proof of its popularity among users. It shows they trust the provider.
Security and frequent updates: Bugs make your app vulnerable to attacks. Regular updates are an indicator of the trustworthiness of the provider. Your choice of an app template should factor this in.
Support: Once you buy the app template, you may run into some issues. Make sure that the seller offers support. While reading ratings and reviews, be sure to check what other users say about the quality of support from the provider.
Finally, keep in mind that directories generate a lot of activity. High activity has the potential to slow down your back-end, which can turn off your visitors. Your hosting provider should have the capacity to handle it.
Mobile Directory App Templates for Android Available on CodeCanyon
There are a wide variety of premium mobile directory Android templates available on CodeCanyon.
Ultimate City Guide allows developer to create listings app that focus on the tourism niche. Users can list destinations, nearby places like hotels and restaurants close to users current location.
Some features of this app include:
login via facebook or email
ratings and reviews of places
exclusively feature certain places
sorting by distance, name or rating
map view with custom place icons
five monetization methods including native ads and referrals to booking websites
For those who love blogging, the template also includes an optional fully functional blog, manageable through the admin page.
ListApp is a listing directory mobile template that runs as a native app. It allows you to create directory listing apps. It has many elements and features to help you do so.
Features of this awesome app template include:
map to help find listing location
easy reservation by tapping on the calendar
social login supports Facebook login
monetization and advertising: MobAds and Facebook ads.
The app is coded in React Native, so you can use the same app template for Android and iOS! Have a look at the live preview demo and see if it suits your needs.
QuickAd is very new to the CodeCanyon marketplace. Using the QuickAd classified app template you can build a classifieds directory app to buy, sell, and find anything online. You can also use this app to rent, buy and sell properties.
It is such a wonderful and pure professional [app template]... For code quality, customization, documentation quality, flexibility, feature availability, design quality and above all which should not be forgotten is their customer support... Fabulous.
Business Directory Ionic is a complete store and business listing solution that consists of a mobile application and a powerful content back-end with data updates.
It has a clean and user-friendly interface, is highly customizable, and comes with carefully curated color themes. Not only that, but the app template is coded in the popular Ionic framework so the same files can be used to create both an Android and iOS app!
Users can easily browse through businesses and stores using various filters such as category, name or distance. Store and business owners can display and promote their products, services, news, contact information and more.
CitiesDirectory is an Android app template for building city guide or city directory listing apps. It supports both Android phones and tablets. You can build a listing for one city or unlimited cities. You can also categorize your city listing according to attractions, hotels, restaurants, theaters, shopping centers, nightlife, and so on. In addition, users can search by using keywords and the current location. They can also explore the city using maps.
Some back-end features of this app template include:
city registration from a public user
ability to manage item likes, item reviews, item ratings, item favorites, and item inquiries
Excellent service: really helpful and professional. Will recommend to any user or developer. Great job.
App Templates That Integrate With WordPress Sites
I want to round out the list with some app templates that are built specifically to work together with a WordPress site. This is a great way to build a mobile app and web site that share the same data and have a consistent look and feel.
The following app templates are each built to look like a specific popular WordPress theme though the theme and the app may not necessarily be built by the same developer. Having an app tailored for a particular theme allows for a consistent look between the website and the app you create. And most importantly: you can easily sync data between the app and website.
Note, the theme for each app is sold on ThemeForest.
DWT Listing is a React Native app template that gives you complete freedom to create any type of directory or listing website and apps. It comes with everything including a WordPress back-end, so you don’t need any paid plugins.
DWT Listing app comes packed with interesting and useful features including:
ability to create free and paid listings
geo-listing, that is listing according to location
options to create custom fields
listing owners can give discounts by creating coupon codes
review and rating system including user reactions
To use this app template, you must have the DWT—Directory & Listing WordPress Theme. This will allow a consistent look between the website and the app you create, and most importantly will let you easily sync data between the app and website.
Check out the live preview and see for yourself why user by Yashmathur4018 give DWT a glowing recommendation:
Excellent customer support, code flexibility, documentation and everything. Will make sure to recommend all my friends with the same website and the app.
Learning management systems are directories of online courses—paid or free—where users can teach or take courses.
WPLMS Student app is a mobile app developed for the WPLMS learning management system so students can learn anywhere anytime.
Since 80% of the population go online using mobile devices, learning management systems also need apps where students can access courses on their mobile devices.
To use this app you must have the WPLMS Learning Management System WP Education Theme. You can count on a consistent look between the website and the app you create and easy syncing of data between the app and website.
Some best features of this app include:
students can register directly in the app and their account is created in the site
students can browse courses and subscribe to the courses
students can enroll themselves in free courses or pay via website–includes a WooCommerce checkout system which supports multiple payment gateways
students can keep track of their courses on the app or website
the students' courses are loaded and available in offline mode
user dashboards with course and quiz graphs, and a quiz results section
online quizzes with MCQ, MCC, fill in the blank, select drop, and text answer type
And so much more!
Check out the live preview and see why this is the perfect app for you.
The Listingo app template allows developers to build directories for service providers where users can search for service providers, book appointments, review providers.
Features of this app include details of professional service providers like:
This app is not developed by developers of the above mentioned Listingo WP Theme. So in case you need help with the app you must contact the developers of the app directly and not developers of the theme.
User fpizziferri says this about this beautiful app template:
Really good app, does the job. Great support, issues resolved in 30 minutes. You can trust this company.
Conclusion
While these directory app templates stood out for me, there are many more you can explore on CodeCanyon.
The following posts should also help you in your search for app templates.
One of the ways to create brand awareness is by offering prizes to customers. Luckily WordPress provides you with an easy way to do that by running a contest. With just a simple plugin, you can set up a contest in your WordPress site.
Creating competitions and contests is also the quickest way for any brand looking to increase popularity or create a buzz.
Whether you want to show off customer testimonials, your latest blog posts, your best images, or just celebrate the members of your team, there is a...
CodeCanyon has a wide range of best-selling WordPress audio and video players. No matter what your vision for your audio or video content, there is a player...
In this tutorial, we will cover how to create a photography contest using Photo Contest plugin available at CodeCanyon. By the end of the tutorial, we should have a photography contest where:
contestants can register and submit up to 3 photos per person
contestants can share photos via various social media sites or get a shareable link after uploading their photos
others users can register and vote only once per photo
By the end of the tutorial, we should have something like this:
Advantages of Contests
Before we dive further let's get to understand why its a good idea to run a contest in the first place.
Increase in Web Traffic
Running a contest on your site is a great way to increase user engagement and hence drive traffic to your site. Then you can entice potential customers by offering incentives if they purchase anything.
Increase in Sales
A contest will bring new visitors to your website who are not familiar with your business. Contests can also prove as a way of increasing sales, especially if people have to purchase a product or service to enter the contest.
Gain More Subscribers
If your entry point is via registration, you will be able to grow your email list even faster. You can also entice visitors with rewards if they subscribe to your newsletter.
What Makes Photo Contest the Best Contest Plugin?
Photo Contest plugin is a fantastic plugin that lets you run any contest centered around photography. It enables you to run a photo contest where the audience chooses the winners based on the photo with the highest number of votes.
It also lets you control the voting process based on user roles. You can also limit the number of images uploaded by contestants. This plugin also lets you integrate with Disqus comments.
Security
Photo Contest plugin has several layers of fraud protection, hence assurance that the voting process is free from bots, automatic scripts, and hackers.
Easy to Translate
Photo Contest gallery comes with the ability to translate into several languages including French, Spanish, and German.
100% Responsive
Photo Contest gallery is fully responsive on all mobile devices as well as on most operating systems.
Powerful Admin
Photo Contest plugin also features a powerful admin area where you have full control of who can vote, as well as the vote count.
Integration With BuddyPress
Another advantage of the Photo Contest plugin is that you can integrate with BuddyPress with just a few steps.
Social Share
Photo Contest plugin lets users share their photos via most of the popular social platforms which could result in viral campaigns.
Planning Your Contest
What Is the Objective of the Contest?
It's good to have a clear objective to obtain the required results. A precise aim of the contest could be to:
increase brand awareness
build a following
increase sales
grow your email list
boost your brand
create buzz, especially for new products.
This contest aims to get people to post a creative photo picture, share with their friends, and have them vote for the best photo. The photo with the highest votes will then become the winner at the end of the competition.
Rules and Prizes
The success of any contest will largely depend on choosing the best prizes. The prize needs to be relevant to your target audience. It should also be unique and valuable. The award need not be expensive as long as it makes it worthwhile to participate in the contest.
Examples of contest prices that can be used by any brand include:
gift vouchers
cash prizes
free products or service
The next thing will be to create the contest rules. The purpose of the contest should act as a guide when making the rules. Some of the universal rules include:
Who is eligible to enter the contest?
When does the competition start and end?
For how long will the contest run?
How and how often should people enter the contest?
How will the winners be chosen?
What actions could cause disqualification?
Create a Contest With the Photo Contest Plugin
To start, download the Photo Contest plugin from CodeCanyon. You will get a link to the download the files. Alternatively, you can find them in the download section of your account with your other purchased items.
Once you've downloaded the WordPress files, log in to your WordPress site, go to Plugins > Add New, and upload the zip file you got from CodeCanyon. After uploading, click Install Now, wait a few seconds, and then click Activate. You can now start using the plugin.
After activation, the plugin should appear as a sidebar menu option in the admin area of your WordPress site.
Configurations for the Contest
The first thing is to configure the general settings. Go to Photo Contest > General Settings and choose how you want the contest to work in terms of voting, notifications, and layout.
vote settings: lets you decide how and who gets to vote once the contest goes live.
email and notifications: configure what kind of notifications will be sent to the users and the admin and how often
menu: design how the layout will look
integrations: use a third party for login and registration by merely using a shortcode. You can also integrate with BuddyPress.
Create a New Contest
You can create a new contest in one of two ways:
With the WordPress editor: create a new page and add a photo contest block (in the Gutenberg editor) or shortcode depending on your WordPress editor.
From the admin menu: navigate to Photo Contest > Contests > Create a New Contest.
Create a New Contest From the Admin Menu
In our case, we will use the contest section to create a new contest. Go to Photo Contest > Contests > Create a New Contest.
Fill out all the parameters for your contest, as shown above. The above contest will use the settings we configured in the previous section. Once you create a contest, it will appear in the list of contests as shown below.
Design the Layout and Create Rules and Prizes
Once you create a contest, go to Contests > Edit where you'll want to do the following:
choose a layout
edit the user settings
select the voting criteria
manage the rules, prizes, and registration fields
The contest is now complete, and users can upload their photos!
Share the Contest
To get traction and more people to participate, promote your contest to a broader audience. There are several ways to do that, such as:
posting on social media
sending via newsletter to subscribers
display as a banner on multiple pages on your website
use other offline media
you can even ask the participants to share with their friends and families in exchange for a small prize.
It's important to share the contest before it even starts, this will give people enough time to prepare their entries, and share with friends and families.
Winners and Results
You should now be in a position to determine if the contest performed as it was intended to. If the results are excellent, you might consider running contests regularly on your site. However, if it is the first contest, the results will help you improve on your future contests.
Remember, once you have a winner, be sure to let everyone know!
Conclusion
A successful contest will also depend on people feel about your brand after the contest has come to an end. Here are things to keep in mind:
ensure you let everyone know once you select a winner
For those looking to build hybrid mobile apps, Ionic is one of the first frameworks that you’ll run into. There’s good reason that it has gained significant usage among developers looking to create apps for several mobile devices from a single code base.
Ionic has a number of features that go beyond other offerings though, with something for everyone from beginning developers to veterans.
Read on to find out more about Ionic, and find tutorials to help you advance your skills no matter your current level.
The Ionic Framework
Ionic aims to solve a huge problem that came along with the explosion of smart devices. If there are a dozen different mobile operating systems out there, how do you build an app using the least amount of resources?
More recently, the market has become dominated by two mobile operating systems, iOS and Android. Each still required a separate app to be created though, using its own set of languages and libraries. However, with frameworks like Ionic, it has become possible to create your mobile app with a single code base, and deploy it to multiple types of devices.
What does Ionic do though exactly?
It allows developers to create a mobile app using familiar web technologies: HTML, CSS and JavaScript. It also has a set of libraries that help to create abstractions for system features on each type of mobile device. This means that the command to grab a picture from an Android camera and an Apple camera look largely the same in the JavaScript code, despite big differences under the hood.
The benefit of this is that it cuts down development time and resources by half, or even more if your target audience is larger than just Android and iOS. It also means that you don’t have to be a specialist in mobile development to create mobile apps any more, as JavaScript is a common web development language. This use of a transferable language means that it’s easy to build with Ionic if you’ve ever done web development before, and it also opens up the number of developers that are able to create mobile applications.
Before getting started with Ionic though, you’ll want to have a solid grasp on JavaScript.
JavaScript Foundations
Ionic is a framework built on what is arguably the most loved and simultaneously most hated programming language of all time, JavaScript. Having been around for more than two decades, JavaScript's proliferation on the web makes it one of the most used languages out there.
To get started with Ionic then, you’ll first need to know JavaScript.
There’s a number of ways to get up to speed on JavaScript, with one of the available courses being “Modern JavaScript Fundamentals” by Dan Wellman. This 6 hour course takes you through all of the basics of JavaScript, and prepares your for working with it, and lays the groundwork used in many of its frameworks.
JavaScript has strong support for object-oriented programming, though sometimes the object-oriented features of the language have been misunderstood. In...
Functions are one of the most important constructs in JavaScript. But despite their importance, there's a lot of confusion around JavaScript...
Learning Angular
Once you're up to speed on JavaScript, you'll want to look at some tutorials or courses on Angular. Ionic is built on top of the Angular framework (similar to how React Native is built on React), so having the basics of the framework down as well will go a long way to making your learning path go smoothly. The Angular Fundamentals course will help you to flex your skills within the framework.
Once you’ve brushed up on your JavaScript, it’s finally time to start digging into Ionic.
Basics of the Ionic Framework
Before getting into making fully-fledged apps, let’s start by dabbling in the basics first. While we talked about the Ionic Framework a bit, it’s important to know that Ionic is actually a series of related services.
We’ll be focusing on the open source framework, but there are also expanded tools such as a drag and drop editor, enterprise versions of the framework, and a continuous deployment aspect. The drag and drop editor is especially interesting, and if you want to get started with it, check out the course“Easy Mobile Apps with Ionic Creator” by Reginald Dawson.
Components make your Ionic app come to life. In this post we'll take a look at some key components—the building blocks for your Ionic app.
Once you’ve worked your way through all of that information, you’re now at the fun step, making apps! Next, we’ll look at resources that can help you bring it all together.
Build Apps with Ionic
Once you’ve got the basics of the framework down, it’s time to start making apps. The goal at this point is going to be to learn more about advanced components, as well as looking at how to structure and create simple apps.
The next step will be looking at the developer docs in more detail, really delving into the areas for specific components, architecture, and each of Ionic’s core concepts. Then it might make sense to get your hands on some complete code examples to break down for understanding.
To explore advanced components, check out the article “Ionic Components for Quickly Building Your MVP”. It includes links to complex components for UI, social authentication, restaurant booking, and a number of other pieces that can help to expand your understanding of components.
Once you feel comfortable with that, take a look at some existing templates for Ionic. These fully-fledged apps can help you to get a feel for how the architecture for apps can look, as well as how all of the components fit together. The article “15 Ready-Made Ionic 3 App Templates” links out to a number of useful app templates in many niches, each giving you direct access to their source code.
IonFullApp - One of the most popular Ionic App Templates in action
Ionic templates work similar to front-end development themes and templates that you might have run into using other platforms, such as WordPress themes. They consist of a series of files and assets that help to bridge the gap between the framework itself and the finished product that you are seeking.
There are a ton of benefits to using an Ionic app template, namely:
starting with a large portion of your project already completed
documented, professional code
reduced project cost
an existing structure to build the remainder of your project on
Pairing these benefits with the already powerful framework provided by Ionic gives developers a huge leg up when it comes to app development. Small development teams and those with limited resources will find them especially helpful. Here are a couple of the best:
Ionic 3 App for WooCommerce, developed by hakeemnala, is a template you should definitely consider using if you are creating an e-commerce app. It allows you to quickly create a beautiful app that can connect to your WooCommerce website.
If you are looking for a modern template with dozens of beautiful pages and a wide variety of useful features, this template is for you. Built with Ionic 3, it is very modular and extremely easy to extend. In fact, it has over 20 modules and over 35 components!
The developers of Ionic 3 UI Theme promise that you can make just about any app with their UI app template. With over 100 layouts and hundreds of HTML5 UI components, they might just be right. Apart from offering maximum flexibility and easy customization, the app offers Google Analytics so you can track your user’s behavior, MailChimp integration, Google Maps integration, and so much more.
Advanced Ionic and Complex Features
OIten the focus with Ionic is on how easy it is to create very simple apps, especially with its drag and drop editor. Beyond that though, it presents a set of complex features and a robust framework. It’s even become the framework of choice for a number of popular apps, including Untappd, MarketWatch, Nationwide, and Joule.
One of the most interesting aspects of Ionic is its theme system, which allows for easy swapping of styling with CSS and CSS-live variables. Ionic has thorough documentation on its theme system, along with several advanced features here.
There are many paths to learning Ionic, but hopefully this gives you some starting points no matter what point of your journey you’re at. How did you learn Ionic? What resources did you find the most useful? Let us know in the comments below!
In this post, we’re going to review the FormCraft WordPress plugin which allows you to create amazing forms with drag and drop. It’s one of the most popular and useful form builders available in the market at the moment.
Forms are one of the most important parts of the website—they allow you to collect various types of information from visitors. Whether it’s a simple contact or feedback from or a full-fledged survey form, it’s always handy to have a plugin which allows you build it easily. As a WordPress site builder, you would like to have a plugin which allows you to create professional forms on-the-fly and collect form submissions at different endpoints.
A host of extensions and form-builder scripts are available for creating forms on your WordPress website. Along with the free plugins, you’ll also find commercial options that provide ready-to-use premium features and extended support. In the case of commercial options, you can also expect quality code, bug fixes, and regular feature-wise enhancements.
In this post, we’re going to discuss the FormCraft WordPress plugin, available at CodeCanyon for purchase at a very reasonable price considering the amount of features it provides. It’s one of the most powerful drag-and-drop form builders which comes with a dozens of features and several built-in templates. This, or something like it, is a must-have tool for site builders who are looking for a professional form builder script.
Let’s have a glimpse of features this plugin brings on the table:
drag and drop form builder
several templates support
responsive and scalable
conditional logic to show/hide fields
form views and submission analytics
built-in GDPR support
multi-site support with additional add-on
and more
The FormCraft WordPress Plugin provides a plethora of useful features that are handy and allow you to create rich-looking forms on your WordPress websites effortlessly.
What We'll Be Building: a Survey Form
In this post, we are going to build a survey form which allows you to collect different types of information from users. Mainly, we’ll ask users a couple of questions about their online shopping choices and habits along with their basic personal information.
To achieve this, we are going to create a form which asks a couple of basic questions about their personal information and we’ll ask our survey specific questions as well.
The overall form will look like this:
So that’s the agenda of this tutorial. In the next section, we’ll see how to download and install this plugin.
Installation and Purchase Code Registration
In this section, we’ll see how to install and configure the FormCraft WordPress plugin once you’ve purchased and downloaded it from CodeCanyon. For this post, I’ve used WordPress 5.2.3, and the FormCraft WordPress plugin version is 3. I would recommend that you install it if you want to follow along with this post.
As soon as you purchase this plugin, you’ll be able to download the zip file. It’s the WordPress plugin file itself which you could use to install this plugin from the WordPress admin side. Go ahead and follow the standard WordPress plugin installation process and you’re almost done.
Next, we need to register the plugin’s purchase code. Firstly, you need to retrieve your purchase code from the CodeCanyon downloads section. Click on the Download > License Certificate link and that should get you a text file which should contain the item purchase code.
Once you get the purchase code, click on the FormCraft in the left sidebar on the admin side and that should display the plugin dashboard page. On this page, click on the Click here to register your copy of FormCraft link and enter and register your code. With that, you’ve unlocked the full power of FormCraft.
With that, we’re ready to dive-in the plugin exploration. In the next section, we’ll go through the different configuration sections this plugin provides.
A Quick Walk Through the FormCraft Configuration Sections
In this section, we’ll briefly discuss the back-end configuration sections provided by this plugin. Once you install the FormCraft plugin, it will add a link in the left sidebar. Let’s go through each section briefly.
Forms
This is a form listing page which lists all the forms created so far. You can also create a new form by clicking on the New Form link.
Apart from that, you can see the Form Analytics section which displays statistics about the different aspects of your forms.
Entries
This is an entry listing page which lists all the form submission entries in all the forms. You could use the search interface to filter specific records and there’s also the Export button which allows you to export entries.
There’s also the Entry View which facilitates you the detail view of the form submission entry.
Insights
Form insights is a new feature, added in FormCraft 3.3, which turns FormCraft into a powerful survey and polling tool. FormCraft can analyze certain fields to produce insights like drop-down, rating, checkboxes, date, slider, etc.
Uploads
This page lists out all the files uploaded via different forms.
License
Finally, this section displays your license information. It also displays the days left to renew license.
So that was a brief introduction to the features provided by this plugin. In the next section, we'll build a survey form as we discussed earlier.
How to Build a Survey Form
In this section, we’ll build a survey form which allows us to collect user feedback about their online shopping experiences.
Head over to the admin side and access the FormCraft > Forms section. Click on the New Form button to create a new form. That should ask you a couple of choices as shown in the following screenshot.
As you can see, while building a new form, you could choose from already existing templates or you could even duplicate an existing form. However, in our case, we’ll go with the Blank option as we’re building our form from scratch. Click on the Blank option and that should present you a nice form building UI as shown in the following screenshot.
There are two main navigation sections; one allows you to configure global settings of your form and the other allows you to add fields to your form. We’ll explore different sections as we go through setting up our form.
Firstly, let’s add a title to our form. Click on the Add Field > Heading. That should add a title field to the form and when you click on the field box it allows you to configure it as shown in the following screenshot. Enter E-commerce Survey in the title field label as shown in the following screenshot. Also, you could adjust the other field specific settings as per your need!
Next, we’ll add a text field to our form. Click on the Add Field > One Line Input and it’ll add a text field as shown in the following screenshot.
I have made it a required field as we’ll need it from the user. In the same way, go ahead and add Email and Mobile No text fields. Next, we’ll add a drop-down field for Industry selection by clicking on the Add Field > Dropdown link. You can configure it as shown in the following screenshot.
In the same way, I’ve added another drop-down which asks the user about their online shopping frequency. I’ve added Very frequently, Frequently, Occasionally and Rarely as options.
Next, I’ve added the checkbox field by clicking on the Add Field > Checkbox link. In my case, I’ve asked about the category the user mostly purchases from and the options are: Clothes, Electronics, Footwear, Books and Furniture.
Moving further, I’ve added a couple of radio fields by clicking on the Add Field > Dropdown link. It’s important to note that we’re selecting the Dropdown option to add radio buttons too. When you want to render radio buttons instead of checkboxes, just uncheck the Allow Multiple Selections option in the field configuration as shown in the following screenshot.
Finally, we’ve asked their device preference by using the drop-down box. We’ve also provided the textarea field just in case they want to describe their overall experience. With all the bits and pieces together, if you click on the Preview button, it should look as per the following screenshot.
Make sure to save the form settings by clicking on the Save button in the top navigation.
Now, we’ve built our form and it’s ready to get published and collect the user input from the front-end. Although, we can see user submissions from the back-end, it would be nice to get an email when there’s a new user submission. You can configure the email address where you would like to get the email in the Settings > Email > Email Notification section as shown in the following screenshot.
So everything is in place now and we can publish our form. As usual, you just need to get the shortcode of your form and you can place it where you want to display the form. You can get the embed code of your form from the Settings > Embed section as shown in the following screenshot.
Copy it and place it in a page or post to display your form. You can check the form submissions at FormCraft > Entries as shown in the following screenshot.
Other Possible Use-Cases
Although, we’ve built a simple survey form, the FormCraft plugin is capable of creating advanced complex forms as well with the configuration options it provides. You can create anything from a simple contact form to a complex condition based dynamic forms.
newsletter forms
feedback forms
appointment forms
complaint forms
quote forms
So it allows you to create various types of forms!
Conclusion
Today, we reviewed the FormCraft WordPress plugin available at CodeCanyon. It’s a form builder plugin which allows you to create different types of forms by a drag and drop interface. Although it’s a commercial plugin, I believe it’s reasonably priced considering the plethora of features it provides.
Do you want to start earning money from your WordPress website?
You could enrol in the Amazon Associates program and generate revenue via referral links; sell advertising space using a plugin such as ADning, or your might even decide to start selling your own products via your website.
All of these methods can generate a healthy income, but they tend to revolve around one-off payments—what if you’d prefer a consistent revenue stream that’s guaranteed to deliver over the next few weeks, months or potentially even years?
Today, many WordPress websites generate money by selling subscriptions. A subscription strategy might mean creating free content plus exclusive, premium content for paying members; selling early access to your best content, or you could even move your entire website behind a subscription paywall.
With UserPro, you can give everyone who visits your website the option to create a profile, connect with other users, display their location using Google...
Whether you’re an online freelancer or a brick and mortar business, having a website is no longer enough to get and retain customers. You need to create a...
In this post, we’re going to explore the Simple Membership plugin, which allows you to set up different kinds of memberships for your WordPress site. With...
In this article, I’ll show you how to start selling membership subscriptions, using the Ultimate Membership Pro plugin. By the end of this article, you’ll have created several free and paid subscription levels, and explored various ways that you can restrict access to your website’s content, based on the visitor’s subscription level.
To ensure collecting your payments is as painless as possible, we’ll setup a PayPal payment gateway, so your website's entire payment process is managed by one of the Internet’s most popular payment platforms.
Getting Started With Ultimate Membership Pro
To start, you need to download the UMP plugin, and upload it to your WordPress account:
Head over to the CodeCanyon website, click Sign In and then enter your Envato account details when prompted.
Head over to the Ultimate Membership Pro listing, click Buy Now and then follow the onscreen instructions to complete your purchase.
Download your plugin when prompted.
Unzip the downloaded file; the subsequent Main folder should contain several files and folders, including an indeed-membership-pro.zip file, which you’ll need to upload to your WordPress account.
Log into WordPress, if you haven’t already.
Select Plugins from WordPress’ left-hand menu, followed by Add New.
Select the Upload Plugin button.
Scroll to the If you have a plugin in a .zip format section, and then select Choose file.
Select the indeed-membership-pro.zip file.
Click Install Now. After a few moments, you should see a Plugin installed successfully message.
Select the Activate Plugin button.
A new Membership Pro Ultimate WP item should now appear in WordPress’ left-hand menu.
Activating the UMP Plugin
By default, you’ll only have access to a trial version of UMP. To access the full version, you’ll need to enter your purchase code which can only be used for a single WordPress installation on a single WordPress website.
You’ll find this code in the [CodeCanyon] Purchase Confirmation email you received when you purchased UMP, or in UMP’s Support section when you’re logged into your Envato account.
Once you have your code:
In WordPress’ left-hand menu, select Membership Pro Ultimate WP.
Hover over the side-tabs, and select the Help tab when it appears.
When prompted, enter your purchase code and then select Activate. You should now have access to the full version of Ultimate Membership Pro.
Exploring UMP’s Membership Pages
UMP automatically creates all the pages required to deliver its core functionality.
To take a closer look at these default pages, select Pages > All Pages from WordPress’ left-hand menu. You should find that UMP has created all of the following:
IUMP – TOS PAGE. This is the page where you’ll display your website’s Terms of Service, which should include information about the kind of data your website collects from its users, and how you plan to use that data. If you need some inspiration, then check out Envato’s Terms of Use, or you can find plenty of ToS templates available online.
IUMP – SUBSCRIPTION PLAN. This page displays all of your website’s subscription plans. By default, UMP creates a Free level that provides limited access to your website’s content; a One Time Plan that provides access to premium content for a one-time payment of $10; and a Recurring Plan priced at $1 per month. Later in this tutorial we’ll be replacing these automatically-generated subscription levels with our own subscription plans, as shown in the following screenshot.
IUMP – Register. By default, this page displays the same content as the Subscription Plan page.
IUMP – Default Redirect Page. If a visitor tries to access a page without the necessary subscription, then they’ll be redirected to the IUMP - Default Redirect Page.
IUMP – Login. This page will display a login form for any visitor who isn’t currently logged into their account.
IUMP – Account Page. If the visitor is logged into their account, then this page will display their user profile. Here, the user can change their profile picture, or access links that contain additional information about their account. For example, clicking the Subscriptions icon will display the user’s current subscription level and any alternative subscriptions they may want to purchase, and selecting Orders will display their complete order history.
IUMP – LogOut. This is the page visitors will see when they log out of your website.
IUMP – Reset Password. This page displays UMP’s standard Get New Password form.
IUMP – Visitor Inside User Page. This represents content that a visitor will only see if they’re logged into their account.
Creating the Membership Directory
UMP may automatically generate all the pages required to sell and manage subscriptions, but by default it doesn’t generate the UMP Members List page. This page displays information about every user who’s currently subscribed to your website, and can be easily created using UMP-provided shortcode.
Since it provides a good introduction to some key areas of the UMP dashboard, let’s generate a Members List for our website:
In WordPress’ left-hand menu, select Membership Pro Ultimate WP. This takes you to the main UMP dashboard.
Select Showcases from the UMP toolbar.
Select the Members List card.
At this point, you can customize your Members List in several ways. Most of these settings are self-explanatory, but a few that are worth exploring include:
Displayed user fields. This is the information that’ll be displayed for each member, such as their name, email address, social media accounts, bio, and location. You can choose to hide or display each piece of information, as required.
Pagination. This controls how many registered users should be displayed per page.
Search bar. When enabled, visitors will be able to search for registered users based on various criteria, such as their nickname, email address or country.
When you’re happy with your settings, scroll to the Shortcode section. This section contains a piece of shortcode that’s generated automatically based on your chosen settings.
You can turn any page into a UMP Members List, by copy/pasting this shortcode:
Copy the shortcode.
In WordPress’ left-hand menu, select Pages > Add New.
Give this page a descriptive title; I’m using Members List.
In the main body of your WordPress page, give the little + button a click.
Search for Shortcode and then select it when it appears.
Paste your shortcode into the subsequent window.
Click the Preview button to see how this page will appear to your website’s visitors.
If you’re happy with your Members List, click Publish to make it public.
Monetize Your Content With Subscription Levels
If you’re going to start earning money from your subscribers, then you’ll need to create some subscription levels.
Let’s take a look at the levels that UMP creates automatically:
In WordPress’ left-hand menu, select Membership Pro Ultimate WP.
In the toolbar, select the Levels tab
You should see the following subscription levels:
free_demo. This provides lifetime access to most of your website’s content.
onetime_demo. This provides lifetime access to your website’s premium content, priced at $10.
recurring_demo. This provides access to your website’s premium content for $1 per month.
Depending on the subscription structure you want to implement, it may be quicker to simply make a few tweaks to these automatically-generated levels. However, to keep things straightforward we’ll be deleting these default subscription levels and then implementing our own subscription structure, from scratch.
I’ll be creating three subscription levels, which reflect the kind of structure commonly used by many subscription-based websites:
Free. This will provide visitors with lifetime access to limited content.
Recurring payment. This will be a rolling, one-month subscription plan that provides access to premium content.
One-off payment. This will provide lifetime access to premium content, in return for a one-time payment.
To remove UMP’s default subscription levels, hover over each level in turn and then click the Delete link when it appears.
Creating a Free Subscription Level
To create a subscription level, you’ll need to enter some information that UMP will use to request and process each payment, such as how much this subscription costs and what should happen when the subscription expires.
You’ll also need to provide some information for UMP to display on your website’s IUMP - Subscription Plan page, including a sales pitch that explains this level’s benefits to potential new subscribers
To create a free, lifetime subscription level:
Navigate to Membership Pro Ultimate WP > Levels.
Give the Add New Level button a click.
In the subsequent form, enter a slug for this membership level, which will be included in the subscription level’s URL; I’m using free. Note that this slug must be lowercase.
In Level label, enter some text that’ll be displayed at the top of this level’s subscription box (circled in the following screenshot). I’m using Free.
In the Level Access section, you’ll need to decide whether to give subscribers lifetime or limited access to your website’s content. If you opt for limited access, then you can specify a certain number of days, weeks, months or years (Regular Period) or provide access between two dates (Date Range). I want Free subscribers to have permanent access to a limited set of content, so I’m opting for Lifetime.
Since this is a free level, open the Billing options dropdown and select Free.
Scroll to the Level Description section. Here, you can type a few lines that’ll be displayed as part of this level’s subscription card (circled in the following screenshot). I’m using Free lifetime membership! Get free access to all of our website's first tier content. Note that you can apply all of WordPress’ standard formatting to this text, including bold, underline and italic effects, and can also use line breaks, as I’ve done in the following screenshot.
In Price Text specify how much this subscription costs, formatted as a currency. This text will also be displayed as part of the level’s subscription card (circled in the following screenshot).
When you’re happy with the information you’ve entered, click Save Level.
You can check how this new subscription level will be displayed to the user, by visiting your website’s IUMP - Subscription Plan page (Pages > All Pages > IUMP – SUBSCRIPTION PLAN > View.)
Offering a One Month Membership
Next, let’s create a recurring Silver subscription, which will provide access to our website’s premium content for a rolling, monthly fee:
Give the Add new level button a click.
In Level slug, type silver.
For Level label, type Silver.
Open the Access Type dropdown. Since we’re creating a recurring subscription, select Regular period. This will give you access to some new controls.
Use the new text field and dropdown to specify that this should be a 1 month subscription.
Open the After Expire move to dropdown and select free. Now, if the user cancels their Silver subscription, they’ll be automatically moved to a Free subscription.
Open the Payment type dropdown and select Payment. At this point you’ll get access to some additional settings.
In the new Level price field, specify the price for each month of Silver membership; I’m using £4.99.
Open the Billing recurrence dropdown and select On Going. Silver subscribers will now be charged once per month.
Scroll to Subscription Plan Page details and create a sales pitch for your Silver subscription; I’m using 1 month of premium content! / Get one month of unlimited access to all of our latest, premium content.
In the Price Text field, type £4.99
When you’re happy with the information you’ve entered, click Save Level.
Creating a One-Time Payment Subscription
For our third level, I’m going to create a Gold subscription, which will provide lifetime access to all of our website’s premium content, in return for a one-off payment:
Give the Add new level button a click.
In Level slug, type gold.
In Level label, type Gold.
Open the Access Type dropdown and select Lifetime.
Open the Payment type dropdown and select Payment.
In the new Level price field, enter the price of lifetime access to your website’s premium content; I’m opting for £29.99.
Open the Billing recurrence dropdown and select One Time, since we want this to be a one-time payment.
Scroll to the Subscription Plan Page details section and create your sales pitch; I’m using Lifetime access to exclusive content / Get unlimited, lifetime access to Gold membership content.
In the Price Text field, type £29.99
When you’re happy with the information you’ve entered, click Save Level.
Subscription Plan Showcase: Customizing Your Levels
UMP provides several themes that you can use to quickly and easily customize the look and feel of your Subscription Plan page. To try out these different themes:
Select Membership Pro Ultimate WP from WordPress’ left-hand menu.
Choose Levels from the toolbar.
Select Subscription Plan Showcase.
Open the Select Template dropdown and work your way through the list of themes. Every time you select a new theme, the preview towards the bottom of the page will update to reflect the new theme.
When you’re happy with your chosen theme, click Save Changes.
Re-Ordering Your Levels
The Subscription Plan page displays your levels in the order they were created, but you can change this order, if required:
Navigate to Membership Pro Ultimate WP > Levels.
Click the ReOrder Levels button
Change the order of these levels, using drag and drop.
Start Monetizing Your Content
After creating your levels, the next step is granting and restricting access to your content, based on the visitor’s subscription level.
To see this process in action, let’s create a few pages that’ll represent the different content types:
Free Content. This will be a stand-in for content that’s accessible to everyone, regardless of subscription level. Since this content is free, we don't need to apply any restrictions to this post.
Silver Content. This content will be accessible to anyone with a Silver or Gold subscription.
Gold Content Blog 1. Later in this tutorial, we’ll be exploring UMP’s drip content feature. This content will be accessible to Gold subscribers, on the first day of their subscription.
Gold Content Blog 2. This will only become available to Gold subscribers on day two of their subscription, as part of our drip content campaign.
Navigate to Posts > Add New and create these four posts.
Restrict Access Using Pro Locker
UMP provides several ways that you can restrict content, including methods for restricting content en masse.
Let’s start by restricting access to our Silver Content page, using the Ultimate Membership Pro Locker method:
Open your Silver Content page for editing, as normal.
In the right-hand menu, scroll to the Ultimate Membership Pro Locker section.
Open the dropdown menu and select Show Page Only.
Open the ...for dropdown and select silver, which ensures this content will be accessible to Silver subscribers.
Since a Gold subscription allows access to gold and silver content, we need to open the ...for dropdown again, and this time select gold.
Open the If is not allow…. dropdown and select Redirect the page.
Open the To dropdown and select the page where visitors should be redirected, if they don’t have the required subscription level. I’m going to choose IUMP - Subscription Plan.
When you’re happy with the information you’ve entered, click Update to save your changes.
Now, if you try to view the Silver Content page without a Silver or Gold subscription, then you’ll be automatically redirected to the IUMP - Subscription Plan page.
Designing a Drip Content Campaign
UMP lets you combine content restriction with a “drip content” strategy, where you make content available to different subscription levels depending on how long they’ve been subscribed. For example, a Gold subscriber might gain access to Gold Content Blog 1 as soon as they purchase a subscription, and Gold Content Blog 2 on the second day of their subscription.
Drip content can be a powerful way to drive user engagement. For example, imagine you signed up to a website and saw that they’d published a popular three-part blog series two months ago - what are the chances of you spending a few hours reading through all of this “old” content?
Now, imagine that new instalments in this series appear at regular intervals, throughout the first week of your subscription - you would be much more likely to become invested in this “ongoing” series.
You could also potentially combine a drip content schedule with other marketing techniques, such as targeted email blasts, to further encourage new subscribers to engage with your website.
Let’s create a simple drip content campaign:
Open your Gold Content Blog 1 page for editing.
Scroll to the Ultimate Membership Pro Locker section.
Open the dropdown and select Show Page Only.
Open the ...for dropdown and select gold.
Scroll to the Membership Pro - Drip Content section and drag the slider into the On position.
Scroll to the Release Time section.
Open the Type of release time dropdown and choose when this content should become accessible to Gold subscribers. To ensure this content is available immediately, I’m selecting Instantly Subscription.
Scroll to the Expiration Time section.
Open the dropdown and select Never, since we want this content to be permanently available.
Click Update.
Now, let’s release Gold Content Blog 2 on the second day of subscription:
Open your Gold Content Blog 2 page for editing.
Scroll to the Ultimate Membership Pro Locker section, and select Show Page Only.
Open the ...for dropdown and select gold.
Scroll to the Membership Pro - Drip Content section and drag the slider into the On position.
Scroll to the Release Time section.
Open the Type of release time dropdown and choose After subscription.
In the subsequent controls, specify that this content should become available 1 day after subscription.
Make sure Expiration Time is set to Never.
Click Update.
Now, Gold Content Blog 1 will be accessible as soon as someone purchases a Gold level subscription, and Gold Content Blog 2 will become available the following day.
Restrict Your Content With Paywalls
Alternatively, you can restrict access to your content using inside lockers, which are similar to the paywalls you may have encountered on some news websites. The following screenshot shows an example of a content locker-style paywall, on news website The Times.
To create an effective inside locker, you’ll typically place some teaser content outside of the paywall, and then hide the rest of that content behind the paywall.
UMP lets you create custom lockers featuring different messages and graphics, for example you might create separate lockers for your Gold and Silver-restricted content.
Let’s create a locker for our Gold content:
In WordPress’ left-hand menu, select Membership Pro Ultimate WP.
In the toolbar, select Inside Lockers.
Select Add New Locker template.
In Locker Name give this locker a distinctive name, I’m using Gold Locker.
Open Locker Theme and choose a template; every time you select a new template the Preview section will update based on this new template. Work your way through the list of available templates until you find one you’re happy with; in the following screenshot I’m using Zone.
You can now customize the locker message, for example you might prompt the user to sign up for a Gold subscription or a Silver subscription, depending on the kind of content you’re restricting.
Scroll to Additional display options, and decide whether you want your locker to include a login form and/or social media logins.
In the Additional display options section you can also select Additional Links, which will add Register and Lost your password? links to your locker - perfect for visitors who may have already purchased a subscription, but aren’t currently logged into their account.
In Locker Message, customize the text that appears on your locker.
When you’re happy with the information you’ve entered, click Save Changes.
Applying an Inside Locker
Now we’ve created a Gold locker, let’s look at how you can apply an inside locker to your content. To get the full effect, you’ll need to create a page that features at least a few paragraphs of content:
Navigate to Posts > Add New.
Give this page a descriptive title; I’m using Gold Content (Locker).
Add several paragraphs of text to this page. To save time, I’m using Lorem Ipsum generator to automatically generate five paragraphs.
Click Publish…
Now, let’s hide a portion of this content behind a paywall, using our Gold inside locker:
Make sure you have the Gold Content (Locker) page open for editing.
Highlight all the text that you want to hide behind the locker “paywall,” so that it’s highlighted blue.
Select the red MP Locker button from WordPress’ toolbar (if you don’t see this button, then skip ahead to the next section).
In the first dropdown, select Show Content Only For.
Open the Target Users dropdown and select gold, since this content should only be available to gold subscribers.
Open the Choose Locker dropdown and select the locker we created in the previous section.
Give the Save button a click.
Save your WordPress page, by clicking the Update button.
Now when you visit this webpage without signing into a Gold account, you’ll see a preview of the page’s content, while the rest of the content is hidden behind the locker message.
Can't Locate the MP Locker Button?
If the MP Locker button isn’t appearing in your WordPress toolbar, then you can coax it out of hiding by switching to WordPress’ Classic Editor.
The easiest way to make this switch, is to install the free Classic Editor plugin:
In WordPress’ left-hand menu, select Plugins > Add New.
Search for Classic Editor and when the plugin appears, select Install Now.
Once the Classic Editor plugin is installed, select Plugins > Installed Plugins from WordPress’ left-hand menu.
Find Classic Editor and click its accompanying Settings link.
Find Default editor for all users and select Classic Editor.
In the Allow users to switch editors section, select Yes.
Click Save Changes.
Next, navigate to Posts > All Posts.
Hover over the Gold Content (Locker) post that you created in the previous step, and select Edit (Classic Editor) when it appears. The WordPress toolbar should now contain the missing MP Locker button.
URL Blocking: Restrict Access to Any URL
You can also restrict access to specific URLs. This method can be more efficient if you have a long list of posts that you want to restrict, as you can simply copy/paste each URL into the UMP dashboard.
To restrict access to one or more URLs:
In WordPress’ left-hand menu, select Membership Pro Ultimate WP.
In the toolbar, select Lock Rules.
Find Specific URL, and give it a click.
In the Full URL field, enter the first URL that you want to restrict.
Open the Restrict type dropdown, and then select either Block Only or Show Only.
Open the Target Users dropdown, and select the subscription level that you want to apply this new rule to.
Open the Redirect to dropdown and select the page where visitors should be redirected to, if they try to access this URL without the necessary subscription.
When you’re happy with your settings, click Add New. The target URL will now be restricted, based on your criteria.
Rinse and repeat for every URL that you want to restrict.
Creating a Keyword Strategy
You can also restrict access to specific URLs, based on keywords within that URL.
You can use this feature to create a system where content is automatically restricted as you publish it. For example you might create a rule where all posts with gold in the URL are restricted to gold subscribers. Once this rule is in place, you then just need to include the keyword gold in a new post’s URL, and this content will be accessible to gold subscribers only.
This approach does require some planning, and it’s entirely reliant on you remembering to edit each post’s URL to include the necessary keywords. However, once you’re in the habit of editing your URLs, this approach can save you a significant amount of time, particularly when compared to manually assigning a subscription level to each piece of content.
Let's imagine you wanted to restrict content to gold-level subscribers, using the keyword gold. To implement this rule, we need to complete the following steps:
Navigate to Membership Pro Ultimate WP > Lock Rules.
Select All URL (based on keywords) from the toolbar.
In the Keywords field, type gold.
Open Restrict type and select Show Only.
Open the Target Users dropdown and select gold.
In Redirect to select the page that everyone apart from gold subscribers should be redirected to, if they try to access a URL containing the keyword gold.
When you’re happy with your settings, click Add New.
Now, everytime you create a page or post that's targeting gold subscribers, you need to include the word gold in that item’s URL. You can edit a page or post’s URL by opening that item for editing, finding Permalink in the WordPress toolbar, and then selecting its accompanying Edit button.
Receiving Payments via PayPal
At this point, we’ve created several subscription levels and explored multiple ways that you can restrict content based on these levels. However, there’s currently no way for potential subscribers to actually purchase any of your subscriptions!
In this section, I’ll show you how to setup payment gateways, so you can finally start earning money from your website’s content.
To take a look at all the different payment gateways that UMP supports:
Select Membership Pro Ultimate WP from WordPress’ left-hand menu.
In the toolbar, choose Payment Services.
All the supported payment gateways will now be displayed along the top of the dashboard.
The process of setting up a payment gateway will vary depending on the payment gateway in question, but since it’s one of the most popular online payment methods, I’ll be using PayPal: .
Select PayPal from the toolbar.
In Email address, enter the email address associated with your PayPal account.
Open the Redirect page after payment dropdown and choose a page the visitor should be redirected to, following a successful payment.
Click Save Changes.
Scroll to the PayPal Activation section and drag the slider into the On position.
Click Save Changes.
Assuming this is the first payment gateway you've added to UMP, it’s recommended that you take a few moments to configure your website’s payment settings:
In the toolbar, select General Settings.
Click Payments.
Open the Currency Settings dropdown and choose your preferred currency.
Open the Default Payment Gateway and select the payment gateway you’d prefer subscribers to use; I’m choosing PayPal. Now, if you add multiple payment gateways to your website, PayPal will always be highlighted as the default payment option.
Click Save Changes.
Head over to your website’s IUMP - Subscription Plan page, and you’ll see that PayPal is now listed as a payment option.
If you select any of the subscription plan Sign Up buttons, you’ll now be redirected to a PayPal form where visitors can purchase this subscription and send you payment via PayPal.
Every time a new subscriber completes a purchase, you’ll see a New Order notification along the top of the UMP dashboard.
You can view more information about this payment, along with your website’s entire payment history, by navigating to Membership Pro Ultimate WP > Payment History.
Conclusion
In this article, I showed how you to start earning money from your website’s content, using the Ultimate Membership Pro plugin. Over the course of this tutorial, we created several free and paid subscription levels, and explored various methods of restricting your website’s content, based on the visitor’s subscription level. We also covered how to encourage new subscribers to engage with your website, by combining subscription levels with a drip content strategy.
WordPress is always evolving, and and we've just updated some of our WordPress courses to help you stay up to date.
Whether you're a beginner who wants to learn how to create beautiful pages using the Gutenberg block editor or an experienced WordPress developer who wants to code custom themes and plugins, there's something here for you.
In WordPress, all your content is organized into posts and pages. If you want to use WordPress to the fullest and create a well-organized site, you'll need to understand:
how to create and edit posts and pages
how to use the Gutenberg block editor
how to categorize your content with tags and taxonomies
how to show your content in the menu
In this beginner's course, you'll learn how to create posts and pages for your WordPress site. Your instructor Rachel McCollin will show you how to edit posts and how you can use blocks to create content within them. You’ll also learn how you can add pages and category archives to the navigation menu as well as how to use custom page templates.
Looking for something a bit more advanced? This one's for you.
In this course, you'll learn how to customize your themes with advanced theme templates. You'll also see how to create an advanced WordPress theme for a blog.
Along the way, you'll learn different ways to code the Loop, how to create templates for custom page and post types, how to create templates for custom taxonomies, and how to use conditional tags to make your templates more flexible.
What if you are a plugin developer, or you simply want to code a custom plugin to solve a specific problem for your site?
Try this course, in which you'll create three practical projects to help you learn WordPress plugin development. Learn how to create a list of pages in the current section of your site, to customize the admin pages, and to add an attractive display of the most recent post in each category to your home page or below each post in your site.
Watch Any Course Now
You can take any of our courses straight away with a subscription to Envato Elements. For a single low monthly fee, you get access not only to these courses, but also to our growing library of over 1,250 video courses and industry-leading eBooks on Envato Tuts+.
Plus you can download unlimited items from the huge Envato Elements library of more than 1.5 million creative assets. Create with unique fonts, photos, graphics and templates, and deliver better projects faster.
In this tutorial you will learn how to make your WooCommerce store a little more stylish by organizing the product archive with tabs. We’ll create tabs with a multi-column layout, a multi-row carousel, and a grid layout.
What We’re Going to Build
Over the coming steps we will create a WordPress plugin, inside which we
will setup the required shortcodes. Should you wish to take your WooCommerce product archive further, you could convert it to a Gutenberg block,
use it with Elementor as a widget, or integrate it with Visual Composer.
This tabbed product archive will be perfect for showing recent, featured, sale, and best selling products, like this:
Our product archive, showing tabs and carousel controls
So let’s get started!
1. Create a WordPress Plugin
In your WordPress site under wp-content/plugins create a
folder called (perhaps not the most original name) “woocommerce-products”, then inside that folder
create a php file with the same name. Open the file and paste into it the code below (change the details to fit your own):
/*
    Plugin Name: WooCommerce products
    Plugin URI: https://www.enovathemes.com
    Description: Better product grouping presentation for your WooCommerce shop
    Author: Enovathemes
    Version: 1.0
    Author URI: http://enovathemes.com
*/

if ( ! defined( 'ABSPATH' ) ) {
    exit; // Exit if accessed directly
}
Here we’ve done nothing more than define our plugin name and provided some meta info.
Enqueue Scripts and Styles
For our WooCommerce product archive plugin we will next need to enqueue the required scripts and styles, so add the following code snippet:
First, we’ve added a basic CSS file to store our styles. Next we loaded the built-in imageLoaded
plugin (which comes with the WordPress core), and to create the carousel we will use the wildly popular
jQuery plugin owlCarousel.
And, of course, the main js file.
Note: Make sure these files are added to your plugin folder in the relevant subfolders.
For more on WordPress
plugin and shortcode creation, or further information on using owl.js, here are some recommended tutorials on Tuts+:
In this step we will create a tab shortcode. It will consist of two shortcodes actually; the parent tab container, and then child tab items. For the
first parent container add this code to the PHP file:
At this point, if you were to add them to your front-page, then view the result in your browser, you
would see unstyled and non-functional HTML output. So let’s fix it.
I won’t describe all this code in great detail, but the logic here powers the tab functionality. If you are not familiar with JavaScript or
jQuery, I highly recommend this amazing free course for beginners:
Style the Tabs
Now the tabs work, but they still appear ugly, so let’s add some
basic CSS:
We’re making great progress; our tabbed WooCommerce product archive is nearly there! The time has come to
create a shortcode for the products. This will fetch the products with a query, then from those results create a series of arrays: featured, sale, and best-selling products. It will then output the contents of those arrays to give us our tabs of products.
The shortcode we’ve created here has several attributes:
Layout – this can
be grid or carousel
Autoplay– true or false, this is an additional option for the carousel layout
Columns– here you can
specify how many columns you want
Rows– this is the same
as columns, and only applies to the carousel layout
Quantity– the number of items to display
Type– here you
can specify recent products, best sellers, sale, or featured products
A Note on Our Carousel Rows
When you have a carousel, each product becomes a carousel item–normal behavior when you have one row. However, what happens if you want two, three, or four rows
per carousel item?
In this case you would need to wrap each of these possibilities inside a wrapper that would act as the carousel item. And you have
the question: do you do this with JavaScript or with PHP? I prefer the second option, as JS has
some delay on execution. So if you examine the shortcode you will find the following:
This is very similar to a for loop, we need an increment to
loop through our query and wrap each two, each three, and each four product items
inside the carousel item wrapper markup.
You’ll notice the %, which is the modulo operator. It gives the
remainder of a division; 0 when the number is exactly divisible
by 2/3/4, and 1 when not. And with each loop we will need to increment
the counter with:
We’re almost ready, but first let’s add some owl carousel
styles and some additional styling to our products.
Open the style.css file
and paste the owl carousel styles (you should find these in your owlCarousel
plugin download .zip file). And some additional style for carousel navigation
and our products:
But wait a minute, we haven’t yet called the carousel plugin, so
let’s now go to the main.js file, and right after the tab code add the following:
// Initialize carousel for the first load

$('.products.carousel').each(function(){

	var $this = $(this);
    $this.imagesLoaded(function(){
        $this.owlCarousel({
                margin:24,
                nav:true,
			    autoplay:$this.data('autoplay'),
				items:$this.data('columns'),
			    responsive:{
			    	320 : {items:1},
			    	768 : {items:2},
			    	1024 : {items:3},
			    	1280 : {items:$this.data('columns')}
			    },
			});
    });

});
Here we use two plugins at the same time: first we make sure
that our images are loaded to avoid any kind of content overlapping, and then
we call the plugin for our carousel products layout.
6. Fix Carousel Glitch
One thing remains to be done: if you now go to the
tabs and state that you want a carousel based layout you will see it working on the active tab
for the first page load, but if you start switching from tab to tab your
carousel layout will break. On the tab change event our carousel needs to updated. So at the very beginning of the file add the function:
function refreshCarousel(tab){
    tab.find('.products.carousel').each(function(){
        jQuery(this).trigger('refresh.owl.carousel');
    });
}
This function refreshes the carousel layout each time the tab is
changed. And now inside tab function right after the code:
In this case I am using the default WordPress theme with Gutenberg editor (hence the Gutenberg comments <!-- wp:separator -->), if
you have the classic editor, just copy the shortcodes.
You are free to use and modify this plugin in your projects,
both commercial and non-commercial. Visit the repo on Github to grab the source code in full. I hope you find it useful, thanks for reading!


.png)
.png)


.png)
.png)


.jpg)