Forms are essential for any website as they provide an efficient way for your customers to communicate with you. Whether you are looking to receive feedback, complete an order, or receive an application from your website visitors, forms allow you to effectively collect all of this information.
Many of the WordPress forms on the market today are quite complex and can be difficult for the user to integrate into their site. Not only are they too complex, but they often require expensive upgrades to unlock all the necessary features. Luckily there is a WordPress form builder that tackles all of these issues.
Sometimes you need to modify your WordPress login form to make it more user-friendly or maybe add some features. No matter your reason, here are 20 best...
If you own a WordPress site, forms are indispensable for creating a satisfying user experience and increasing your conversion rates. You need forms for...
The forms on your site are useless unless people actually complete them. Find out how to create great forms that encourage people to click submit.
The simple and easy to use form builder, Quform, is an incredibly powerful form creation tool for your WordPress website that features nineteen form elements and an unlimited number of forms for each website.
Quform can quickly create whatever forms your mind can conceive and style these forms with easy to adapt themes. In this article, I am going to show you just how easy it is to create a feature-rich form with Quform.
What We Will Be Building
The form that we will be building in this tutorial will be for a blog website. The purpose of the form will be to collect blog submissions from website visitors so we can go through all of the submissions in an organized manner. The form will contain a variety of fields for the user to fill out to give including name, age, email address, an explanation of why their blog post should be on our website, and an area to upload their blog post.
Decide What Type of Form to Create
Before you can begin to create a form for your website, you will need to know the specific form you are creating and what needs to be included in the form. The form you are looking to create will depend on your specific needs.
First, analyze what type of information you want to gather from your audience and then write down each specific piece of information that you are looking to collect. This will be your road map for the form.
In this example, I am going to create a form that collects articles to be posted on my blog from my audience. In this article collecting form, I would like to obtain important details about the person who sent in the article, to have them explain why they think the article would be a good fit for my blog, and to have a section where the person can upload the actual article.
Creating a Form and Adding Elements
To create a form, head on over to the Quform dashboard by clicking dashboard under Q Forms in the left-hand sidebar of your WordPress Dashboard. Then under the section Forms, click Add New. Give your new form a name and click Add Form. You will be then directed to the Quform editor where you can create the actual form.
As mentioned, we would like to collect three pieces of information from the user who submitted the article. The first piece of information is who they are and how we can contact them. We would like to include fields to collect their name, email address, and age.
To add in a field for the user to insert their name, we are going to click the person icon. This will add in a field for the user to input their first and last name. On the left-hand side of the editor, you will see that a new block titled "Name" has been added. On the right-hand side of the editor, you can view what the actual form looks like. To add in the email address field, click on the mail icon and the email address field will be added to your form below the first and last name fields.
Next, we are going to add in a text field for the user to input their age. Click on the text icon at the top of the editor and a text field labeled "Untitled" will appear. To change this title, click Untitled in the block editor and type in "age."
The next piece of information that we would like to collect is an explanation of why the person thinks the article would be a good fit for the blog. I would like to have this section on a separate page from the name, email address, and age fields. To do this, we can click the + sign at the top of the editor and a new page on the form will be created.
To collect an explanation from the user, we will add a text area by clicking the left align icon at the top of the editor. Then click on Untitled in the text area in the block editor and type, "Please explain why you think your article would be a good fit for this blog." This will place the instructions for what the user should type in the text area on the form.
Finally, we need a section where the user can upload their article. Again, I would like this section to be on a separate page, so click the + sign again at the top of the editor. To add an upload option, click the download icon at the top of the editor and type in the text, "Upload Your Article Here" in the upload block editor.
You will have also noticed that a submit block was added to the block editor when you created your new pages as well as to the form preview. This allows the user to submit the form and go back to the previous pages of the form. This is exactly how we want the form to function, so we are not going to make any changes.
By following the above steps, you will have successfully created your first form on Quform. To watch the form creation process in action, please view the video below:
Adding Quform To Your Website
Quform makes use of WordPress's shortcodes to add forms to your site. Before you can add your form to any page or post on your website, you will need to copy the shortcode to your clipboard. The Quform shortcode is located at the very top center of the Quform editor.
Once you have finished editing your form, copy the shortcode and head on over to your post or page. In the text area of your new post or page, enter in this shortcode, click Save Draft, and then click Preview. You can now see your form has been added to your website and are ready to publish this page and start collecting articles for your blog! View the video below to see how the form can be added to your pages and posts.
Getting the Most Out of Quform
The amount of features you have to display on your form makes the Quform incredibly versatile. This article only goes over how to construct a submission form for your blog, but there are many other types of forms that you can create. Here are a few popular form types that you can create:
Contact Form
Every website should have a contact form, so any website visitor can get in contact with you. Quform allows you to create this contact form by simply building a form that contains text inputs and a submit button.
Survey
Surveys are a very helpful way to gauge how certain aspects of your business or overall business are doing. You can create a survey with as many text fields or multiple-choice questions that you require and add this survey to one of your web pages. From there, you can send out an email to your email list and post a link to the survey on social media to get your audience to take the survey. It is recommended to offer some sort of free download or incentive for completing the survey to encourage your audience to take the survey.
Job Application Form
If your business is hiring, then you need to have a way to collect job applications on your website. All the various input fields and upload feature allow you to create a complete job application form for your business. You can ask your potential employees any questions you would like as well as have them upload their resume.
Feedback Form
While this is similar to a survey, it is interpreted differently by your audience. A basic feedback form will ask one or two open-ended questions about a product or service that you provide and allow them to expand on what they think. This allows your customers to give their opinion on one specific product or service in their own words. This form would be great to email out to any customer a week or two after they have made a purchase.
Conclusion
Forms are a necessary tool for you to collect information from your audience on your WordPress website. Many of today's forms on the market can be quite costly and over-complex.
With Quform, you can quickly create any type of form that you will require as shown in this article for an affordable price. To download this form plugin, you can head on over to CodeCanyon and purchase the Quform plugin as well as take a look at its live preview.
A multilingual WordPress site is one that offers content in more than one language. For example, a site can provide content in English, French, German, and Spanish. Since most countries have more than one official language, it makes sense to have content in multiple languages. Having a multilingual site is one of the best ways to break into international markets.
With the AJAX Translator Revolution plugin, you can automatically translate your WordPress site into any language you want!
Any site owner aims to reach as many people as possible. The easiest way to achieve that is by creating a multilingual site. There are many plugins that make it easy to translate your site. In this tutorial, we'll look at one of the best: the Ajax Translator Revolution dropdown plugin to create a multilingual website.
By the end of this tutorial, we should have something like this:
Advantages of a Multilingual Site
When it comes to staying ahead of your competition, businesses are inventing all manner of ways to capture as many customers as they can. Having a multilingual site is one of the ways you can stay ahead of your competition. It also has other advantages, as outlined below.
Reach a Wider Audience
The number of internet users in 2019 is an estimated 4.39 billion. This number is expected to go up every year. This population represents potential customers who could be interested in what you have to offer if they can access it—but most of those 4.39 billion people are not English speakers.
Increase in Sales
Making your site multilingual is an effective way of increasing sales. Since more and more people will visit your website, the chances of sales increase rapidly.
Increase in Web Traffic
A multilingual site means that your website will mean that users all over the world will discover your site, especially if it is optimized for SEO. If your site appears for a single search in multiple languages, the traffic on your website will blow up within months, and of course this also has a direct effect on sales.
Expand Into New Markets
A multilingual site can help you break into new markets and acquire new customers without any extra effort. eCommerce websites have perfected this strategy well. A new language on your site can double the number of people who visit your website.
Build Trust
Most people tend to view multilingual sites as global sites, and this proves to be an advantageous trait since it adds a feeling of trust towards your brand.
Ajax Translator Revolution Dropdown Plugin
Ajax Translator is a powerful and user-friendly plugin that makes it easy to translate your site, saving time on manual translation. Ajax Translator comes with over 100 built-in languages, allowing you to offer content with any possible language in the world. It provides the ability to keep your content in every language up to date while still only having to maintain the original content.
It is also easy to set up and allows you to change the default language on your site and arrange the order in which languages will display to the user. It will literally only take a minute to translate your website!
Ajax Translator works by automatically translating content in pages, categories, posts, custom post types, tags, widgets, plugins, and themes—unless otherwise specified.
Key Features:
supports 103 languages
integrates with the WordPress admin system
search engine optimized.
customizable—you can translate anything
remembers visitors' languages
can show language flags or names
Create a Multilingual Site
To start, download the AJAX Translator Revolution plugin from CodeCanyon. You will get a link to download the files. Alternatively, you can find them in the download section of your account with your other purchased items.
Once you've downloaded the WordPress files, log in to your WordPress site, go to Plugins > Add New, and upload the zip file you got from CodeCanyon. After uploading, click Install Now, wait a few seconds, and then click Activate. You can now start using the plugin.
Configurations
After activation, the plugin should appear as a sidebar menu as Auto Translation option in the admin area of your WordPress site. Go to Auto Translation > Dashboard,click on Settings, and enter the purchase code.
The next task is to choose which languages you want your site to be translated into. Go back to the settings section and select the languages you wish to translate to, as shown below. Save your changes.
Display Multiple Languages for Content
The next step is to place the Auto Translation widget at the site, preferably at the top right of your website, which in turn allows users to switch between multiple languages when viewing content. Go to Appearance > Widgets, and drag and drop the widget to the sidebar, header, or menu section of your website. Depending on your theme, choose the appropriate place for the widget. In this case, we will place it at the Header Sidebar. Once you are done, save the changes.
Now go back to your site, and you should see the Auto Translation in action. All the active languages are showing automatically everywhere on the site. Your visitors can now choose which language they wish to view your site with.
For example, if a user is browsing the posts page, they can switch to any language, and Auto Translation displays the posts in the user's preferred language. A Spanish translation will appear as follows.
The plugin also looks good on smaller devices as seen below
All the content on the site now is being translated. However, if you don't wish to have all the content translated, you can disable or hide the translator. Go to Auto Translation > Settings> Hide on Pages, Posts, and Categories, select your preferred options, and save the changes.
Conclusion
A translation plugin is the easiest way to get your content available in different languages. This plugin is suitable for all types of businesses, including educational institutions, blogs of all kinds, and international organizations. It takes the hassle out of translating your site manually, which may end up taking a lot of time and resources.
If you have ever placed an order online, then you have probably received a transactional email. Transactional emails are emails that are sent to you and your customers after a transaction has occurred on your website.
These transactional emails are not to be confused with promotional emails that are sent to a list of recipients who have opted-in for promotional content from your website. Instead, transactional emails include information about a completed order, processing order, refunded order, or a new order.
These emails contain pertinent information on the transaction that just occurred and this information must be presented in a professional manner. This means that the email should be presented in a clear and friendly manner and that the design of the email should fit your company or website's theme. If the email is not presented in this way, you run the risk of making your business seem unreliable, inconsistent, or disorganized.
Unfortunately, the WooCommerce shopping platform does not allow you to fully customize your transactional emails unless you have experience with web development and coding.
That's where the Email Customizer plugin comes in. Thankfully, this plugin allows you to fully customize your transactional emails and give your customers a professional-looking email.
In this article, I am going to show you how to create a transactional email for your WordPress website using the handy Email Customizer plugin.
WooCommerce is an excellent platform for selling digital and physical products. Adding an affiliate system is an excellent way to increase your reach around...
If you use a WooCommerce plugin to manage your online store, these 20 terrific shipping and pricing plugins can help make running your online store a whole...
If you're running an online store, chances are you're using WooCommerce. It happens to be the world's favorite ecommerce solution—and there are innumerable...
Online shopping has revolutionalized nearly every industry. It's very likely that every business has a website. Having a chat feature on your website not...
What We Will Be Building
The transactional email that we will be building will be for our music production website, SoundShock. The SoundShock website sells music samples to producers and WooCommerce sends out a transactional email when a purchase is completed called the "completed order" email.
We want to customize the completed order email that is sent to our customers to let them know that we appreciate their business and to display our business theme and logo.
The transactional email that we will create will contain our company's logo, changes in the email font colors, and additional text.
The company logo will help create a strong sense of branding for SoundShock, the font colors help connect our email with the SoundShock color palette, and the added text makes sure that the customer feels appreciated and encourages them to stay in contact with the company.
Below is an image of the completed order transactional email that we created to give our business a more professional look.
Creating the Completed Order Transactional Email
To create the completed order transactional email we are going to head on over to our WordPress dashboardand click WooCommerce > Email Customizer (after you have installed the plugin.) You will then be redirected to the email customizer editor.
To begin editing the completed order transactional email, we are first going to change the Email Theme to show setting. This will allow us to choose which theme we would like to customize. Once we click the drop-down menu, you can see there are a few options for us to choose from. The default WooCommerce email template has the most eye-catching design out of the four themes available, so we are going to choose this one to edit. Click the WooCommerce (copy, editable) option from the drop-down menu.
Next, we need to choose the type of transactional email. Right below the theme drop-down menu is the Email Type to show option. Click this and choose the Completed Order option. This will pull up the completed order transactional email in the right-hand side of your screen in the email preview section.
We will now begin the editing of the email. Click the Customize button below the Email Type to show option. An editor will now pop up to the right of the email customizer menu. As mentioned, we would like to change the company's logo, change the font colors, and add in additional text.
First, we will edit the text. Click the text drop-down menu and a text field to change the heading and the main text will appear.
Right now, the text in the header just says, "Your order is complete." To make this more personalized and inviting, we are going to change the text to say "Thank you for your order [ec_firstname]! It is now complete!" You will notice that we have the shortcode [ec_firstname] in this text. In order to display the specific customer's name, you will need to add this shortcode in to tell the email customizer what name to include.
Next, we are going to change the main text. To show our gratitude to the customer, we are going to type in, "Thank you again for placing your order [ec_firstname]! Your recent order on SoundShock has been completed. The order details are shown below for your reference:" into the main text field.
Next up on our list of changes to be made are the font and background colors. The SoundShock website has an orange color as its base color and we would like to have this be our base color to ensure brand congruity across all communication platforms. Currently, the base color is blue. We are going to click on the base color hex code and type in, #FB663D. You will instantly see these color changes reflected in the email preview.
Finally, we are going to change our company logo to the header of the email. Click on the Header menu item and then click the Upload button. This will open up the WordPress media library. From there we are going to choose the SoundShock logo and click the Choose Image button on the bottom right of the media library. The logo will now be present on top of the email header.
Now that we have implemented all the customization we want for our completed order email, we are going to click the Save & Publish button at the top right-hand corner of the top of the customized email editor.
Watch the video below to see the email customization process in action!
To double-check and make sure this email looks the way we want it to when it is sent to a customer, you can enter in your email address in the Send a Test field and click the email icon. An example email will then be sent to your email address and you can confirm that the changes you made to the email are correct.
There you have it! Now every order that is completed, the customer will receive our custom email that has a professional look and sound to it!
Getting the Most Out of the Plugin
While the email customizer plugin is very straight forward, there are a few ways that you can take the customization of your email a step further:
Adding Custom Links and Social Media Links
The text editor in the email customizer allows you to add custom links. This allows you to direct the customer to any place on the web. Adding in your social media links here allows your customers to continue connecting with your brand and for this reason, it is highly recommended to include in these emails.
Using Shortcodes
The shortcodes listed on the bottom of the customize menu are only a few of the possible shortcodes that you can add. In addition, you can also modify the shortcodes to display other text that could be helpful to connect with your customers. You can view the complete list and customization options for the shortcodes in the official documentation. For example. Let's say you want to send your customer their order number. Not only do you want to show them their order number, but you also want to show the date of the order. By looking at the shortcodes reference webpage ere, you can see that you to accomplish this, you will need to use the shortcode, [ec_order show="date"]
Updating All Transactional Emails
While this may seem rather time-consuming, it is well worth the effor. Email Customizer allows you to customize all the WooCommerce transactional emails. If you change one email template, then it is advisable to change all of them to present your customers with a consistent brand identity.
Conclusion
When communicating with your customers, it is necessary to ensure that your brand identity is consistent and that you are communicating in a positive and welcoming manner. By default, the transactional emails that are sent through WooCommerce are not editable —unless you create custom code.
Some websites require you to add many images in a single post or webpage. For example, you might want to upload a lot of images from an art exhibition or an event on a website. Similarly, any business that focuses on products and services might add a lot of relevant images on a single page.
When used properly, images can make any webpage a lot more interesting compared to a page with just lots of text. However, using multiple images on a single webpage has its own downsides. Big images will take up a lot of space on the webpage. They will also use a lot of bandwidth and decrease page loading speed on slow networks. Both these problems can be solved with use of some good WordPress gallery plugins.
Whether you want to show off customer testimonials, your latest blog posts, your best images, or just celebrate the members of your team, there is a...
Tame chaos and transform your content using one of the best WordPress gallery plugins available on CodeCanyon. Read on to find out about these WordPress...
Simply uploading photos in WordPress and putting them on your pages and posts is not enough. You need a professional gallery plugin to display your images in...
Looking to add a beautiful video gallery or grid to your WordPress site? Figure out what you need, and then check out seven of the best video gallery plugins...
In this tutorial, we will learn how to create an image gallery using the free WordPress FooGallery plugin.
What We'll Be Building
As I stated earlier, we will use the FooGallery to create an image gallery.
The image gallery will have 14 images of ducks. Some of them are my own pictures and others were taken from Pixabay. The image below shows you the gallery design that you will have by the end of this tutorial. The text in the screenshot came from the Wikipedia entry about ducks.
We will use the plugin to set the border width, box shadow and size of the thumbnails.
The plugin also allows you to set up pagination for the image gallery. This is useful if you have a lot of images in the gallery. The background, border radius of the thumbnails and a few other things in the gallery have been modified using custom CSS.
By default, clicking on any thumbnail will open a large version of the image in a lightbox. However, you need to install a lightbox plugin for that to happen. The FooBox Free Edition is a free plugin that works with FooGallery.
Getting Started
Once have installed and activated the plugin, you can start creating your own responsive image gallery by clicking on FooGallery > Add Gallery in your WordPress dashboard.
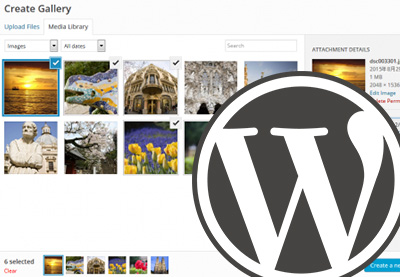
You can now give a title to your gallery and add any images from the media library in your gallery by clicking on the Add From Media Library button.
After uploading the images, you can specify some general options for the gallery by clicking on the General tab.
In our case, we will set the width and height of thumbnails to 100px.
The Link To setting allows you to specify what happens when a user clicks on one of the thumbnails. If you have installed a lightbox plugin, the Full Size Image option will open the image in a lightbox. Otherwise, it will simply open the original image in the web browser. If you are creating a gallery with product images, you can also set the option to Custom URL in order to open a specific product page.
The Alignment setting controls the alignment of thumbnails within the gallery container. We will set it to Center for our gallery.
Customizing the Thumbnails
You can change a lot of aspects related to thumbnails with the help of settings in Appearance tab. This includes the border color, border width, and box shadow.
Before we make any changes to these settings, you should click on the Gallery Preview button on the top of the page in order to see a live preview of the gallery in the dashboard itself.
The Theme setting basically controls the border color for thumbnails. We will set it to light in order to add a white border around the thumbnails.
You can also determine how round the corners should be for each thumbnail. When Rounded Corners is set to None, the thumbnails would be perfect squares or rectangles. When set to Full, you will get circular thumbnails instead of square ones.
The Loading Icon setting is used to determine the icon that appears before the thumbnails have loaded. This is different than any loading animation that appears when the border is loading full image after clicking on a thumbnail.
The Loaded Effect setting determines if the thumbnails should appear on the webpage with any animation after loading. We will set it to a simple Fade In animation.
Adding Nice Hover Effects
There are a couple of settings that you can change in order to add nice hover animations on the thumbnails.
The Color Effect setting will determine if the thumbnails should be colorful or greyscale when a user hovers over them. We will set the value to Greyscale. Now, the thumbnails will originally have their natural color but turn greyscale when a user hovers over them.
The Scaling Effect scales up the thumbnails a bit when set to Scaled. We will leave it at its default value None in this tutorial.
The Transition setting determines how the overlay should animate over the thumbnails when a user hovers over them. There are a couple of options available here. If you want the overlay instantly, simply select Instant from the dropdown menu. This will remove any overlay animation from the thumbnails. For our gallery, we will apply a subtle animation with Fade.
The Icon setting determines the icon that appears in the overlay. We will use the small magnifying icon for our thumbnails because it lets the users know that clicking on the thumbnail will show them an enlarged version of the image. The icon is also small enough so as not to cover the entire thumbnail.
Adding Pagination to Gallery
Even with relatively small 100 by 100 thumbnails, the gallery will take up a lot of space if it includes many images. At this point, it probably won't be a good idea to make the thumbnails even smaller. If you cannot reduce the number of images in the gallery, a user-friendly option to display the gallery would be to add pagination. This way, you can show only a subset of images in the gallery container and allow users to click on the dots below the gallery in order to see the next set of images.
All settings related to pagination are available under the Paging tab. The Page Size setting determines the number of thumbnails to show at once. By default, the navigation dots for the gallery are added at both the top and bottom positions. We will show them only at the bottom by setting the value of Position to Bottom.
The Theme setting simply controls the color of the dots. The dark theme makes the selected dot indistinguishable from other dots so we will set the Theme to Light.
The Scroll To Top setting will take users back to the top of the gallery container when users click on any of the pagination dots. We will set it to No for our gallery because there are only 10 thumbnails on each page. Adding scrolling here will only distract the user because they can see the whole gallery anyway.
If you have a large number of images in your gallery, you should consider setting the Paging Output value to JSON. Since we don't have a lot of images in our gallery, we will select HTML.
Applying Custom CSS to the Gallery
The only thing left for us to do now is apply some custom CSS in order to make our gallery unique and stylish. There is a section below all these settings where you can write down your own custom CSS that will apply to the gallery.
The plugin will tell you the id which you can use in your selectors to target this particular gallery. Here is the CSS that we are going to use for this tutorial:
We begin by applying a background and outline on our gallery container. After that, we apply a fancier border radius on the thumbnails to make them more stylish.
Finally, we lighten the background color of the overlay that appears when we hover over any image. The last bit makes sure that users can still see the image when they hover over a thumbnail.
After following all the steps in the tutorial, you will get the following result.
Final Thoughts
In this tutorial, we learned how to use the free FooGallery plugin to add image galleries in our WordPress websites. The plugin provides a lot of basic features that can help you create galleries with ease.
However, there are a couple of limitations of this free plugin. For example, you cannot create a gallery that contains both images and videos. Similarly, you cannot integrate any other lightbox besides FooBox with this plugin.
If you are looking for WordPress gallery plugins that offer many more features and don't lock you in with their own plugins, please browse through these premium WordPress gallery plugins available on CodeCanyon. You will get free updates for lifetime as well as free support for six months.
Websites often need to let users know about any upcoming events like movie shows, exhibitions and classes. Listing the schedule for upcoming events helps everyone save time and plan their activities. With a good event listing calendar, your users will be able to see upcoming events along with their timing, location, availability and pricing at a single place. This helps you avoid answering a lot of repetitive inquires, and makes users more likely to buy tickets for events.
Whether you need an event calendar plugin, a booking system with payments, or a Google Calendar widget, this list of plugins will have something to improve...
In the digital age, users are online 24/7. Everyone prefers to check availability and make appointments, reservations, or bookings online. They want to do...
Build a schedule for your website, complete with Google Maps integration, call to action buttons, and a complete automated booking and ticketing system for...
The usefulness of these event calendar and scheduling plugins makes them very popular among website owners. There are a lot of free and paid plugins out there which can help you create such schedules and post them on your website. One of the best is Timetable Responsive Schedule for WordPress, available from CodeCanyon. In this tutorial, I'll show you how to use Timetable Responsive Schedule to create a weekly schedule to list different courses and their details.
What We'll Be Building: a Course Timetable
The plugin offers a lot of nice features that we will be using when creating our own course schedule. The image below shows the final result that you will have at the end of this tutorial.
As suggested by the name of the plugin, the timetable that we create will be responsive and look great on all devices. The plugin also provides booking functionality out of the box. This means that users will be able to register for different courses by clicking a button in the schedule itself.
The Basics of Timetable Responsive Schedule
In this section, we will simply cover some of the basics that will help you understand how the plugin works.
After installing the plugin, you will notice that there are four new menu options in your WordPress admin dashboard: Timetable, Timetable Bookings, Timetable Columns, Events.
The Timetable Columns menu option is used to specify the content that goes in the head of our table. It can be anything that you like. For example, you could create columns for months, days, dates, or places.
The Events menu option contains different settings to help you set up and create events. There is an option to create different categories to group events together. Just like the timetable columns, the event categories can also have different values with any names you want. For example, if the events are happening at different places, you could categorize them with locations. If the schedule is for movies currently being shown in different movie theaters, the category could be the movie genre.
There is no right or wrong way to set timetable columns or event categories. The important thing is to group the events together in an organized manner that makes it easier for people to find quickly find information about events that they like.
Right now, we just need to know about these two menu options to create our events and categorize them. We will discuss the remaining options later.
Creating the Course Schedule
After getting familiar with the basics, we can now start creating our responsive schedule.
First, we will create seven columns—one for each day of the week. To do so, simply go to Timetable Columns > Add New. You will just have to fill in the title of the column and click Publish. This will add the weekday to the list of columns. Do this for all seven days of the week to get seven different columns.
Now it is time to define some categories for our courses. We will use the subjects and categories for our courses. For example, both Algebra and Statistics courses will fall under the category Mathematics. Similarly, French Revolution and World War 2 will fall under the category History in our schedule.
Remember that you can create your own categories depending on how you want to organize the courses. As I said earlier, there is no absolute right or wrong here. The aim is to make the information easier to find.
Finally, we can start creating the course schedule that will appear on the website. Just go to Events > Add New and start filling out all the details. Some information that you fill out is shown only when the users click on the event link to read about it in more detail. Other information will appear in the timetable itself.
You can begin by filling the title and description of the course. The title appears in a lot of places like the tooltip, the course schedule as well as on the course details page. Try to keep it short. The description will only appear on the details page.
There are a couple of options below the description like the Subtitle and the background and text colors. The subtitle only appears on the detail page and is located right below the title. In our case, we will use it to specify the name of the instructor who will teach that course.
If you don't want people to click on the event title and go to the details page, set the value of Disable timetable event URL to Yes. We will leave it as No for our tutorial.
Now, we will set some value for the fields in Event Hours section. Here, we simply provide the basic details of the event along with the exact time when it will take place.
Select one of the weekdays from the dropdown menu next to Timetable column. It will show all the columns that you created earlier. The Start hour and End hour values specify when the classes for the course begin and end. You have to specify them in 24 hour format without adding any AM and PM at the end. This means that 9:00 AM has to be specified as 09:00 and 2:00 PM has to be specified as 14:00. However, the final format in which the date appears in the timetable can still be set to display other formats.
You don't have to fill out both the description fields. The text inside Description 1 appears before the event title. The text inside Description 2 appears after the event title. The text inside Tooltip appears as a tooltip when users hover over the event.
Set the number of available slots to the maximum number of students who are allowed to take a class. Users will be able to register for a class as long as total registered students are below the specified limit.
Click on the Add button once you have filled out all the details. This will add the event to our schedule. Once you have added all the occurrences of the event, click on the Update button at the top.
Showing the Schedule on the Website
You need to use shortcodes to add the schedule to any page or post on your website. The shortcodes for adding the timetable can get pretty big and complicated when you configure a lot of options. To make sure that you don't make any mistakes, the plugin comes with a shortcode generator that you can access by going to Timetable > Shortcode Generator.
You need to create a unique identifier for each schedule that you create. In this case, we will enter course-schedule in the shortcode id field.
Under the Main Configuration tab, we can set different options to determine what appears inside our course schedule. In Events, select all the courses that you have created. In Event Categories, select all the categories whose events you want to show in the schedule. You can select specific days for which you want to show the schedule from Columns. I have selected all days of the week except Sunday.
We will allow our users to filter the courses so that they can just see the courses that they want to take. Set the Filter Style to Tabs to show the event categories as tabs at the top of the table. The text inside Filter Label determines what text should users be shown when they want to see unfiltered schedule table. We will set it to All Courses.
These are the most important options under the Main Configuration section. You can leave the rest of the fields to their default values. Now, click on the Save button on the Shortcode Generator page and copy the generated shortcode.
Paste the copied shortcode in any page or post where you want the schedule to appear. You should get a result similar to the image below.
Final Thoughts
In this tutorial, we learned how to use the Timetable Responsive Schedule plugin to create a course schedule. The plugin comes with a lot of features which make it a perfect scheduling solution for many projects. We used the plugin in this tutorial to create a course schedule but you can use it for many other things like scheduling and booking, movie tickets across different movie theaters, or showing the schedule of different exhibits around the city in a week.
You can read about all the features of the plugin on the description page. Buying the plugin will give you access to six months of free support and lifetime updates. How do you plan on using this plugin? Let us know in the comments below.
For websites that deal with a lot of video streaming content, it’s important that they should organize their content in a way which is appealing and intuitive to end users. Also, it should be a part of their advertising strategy as well. Specifically, if you’re looking for a better way to represent your niche YouTube content, you’re at the right place!
When it comes to embedding YouTube content, there are thousands of free plugins and scripts available online. You’ll also find commercial options that provide ready-to-use features and extended support. In the case of commercial options, you should also expect quality code, bug fixes, and new enhancements.
Today, we’re going to explore one of the most popular plugins available at CodeCanyon: WordPress Responsive YouTube Playlist Video Player. It allows you to embed your YouTube content in different ways, whether as a playlist, channel or single video. Also, it comes with a custom designed interface instead of YouTube’s default interface.
Let’s quickly go through the important features WordPress Responsive YouTube Playlist Video Player brings:
support of YouTube playlist, channel playlist or a single video
responsive with intelligent resizing
interface customization
latest YouTube v3 data API
AJAX based pagination with unlimited number of videos
horizontal and vertical layouts
and many more
This plugin provides a lot of useful features that allow you to embed your YouTube content effortlessly.
Our Agenda
There are different ways you could use this plugin and customize your output. Although in this post, we’re going to build a full-fledged horizontal YouTube player by embedding a YouTube playlist by id.
The outcome of our process will look like this:
Throughout this tutorial, we’ll explore different aspects of this plugin while moving closer to our goal to build a YouTube playlist video player. In the next section, I'll show you how to download and install this plugin.
Installation and Register Your Own YouTube API Key
In this section, you’ll see how to install and configure the WordPress Responsive YouTube Playlist Video Player plugin once you’ve purchased and downloaded it from CodeCanyon. For this post, I’ve used WordPress 5.2.3, and the plugin version is 1.11.0. I recommend that you install the plugin if you want to follow along with this post.
The player uses YouTube’s Data API V3 and in order to use the API you will need an API key. If you do not register your own private API key, the default key will be used. However, the default key is used by lots of other users who haven’t entered their own key, and the API only has a limited number of requests it can make per key. So it’s always a good idea to have your own key to make sure there’s no outage if you’ve a high traffic website.
If you don’t know how to register the YouTube API key, the plugin provides a nice guide which explains it in detail. When you access the main plugin page on the admin side, there’s a message telling you to enter your own API key. Click on the REGISTER KEY button to open the guide. Follow the instructions in the guide and get your key.
Once you get your API key, you just need to enter it in the GENERAL SETTINGS section of the plugin as shown in the following screenshot.
In the next section, we’ll go through the different configuration sections this plugin provides.
Plugin Configuration Options
In this section, we’ll quickly go through the different configuration options provided by the WordPress Responsive YouTube Playlist Video Player plugin.
Once you install this plugin, you can access it by clicking on the YouTube link in the left sidebar.
General Settings
In this section, you can configure generic settings related to pagination, autoplay and GDPR. And as we discussed earlier, you can register your YouTube API key in this section.
Appearance
As the name suggests, you’ll find settings related to the visual aspects of your player in this section. A couple of important settings includes playlist layout, player width, HD display, and a few text-related settings.
Controls
When you want to customize a player, it’s important that you should be able to choose among the different player controls. This section allows you to hide or show different player controls as per your requirements.
Colors
This section allows you to configure colors of almost each and every player control.
So that was a brief introduction of the configuration options provided by this plugin. In the next section, we'll build a full-fledged horizontal YouTube player by embedding a YouTube playlist by id.
Create a YouTube Player With a Horizontal Playlist Layout
YouTube playlists can be added onto your posts or pages by using the shortcode button in the editor as shown in the following screenshot:
When you click on that button, it opens up the popup as shown in the following screenshot.
As you can see, there are different ways you can add your YouTube content to your site. In our case, as we’re going to embed the YouTube playlist, we’ll use the first option: YouTube Playlist. To embed the YouTube playlist you’ll need a playlist URL, which and you can easily get it from your YouTube channel page. Of course, if you haven’t created any playlists yet, you’ll have to create one first. In any case, you should end up with a playlist URL like https://www.youtube.com/playlist?list={YOUR_PLAYLIST_ID}.
Once you get your playlist URL, insert it into the YouTube Playlist field as shown in the following screenshot and click on the INSERT button.
Your shortcode will be generated and added to your page or post. In my case, I’ve created a new page. The shortcode should look like:
Go ahead and publish the page to see how it looks like in the front-end.
So that’s the default view of what it looks like. The main video is on the left side and the other videos in the playlist are on the right sidebar. You can click on any of them to play it. It’s the vertical playlist type in the terminology of this plugin.
In our case, we want to show the other videos in the playlist horizontally. You can control this layout by supplying the playlist_type parameter in the embed code. In fact, this plugin provides a lot of customization options through the shortcode that allows you to control different aspects of the YouTube player. It’s not possible to discuss all the options, but we’ll highlight the ones that are required for our use-case.
Firstly, let’s add the playlist_type parameter as shown in the following snippet.
The settings we have done so far are specific to player controls customization. Somehow, I feel that we also need to change the color of a few controls so that they look more intuitive. So let’s change a couple of color settings at YouTube > COLORS.
When it comes to changing colors, this plugin allows you to change colors of different controls. In my case, I have tried to change colors as shown in the following screenshot. Of course, you could experiment on your own to find a color theme which works for your site.
With all the changes we’ve done so far, the player should look as follows:
As you can see, there are customization options for each and every aspect of the player. In this post, we embedded a YouTube playlist, but you can also embed a channel or a single video. I'll leave that to you as an exercise! Of course, you could always ping me using the feed below if you’ve any queries.
Other Possible Uses
In this post, we discussed how you can add a player for a YouTube playlist to your WordPress site. As we discussed earlier, the WordPress Responsive YouTube Playlist Video Player plugin is also capable playing different kinds of YouTube content. You could also use it to integrate:
YouTube channels
YouTube users
YouTube single videos
YouTube multiple videos by comma separated ids
The Next Step: Other WordPress Media Scripts
If you're looking for other WordPress media scripts that you could use right away, I recommend that you check out the following scripts that are available for a low cost.
Today, I took an opportunity to introduce the WordPress Responsive YouTube Playlist Video Player plugin available at CodeCanyon. It’s a commercial media player plugin which allows you to embed different types of YouTube content effortlessly. Moreover, it also allows you to customize the look and feel of the player as per your requirements.
I hope that you've enjoyed this article, and feel free to post your thoughts using the feed below!
Managing state in large web apps can be messy—and Vue.js is no exception. But the Vuex library can eliminate a lot of the headaches related to managing state in Vue apps. Learn how to use it in our new premium course for subscribers, Vuex for Efficient Vue State Management.
What You’ll Learn
In this course, Jeremy McPeak will teach you how to use Vuex to manage state in your Vue-powered applications. Follow along with this course and you’ll build a practical to-do list app, and learn how to use Vuex for state along the way.
You'll start with basic concepts and tracking simple state with Vuex. Then you'll go on to changing the state with mutations and actions, before tackling advanced topics like getters and modules. So follow along and you'll get a complete introduction to Vuex.
Here are a couple of free lessons from this course, as a preview of what you can expect:
Committing Mutations to Change State
In this video from halfway through the course, you'll add a form to create to-do items and add them to the state by creating a mutation and committing it.
Using Actions for Asynchronous Processes
Mutations are synchronous, and it makes sense to keep them that way. So in this video, you will create a Vuex action to perform async operations that commit mutations.
Take the Course
You can take our new course straight away with a subscription to Envato Elements. For a single low monthly fee, you get access not only to this course, but also to our growing library of over 1,250 video courses and industry-leading eBooks on Envato Tuts+.
Plus you can download unlimited items from the huge Envato Elements library of more than 1.5 million creative assets. Create with unique fonts, photos, graphics and templates, and deliver better projects faster.
If you run a business that takes bookings or appointments, adding a booking calendar plugin to WordPress website will win you more business. Here's how to do it with the Bookly Pro plugin.
This will help you get more business and reduce time spent taking bookings manually.
In the digital age, users are online 24/7. Everyone prefers to check availability and make appointments, reservations, or bookings online. They want to do...
An appointment booking plugin makes it easy to manage your visitors, appointments and schedules in a well-organized manner. Business such as salons, spas,...
WordPress calendar plugins let users make bookings, schedule events, pay for appointments, and more. If your website does any of these things, you need a...
I'm going to show you how to use the Easy Appointments plugin for WordPress to create an appointment booking system. We’ll start by exploring the basic...
In this tutorial, I'll discuss the benefits of adding bookings to your WordPress site and look at some examples of the kind of site that might include bookings. I'll then show you how using the Bookly Pro plugin can help you add slick, professional-looking booking systems to your business website.
Why Add Online Bookings to Your Site?
People are becoming more and more accustomed to browsing and booking things online. Everything from doctors' appointments to holidays: if it's available online, then it'll encourage people to make that booking or appointment. You can even buy and sell houses entirely online now, without even setting foot inside the house.
So if you run a business that offers appointments or bookings to customers, you're missing out if you don't make this possible online. Sure, it can seem easier to include an inquiry form or a phone number (hopefully both) on your site, but if you also add online bookings, you can pick up much more business.
It also saves time. Imagine you run a hotel and you take your bookings over the phone or by email. This involves a member of your team taking the booking and adding it to your calendar or system. It also means that someone has to be available to answer the phone or respond to emails at all times of day. But if you have online bookings on your website, your customers can make bookings at a time of day to suit them, without having to make contact with your team and use their time. Freeing you up to do more important things, or saving on staffing costs.
This doesn't just apply to customer-facing business. A bookings or appointment system also lets you book internal meetings, booking out meeting rooms and adding team members to the booking. This can save time and confusion.
The Bookly Pro plugin lets you add all sorts of bookings to your WordPress site. It's designed to make the process of adding a bookings system quick and easy, and includes blocks for booking forms so you know it's compatible with WordPress Gutenberg.
It's also responsive, so your customers can make bookings on their mobile phones.
Uses for a Booking System
Let's take a look at some of the scenarios in which you might want to add bookings to your website, and some of the business types that would find it useful.
Hotels: take bookings for rooms and include add-ons such as breakfast and in-room treats.
Holiday rentals and campsites: take bookings for time slots (weekly, weekend, etc.) that you define, as well as showing customers what's available and what the prices are.
Healthcare professionals: take bookings for appointments, with an option for the customer to choose which member of your team they'd like to see and what type of consultation they need.
Hair and beauty salons: show potential clients which slots are available with which team members, allow bookings, and then send out reminders when the booking is coming up.
Real estate agents: take bookings for property viewings and follow up for feedback.
Lawyers, accountants, other business professionals: take bookings for consultations and allow clients to provide information about the service they need.
Venues: allow booking of event and venue space along with equipment and other resources.
Teams: book out time and resources such as meeting rooms with other team members.
I'm sure this list isn't exhaustive, and there are plenty more business types that need to book time or resources with clients or between team members. If you need to book appointments, meetings or anything else, a booking system is a great way to make this easier.
Using Bookly Pro to Add Bookings to Your Site
The Bookly Pro plugin is designed to make it quick and easy to add bookings to your WordPress site. You can customize bookings to let people pick services, staff members and time slots, and customize which parts of the booking process people need to go through. The plugin will send notifications to your team and to the customer to remind them when the booking is coming up, and will also link to payment gateways for payment.
Let's take a look at how it works.
Start by installing the Bookly Pro plugin on your site, and activating it.
Configuring the Plugin
Before you can add a booking form, you need to configure how your booking system will work. Do this by going to Bookly > Settings.
To get your booking system set up you'll have to work through the following:
Settings: configure settings for time slots, availability and how far in advance you take bookings.
Staff Members: add staff members to the system if people can book with individual staff members.. Even if your customers won't be booking with staff members, you need to create at least one staff member and assign services to them so they can be notified when a booking is made. If you don't do this, the booking form won't work correctly. You can also configure staff members' schedule to include days off and working hours.
Services: define the service people will be booking, how long it lasts for, what it costs and more. You can add multiple services here.
Payments: configure the payment gateways you will be using so customers can pay when they make the booking.
Once you've done this, you're ready to create a booking form.
Adding a Booking Form
I've created an empty Booking page on my site for an imaginary campsite, which you can see below.
Then while editing the page, add a block for bookings. You'll see a Bookly set of blocks in the Gutenberg Editor.
You have three choices:
a booking form
an appointments list
a cancellation confirmation
Here we'll be adding a booking form.
You then edit the form via the editing pane on the right hand side of the screen.
You can choose to hide categories or staff members or even services—but if you hide services you need to specify a default service. You might do this if you have only one service available.
Cusomizing the Booking Form
You can customize the appearance of the booking form in Bookly > Appearance.
Here you can change the color of the form and customize labels and messages for form items.
Take some time to work through the appearance settings and get the form looking good and in keeping with your site's branding.
My final form looks like this:
Managing Bookings
The plugin also lets you manage bookings and contact customers. You do this via Bookly > Calendar and Bookly > Appointments.
Here you can view appointments for the whole team and for individual staff members, and you can see customer details so you can contact them if needs be, and prepare for appointments.
Summary
Adding bookings to your WordPress site will help you win more business and save you time taking bookings over the phone or by email.
The Bookly Pro plugin lets you add different kinds of appointments or bookings and configure these to meet the needs of your business. Adding it to your site will help you be more efficient and profitable.
In the digital age, users are online 24/7. Everyone prefers to check availability and make appointments, reservations, or bookings online. They want to do...
An appointment booking plugin makes it easy to manage your visitors, appointments and schedules in a well-organized manner. Business such as salons, spas,...
WordPress calendar plugins let users make bookings, schedule events, pay for appointments, and more. If your website does any of these things, you need a...
I'm going to show you how to use the Easy Appointments plugin for WordPress to create an appointment booking system. We’ll start by exploring the basic...
Forms are an easy way to collect information from website visitors, and file uploads allow users to add even more useful or important information. Some of the data which you can collect from file upload forms include:
user-submitted images and videos
content in the form of blog posts
resume files
In this post, I'll show you how to create a resume upload form for a WordPress website. Users will be able to upload resume files in PDF format. By the end of this tutorial, we should have something like this.
I'll also show you how to add these uploaded files to Dropbox.
Sometimes you need to modify your WordPress login form to make it more user-friendly or maybe add some features. No matter your reason, here are 20 best...
If you own a WordPress site, forms are indispensable for creating a satisfying user experience and increasing your conversion rates. You need forms for...
Whether you are running an online store, marketplace, or a blog on your WordPress website, you'll need a contact form. In this article, I am going to show...
The forms on your site are useless unless people actually complete them. Find out how to create great forms that encourage people to click submit.
Drag and Drop File Uploader Add-on for Contact Form 7
The Drop Uploader add-on for Contact Form 7 is a powerful plugin that allows you to add an upload area of any format to a form. You can also add several uploading areas to one form. It also allows you to copy these uploaded files to your preferred server or to Dropbox, which provides another backup for your data.
Other features include:
Javascript (front-end) file validation
ability to restrict specific file extensions
unlimited file upload ensures you can upload files of any size
ability to drag and drop or browse during upload
styling customization including colors, browse buttons and icons
receive uploaded files as links, mail attachments or both
receive attachments as zip files
store files in Dropbox
delete old files at a specific time
The plugin is translation ready and supports English, Spanish, French, Italian, German, Russian and Ukraine
Create Your Resume Upload Form
To get started creating an upload form, first purchase and download the Drop Uploader for CF7 plugin. You can find your installable WordPress files in the download section of your account.
Once you download the WordPress files, log in to your WordPress site, and install the plugin. Go to Plugins > Add New and upload the WordPress zip file you got from CodeCanyon. After uploading, click Install Now, wait a few seconds, and then click Activate. You can now start using the plugin.
Configurations
Go to Settings > CF7 Drop Uploader Settings and customize the Drop Uploader Style and other options such as layout and file storage.
File Storage
CF7 Drop Uploader offers three ways of storing files:
Attachment: if you enable this option, all files will be archived in to zip files.
Link: this option allows you to store uploaded files as links. It also allows you to delete the files at a specified time.
Dropbox: this option allows you to integrate and add your files to Dropbox. All you need is the Dropbox token, which you can obtain from your Dropbox account. You can also generate shareable links and link them to files or folder.
Create Your First File Upload Form
Install Contact Form 7 from the official WordPress plugins directory. Once done, you can now start creating your forms. Click Contact > Add New in your WordPress Dashboard menu. Contact Form 7 comes pre-configured with a ready to use template as shown below
Click on Drop Uploader, and you should see a popup like the one below.
Mark the field type as a required field, set the Files count limit, and input Accepted file types as PDF format. Select the HTML Link checkbox if you wish to send links in HTML. Once you are done, click on Insert Tag, and all the changes are applied to the form. Rearrange the fields as you would want them to appear in your form. You can also add a message by clicking on the Drop Uploader Message tab.
The form template also contains additional fields such as checkboxes, date, and radio buttons, which you can use to make any form.
Next, go to the Mail tab and add the uploader shortcode—in my case [dropuploader-313]—to the message body and save the changes.
You can also receive the uploaded files as mail attachments by pasting the shortcode id of the uploader to the File Attachments section.
Embed Your Resume Upload Form in a Page
The final step is to embed the upload form to a WordPress page. To add the upload form, click the Add shortcode option and paste the shortcode of the contact form.
Receive Uploaded Files in Dropbox
In this section, we’ll cover how you to integrate Dropbox with your contact forms and send copies to Dropbox.
The first thing is to head to Dropbox developers and log in to your Dropbox account. Click on Create apps, select the Dropbox API option, choose the type of access you need for the API, and create a name for your app. Finally, click the Create app button. You will be redirected to the page which contains all the app’s information. Scroll to the OAuth 2 section and click on the Generate token button.
Once the token has been generated, copy and paste it to the Dropbox token section on your WordPress site.
To ensure your files will be stored in Dropbox, edit the form by enabling receiving files option. Go to the Drop Uploader tab and activate the Dropbox setting.
Save your form settings. In addition to receiving files as links in the message body, you will also receive files via Dropbox. To confirm if your file submissions have been saved to your Dropbox account, simply login to your Dropbox account and check under Apps.
Conclusion
This post has covered everything you need to get started on creating upload forms and storing your information. CF7 Drop Uploader will cater to every need, whether its for big or small files. If you are looking for a way to quickly create upload forms that automatically sends your file uploads to your Dropbox, this is an easy way to manage files and ensure safekeeping for your files. Take advantage of this awesome plugin and easily create file uploads.
We've built a complete guide to help you learn CSS, whether you're just getting started with the basics or you want to explore more advanced CSS.
New CSS Techniques
It’s easy to get stuck working with the CSS techniques we know well, but doing so puts us at a disadvantage when new problems surface.
As the web continues to grow, the demand for new solutions will also continue to grow. Therefore, as web designers and front end developers, we have no choice but to know our toolset, and know it well.
That means knowing even the specialty tools - the ones that aren’t used as often, but when they are needed, are exactly the right tool for the job.
Today, I'm going to introduce you to some CSS tools you might not have known about before. These tools are each units of measurement, like pixels or ems, but it’s quite possible that you’ve never heard of them! Let’s dive in.
rem
We’ll start with something that’s similar to something you are probably already familiar with. The em unit is defined as the current font-size. So, for instance, if you set a font size on the body element, the em value of any child element within the body will be equal to that font size.
<body><div class="test">Test</div></body>
body {
    font-size: 14px;
}
div {
    font-size: 1.2em; // calculated at 14px * 1.2, or 16.8px
}
Here, we’ve said that the div will have a font-size of 1.2em. That’s 1.2 times whatever the font-size it has inherited, in this case 14px. The result is 16.8px.
However, what happens when you cascade em-defined font sizes inside each other? In the following snippet we apply exactly the same CSS as above. Each div inherits its font-size from its parent, giving us gradually increasing font-sizes.
<body><div>
        Test <!-- 14 * 1.2 = 16.8px --><div>
            Test <!-- 16.8 * 1.2 = 20.16px --><div>
                Test <!-- 20.16 * 1.2 = 24.192px --></div></div></div></body>
While this may be desired in some cases, often you might want to simply rely on a single metric to scale against. In this case, you should use rem. The “r” in rem stands for “root”; this is equal to the font-size set at the root element; in most cases that being the html element.
html {
    font-size: 14px;
}
div {
    font-size: 1.2rem;
}
In all three of the nested divs in the previous example, the font would evaluate to 16.8px.
Good for Grids
Rems aren’t only useful for font sizing. For example, you could base an entire grid system or UI style library on the root HTML font-size using rem, and utilize scaling of em in specific places. This would give you more predictable font sizing and scaling.
.container {
    width: 70rem; // 70 * 14px = 980px
}
Conceptually, the idea behind a strategy like this is to allow your interface to scale with the size of your content. However, it may not necessarily make the most sense for every case.
Responsive web design techniques rely heavily on percentage rules. However, CSS percentage isn’t always the best solution for every problem. CSS width is relative to the nearest containing parent element. What if you wanted to use the width or height of the viewport instead of the width of the parent element? That’s exactly what the vh and vw units provide.
The vh element is equal to 1/100 of the height of the viewport. For example, if the browser’s height is 900px, 1vh would evaluate to 9px. Similarly, if the viewport width is 750px, 1vw would evaluate to 7.5px.
There are seemingly endless uses for these rules. For example, a very simple way of doing full-height or near full-height slides can be achieved with a single line of CSS:
.slide {
    height: 100vh;
}
Imagine you wanted a headline that was set to fill the width of the screen. To accomplish this, you would set a font-size in vw. That size will scale with the browser’s width.
While vh and vm are always related to the viewport height and width, respectively, vmin and vmax are related to the maximum or minimum of those widths and heights, depending on which is smaller and larger. For example, if the browser was set to 1100px wide and the 700px tall, 1vmin would be 7px and 1vmax would be 11px. However, if the width was set to 800px and the height set to 1080px, vmin would be equal to 8px while vmax would be set to 10.8px.
So, when might you use these values?
Imagine you need an element that is always visible on screen. Using a height and width set to a vmin value below 100 would enable this. For example, a square element that always touches at least two sides of the screen might be defined like this:
.box {
    height: 100vmin;
    width: 100vmin;
}
If you needed a square box that always covers the visible viewport (touching all four sides of the screen at all times), use the same rules except with vmax.
.box {
    height: 100vmax;
    width: 100vmax;
}
Combinations of these rules provide a very flexible way of utilizing the size of your viewport in new and exciting ways.
The units ex and ch, similar to em and rem, rely on the current font and font size. However, unlike em and rem, these units also rely on the font-family, as they are determined based on font-specific measures.
The ch unit, or the character unit is defined as being the “advanced measure” of the width of the zero character, 0. Some very interesting discussion about what this means can be found on Eric Meyers's blog, but the basic concept is that, given a monospace font, a box with a width of N character units, such as width: 40ch;, can always contain a string with 40 characters in that particular font. While conventional uses of this particular rule relate to laying out braille, the possibilities for creativity here certainly extend beyond these simple applications.
The ex unit is defined as the “x-height of the current font OR one-half of one em”. Thex-height of a given font is the height of the lower-case x of that font. Often times, this is about at the middle mark of the font.
There are many uses for this kind of unit, most of them being for typographic micro-adjustments. For example, the sup element, which stands for superscript, can be pushed up in the line using position relative and a bottom value of 1ex. Similarly, you can pull a subscript element down. The browser defaults for these utilize superscript- and subscript-specific vertical-align rules, but if you wanted more granular control, you could handle the type more explicitly like this:
The ex unit has been around since CSS1, though you won’t find such solid support for the ch unit. For specifics on support, check out CSS units and values on quirksmode.org.
Conclusion
Keeping an eye on the continued development and expansion of CSS is incredibly important so that you know all of the tools in your toolset. Perhaps you will encounter a particular problem that requires an unexpected solution utilizing one of these more obscure measurement units. Take time to read over new specifications. Sign up for news updates from great resources like cssweekly. And don’t forget, sign up now for weekly updates, courses, free tutorials and resources like this one from Web Design on Tuts+!
WordPress is a great system for building a company intranet.
You may already be using WordPress for your public website, but it also handles intranets really well. From sharing news, to social interaction and collaboration, WordPress lets you add functionality to your company intranet that helps you communicate more effectively as a team and share resources.
One resource you might want to share via your intranet is a calendar. You can use this not only to book meetings, but also to provide details of events that will affect the whole team and discuss an event in advance.
WordPress calendar plugins let users make bookings, schedule events, pay for appointments, and more. If your website does any of these things, you need a...
For certain kinds of business, having a calendar on your WordPress website is an absolute necessity. Whether you need to share information about opening and...
Build a schedule for your website, complete with Google Maps integration, call to action buttons, and a complete automated booking and ticketing system for...
In this tutorial, I'll show you how you can use the EventON plugin to add a calendar to your company intranet. We'll create a calendar system that is more than just a link to a Google Calendar (although it can link to that): it'll be a hub for sharing company events and planning for them too.
Why Add a Calendar Plugin to Your Company Intranet?
A company intranet is a great place to share information and resources between team members. It's where they can find out about company news, look up information about products and services, check data about products and orders, and more.
What you add to your intranet will depend on your business and the needs of your team. But one invaluable resource in any intranet will always be an events calendar.
You could go down the simple route and simply embed a Google Calendar in one of the pages of your intranet. But using a dedicated events plugin like EventON lets you add much more detail to each event.
You can include images, file uploads, details of the organizer and the venue, and more. You can set some events as featured so they're clearly more important, and you can enable comments so that team members can discuss details of the event right inside your intranet.
The EventON plugin also lets team members link events to their own calendar on Google or elsewhere, so they can save details of events for themselves.
Let's take a look at how it works.
Installing and Configuring the EventON PLugin
Firstly, you'll need to purchase and download the EventON plugin from CodeCanyon.
Once you've done that, you'l need to configure your event settings. Go to myEventON > Settings.
There are a number of configurable settings. Some of the most useful are below:
General Calendar Settings: Enable or disable specific settings, including advanced settings. If you leave all this at the default settings, you won't go far wrong.
Google Maps API: add a Google Maps API key to display Google Maps on event pages. This will help team members find events which are out of the office.
Time Settings: Configure the way time and date are displayed in the calendar.
Appearance: Configure the colors and styles used in your calendar.
EventCard: configure the way individual events are displayed.
Creating an Event
The next step is to create your first event.
Go to Events > Add Event to see the event editing page.
The editing screen includes a main editing pane where you can add information about the event, plus sections for date, time, location and more. You can also add event organizers.
Event organizers and locations are saved separately so that you can reuse them for future events.
Work through the screen, providing all the information about your event until it contains everything you need.
On the right hand side of the screen there are metaboxes where you can provide more information about your event. These include:
event categories
event color
event image
Repeating and Duplicate Events
As well as creating events, you can also duplicate them to create new ones. This is useful if you have a second event which is very similar to an earlier event, such as team meetings.
If the event will be exactly the same every time it runs, you don't need to duplicate it: instead you can set it as a repeating event.
You can find this below the event time and date settings and above the location settings. Set the event to repeat weekly, monthly or at another interval and multiple events will automatically be created for you.
Displaying Events
Each event will have its own event page and will be added to the main Events page which the plugin will automatically create when you activate it. Make sure you add this to your navigation menu.
This page will display a list of upcoming events by month.
Click on any event and you'll be able to see full details. What is displayed will depend on the way you configured the event when setting it up.
You can change the settings for your events so that when they are clicked on, an event page is opened instead. This is useful if an event has a lot of information.
To do this, go to the event editing page and scroll down to the User Interaction for event click section.
The option on the right will open a new page if a user clicks on the event.
Then when a user clicks on the event in the main Events page, they will be taken to a full page for that event with more information.
Adding Extra Features
The EventON plugin is designed to be a simple, minimal plugin that will display information about events with little effort or fuss.
But if you need extra functionality, you can install addons for the plugin. These include:
RSVPs: invite team members to events and they can RSVP.
RSS feed: make a list of event available to RSS readers.
Events map: put all the events in a month on one Google map.
Full cal: display events in a grid style calendar instead of a list.
Weekly view: display events in a weekly view.
These are some of the add-ons that might be useful for a company intranet: it isn't an exhaustive list.
Summary
A company intranet is a great resource for sharing information between company staff and team members. By adding an events calendar, you can plan events and meetings, share resources relating to them, and discuss the agenda ahead of time.
The EventOn plugin will help you add a clean events calendar to your intranet with multiple options for customization and addons if you need them.
Technology has completely transformed how we learn and how training is delivered. Physical presence in a physical location is no longer necessary. Technology has not done away with the instructor or the student though. Instead, it has made how and where we access and interact with learning material easy, dynamic, and flexible.
In fact, it has made instructor-to-student and student-to-student interaction more dynamic. Students learn from each other because there is greater collaboration between students.
Training is now commonly delivered and administered through learning management systems. Lessons are created and uploaded on these systems and can be accessed anytime, anyplace. Learning can happen by from desktops or mobile devices, from websites and apps.
In this article we will explore WordPress learning management systems (LMS) plugins.
Let’s get started.
Why is eLearning Popular?
The future of learning has been with us for a long time now. Learning accessible from anywhere anytime, at your own pace, using wide variety of devices from desktops to tablets to mobile phones. Learning delivered by systems that host large directories of courses. These large directories of e-courses utilize learning management systems.
As a result, there is an explosion in learning. Online learning platforms have responded to users educational needs and preferences for learning anywhere anytime by using responsive websites and apps. This makes sense since over 70% of users go online using mobile devices. And 90% of users spend their time in apps.
Many companies have also embraced online training for their staff. Some deliver their training to an externally-managed platforms that their staff can access. They don’t get involved in running the platform. Other companies have their own self-hosted learning management systems where they create, manage, and deliver training content.
The upside of this is saving on the logistical costs of planning location-based training or seminars for hundreds of employees.
Online learning platforms are very popular and profitable. If you want to get in the game so you too can host courses, or if you’re a company thinking of hosting your own training, or a developer tasked with implementing learning management infrastructures for your clients, then WordPress is your ally.
The fact that WordPress is a content management system makes it a perfect foundation on which to build learning management systems. It has a powerful and stable base, and its functionality can be extended a thousand fold through use of plugins.
But building learning management systems from scratch is extremely costly. This should not dash your hopes of managing your own self-hosted learning management system.
Here is where learning management systems (LMS) plugins for WordPress come in. There are developers who have specialized in catering specifically to this niche.
What is a Learning Management Systems Plugin?
A learning management systems plugin is a cloud-based software that delivers online learning. It allow instructors to create, manage, track, and deliver learning content or e-courses.
WordPress, which is already a comprehensive CMS, is the perfect platform for creating and hosting your Learning Management System. To offer online courses you just need to download and install an LMS plugin. This will provide functionality to several classes of user:
Administrators can manage different learners, teachers, and take care of other administrative tasks from the LMS dashboard.
Teachers can access tools for creating courses, quizzes, grading, and uploading.
Students can select what they want to learn from the directory and immerse themselves in learning.
Components of Learning Management Systems
An LMS is made up of many components enable different users to achieve their objectives.
Automated Administrative and Communication Tools
Communication is key to any successful venture. Automating communication takes a load off administrators’ shoulders. Communication to teachers and students can include notification about accounts and payments, email reminders, weekly course summaries, real-time onscreen progress indicators for each and so on.
Administrative tools include tools for registering teachers and calculating teachers commissions,
Diverse Course Options
An LMS should combine different learning methods. For example, learning content can delivered via audio, videos, powerpoint, multimedia, written text, games, social learning, and more.
Course Content Creation Tools
An LMS comes with built-in authoring tools that allow for easy creation of course content.
Engagement
Chats, forums, and other kinds of online community software tools integrated into the LMS offer opportunities for students to engage with their peers. They are not limited by location. They can collaborate on assignments and projects.
Assessment and Testing tools
Test to see how students are learning and retaining material in the courses through quizzes and exams.
Instant Feedback
Teachers can give learners feedback to show them where they need to improve.
Grading and Scoring
Allows yracking student progress and performance over the duration of the course.
Certification
An LMS should come with the ability create certificates for students that complete a course.
Reporting
Gives you access to data like number of students taking a particular course, individual reports for each student, and how much time students spend on each lesson and quiz.
Feedback
The only way to improve is through user feedback. An LMS system should offer tools for gathering feedback and suggestions from students and learning what they think about the quality of the courses and the system itself.
Reviews
An LMS system should offer students tools to review and rate their learning experience for courses. This will be helpful for others who want to take the course.
Things to Consider When Choosing a Learning Management System
Ease of Use
A user-focused LMS system should be intuitive and simple to navigate and customize.
Compatibility With Mobile Devices
80% of users go online using their mobile devices and prefer to use them for everything including learning. LMS should have companion apps in iOS and Android.
Monetization
A good LMS should offer different payment models like:
one time payment
subscriptions for regular access to courses
course bundles
coupon codes
discounts
Integration
A WordPress LMS system should integrate with software you already use like CRM software, accounting software, and more.
In addition it should be able to integrate with:
payment gateways like Paypal, Stripe, or 2Checkout
email marketing gateways like MailChimp
eCommerce plugins like WooCommerce, or Easy Digital Downloads
Multi-Language Support
If you want to offer online courses to a wider international audience your LMS plugin should offer translation support files.
Regular Updates
When bugs are left unattended they make the system vulnerable to attacks. Regular updates mean the system is reliable and secure.
Security
Users want to know that their personal and financial data is safe.
Reviews
Consider seriously what other users have to say. Users trust the word other users. They have used the system and seen how it works and what its strengths and weaknesses are.
Good LMS has many great features for creating and selling online and onsite courses.
It has an easy-to-use interface that makes creating courses a breeze. Teachers can offer quizzes, including timed quizes, and give students the option to take quizzes again.
Students can earn badges as they progress and they get a certificate at the end of each course. They will also have the ability to review and rate the course.
Payment
pay with Paypal, Stripe, Paymill or Authorized.net
admin can also provide other methods such as bank transfer
It makes it easy to create and sell courses to millions of students. Teachers can register to teach courses and you can approve them. You can have multiple teachers for one course.
It has an easy-to-navigate interface where important information needing your urgent attention is arranged in tabs.
You can offer lesson previews, set lesson durations, and set up lessons drip content so you can release lessons at regular intervals. Students can take notes, receive badges, gain points, see their grades.
You can create quizzes, give hint to questions, set quiz duration and passing grade. Also questions can be multiple choice, essay, or fill in the blanks.
In addition to accepting multiple currencies, it supports many payment options including PayPal, Stripe, 2CheckOut. It can also be integrated with platforms like WooCommerce and Easy Digital Downloads.
Checkout the live preview and see why daedubu says this about Ultimate Learning Pro:
This is an amazing plugin! Easy and powerful :) The best plugin for e-learning on my site. Thanks for all, especially to your fantastic support team!
WPLMS Student app is a mobile app developed for the WPLMS Learning management system so students can learn anywhere and anytime.
To use this app you must have the WPLMS Learning Management System WP Education Theme. This is great because it allows for a consistent look between the website and the app you create. And most importantly, you can easily sync data between apps and websites.
Some best features of this app include:
Students can register directly in the app and their account is created in the site.
Students can browse courses in the app's directory and subscribe to the courses.
Students can enroll themselves in free courses or pay via a WooCommerce checkout system which supports multiple payment gateways.
Students can keep track of their courses through the app or your website.
Students courses are loaded and available in offline mode.
User dashboards with course and quiz graphs, and a quiz results section.
Quizes with multiple choice questions, multiple correct choices, fill in the blanks, dropdown selection, and text answers.
LearnDash is one of the top learning management systems on the market. Its list of users include Fortune 500 companies, universities, training organizations, entrepreneurs, WordPress developers and designers, and more.
It has with all kinds of tools you need to build a thriving business by selling courses.
Its powerful course builder where you can create multilayered courses and even reuse the lessons. It takes into accounts different learning styles so you can engage learners by using all kinds of media from video, audio, images, Google docs. You can also break up courses into sections, lessons, topics, quizzes.
Features on the Admin side include: front-end registration, detailed reporting on student progress, creating user groups and allowing others to manage them, email notifications to learners, ability to approve, comment, and award points for assignments.
You can sell courses by offering one time price, subscriptions, memberships, and course licensing.
5. Sensei LMS
Sensei LMS is made by the same company that brought you WordPress and WooCommerce. And the basic edition is free, so you can get started using it today! However, to sell your courses you'll need to purchase a paid extension from the WooCommerce site.
This LMS is very simple to use. No coding skills are required and it works with your preferred WordPress theme.
Some of this easy-to-use LMS plugin's interesting features include:
Learner management and analysis allows you to view reports on learning progress, set up two way communication between teacher and learner, and set up notifications.
Protect your downloadable files and videos by making them available only to specific users.
Teachers have the ability to create a question bank for quizzes
Easily add shortcodes to any content areas of your page.
Ability to create multilingual courses when combined with WPML.
WP Courseware is a powerful plugin that allows you to create and sell online courses.
Features that come with this plugin include:
easy-to-use drag-and-drop course builder
drip content so you schedule your courses to be released at particular intervals
powerful quiz creation functionality with great options for creating quizzes
It comes with built-in shopping cart support. You can sell courses as a one time purchase or monthly membership subscription, or schedule installment payments.
It integrates smoothly with:
eCommerce plugins like EasyDigitalDownloads and WooCommerce
payment gateways like PayPal and Stripe
membership plugins like MemberPress, Paid Membership Pro and others
most WordPress themes and plugins
In addition, it has great documentation resources to get you started.
Conclusion
While these among the LMS plugins that caught my eye, there are many out there in the market today.
The following articles will help with ideas about how you can expand your online course platform.
Whether you are running a blog, business, or any type of website, you will need to attract and keep your audience's attention to be successful. A major part of attracting and keeping users' attention is to display eye-catching photos on your website.
While displaying these images in a gallery is the usual way to present them, there are other creative and interactive ways to not only show these images but other text and documents. One creative way to display your website's content is with flipbooks.
Flipbooks give your audience a fun and interactive way to view your website's content by allowing them to feel like they have a book in front of them. Flipbooks also help you display your content in an organized way that is not possible with the use of a gallery or other ways of displaying your content.
Displaying your content as a flipbook is an effective way to share content, and there are a wide range of WordPress flipbook plugins available on the market...
Tame chaos and transform your content using one of the best WordPress gallery plugins available on CodeCanyon. Read on to find out about these WordPress...
With so many plugins out there, it can be a time-consuming process to find the right one for your needs. In this tutorial, I'll help you figure out the best...
In this post, we'll be working with the number one best selling WordPress flipbook plugin on CodeCanyon: Real3D FlipBook. This plugin will help you create a stunning-looking flipbook within minutes and help keep your audience interested in what your website has to offer.
In this article, I am going to show you just how simple it is to create a 3D flipbook with the Real3D FlipBook plugin to grab and keep the attention of your audience.
What We Will Be Building
The flipbook that we will be creating is going to be for our travel blog. In one of our posts in the blog, we are going to add a 3D flipbook created by the Real3D FlipBook plugin to show off the photos that were taken on our last trip to Europe.
We visited four different countries in Europe and are going to show off our top four photos for each country in the flipbook to show our travel blog audience. To make this flipbook visually appealing and easy to navigate we are going to change around the styling of the flipbook, how the actual 3D book flipping functions, add a table of contents, and enable a few other features that will enhance the viewer's experience.
Creating the Flipbook
To create this travel flipbook, you'll need to have the Real 3D Flipbook plugin installed. Select Real 3D Flipbook from the WordPress admin sidebar and click Flipbooks.
This will open up the Flipbook creation page where we will then click the Add New button next to the title, Flipbooks, on the top of your screen. We will label our new flipbook European Travel Flipbook.
Now it is time to start creating the pages in the flipbook. There are two options to choose from here. We can create our flipbook pages from a PDF or from JPEG images. Seeing as we took these photos and have them in the JPEG format, we will click the Select Images button below JPG Flipbook which will bring up the WordPress media library. From there we are going to select our sixteen images. We are going to have four images for each of the four countries that we visited. Once we have selected our images, click the Send to Flipbook button at the bottom right-hand corner of the media library.
Now that we have all the images that we would like included in our flipbook, we need to create a table of contents so our viewers will know what country each image is from. On the top of the flipbook dashboard, click the Table of Contents tab.
This will bring up the table of contents editor where we can add in as many titles and page numbers as we need. Each grid represents a line of the table of contents. Again, we want to let our audience know where each country's photos begin and end. The first four photos are from Italy, so we will type in Italy in the first field and then the page that it starts on in the next field which is 1. Next, click the Add Item button to add another table of contents line and we will repeat this process for the other three countries. Here is what our final table of contents will look like.
The next step for creating our flipbook is to adjust the general settings. Click the General tab at the top of the Real3D FlipBook dashboard. From here we are going to adjust two different settings, the view mode and the page flip sound. For the view mode, click the webgl setting from the drop-down menu. This will make sure that the flipbook that is displayed contains realistic 3D page-flipping with lights and shadows to create a realistic effect. Moving on to the page flip sound setting, we will simply click the enabled setting to allow the page sound to play. Adjusting these settings ensures that we create as realistic as a flipbook as we possibly can to keep our viewers interested in viewing the flipbook. Here is what our flipbook looks like now.
Our flipbook is really starting to come together, but the styling of the entire flipbook is rather bland and we would like it to be more pleasing to the eye, so we are now going to adjust the user interface in the UI tab on Real3D FlipBook dashboard. Once you click this tab, you will be directed to the UI menu where will change the background color and side navigation bars to really make the flipbook pop out of the screen.
First, click on the Flipbook Background accordion and then click on color. We will choose the default blue color at the bottom right of the color selector. Next, click on the Side Navigation Buttons accordion menu to expand out the menu. To highlight the navigation button, we will change the background color to be red which will contrast nicely with the blue background color.
To make the navigation buttons more appealing to click we are going to change the radius so the button will be a circle instead of a square. We will type 30 into the radius field. The last styling change on the button is going to be the size. Again, we want this navigation button to invite the user to keep navigating, so we will bump up the size to 48. Finally, click the update button at the bottom right-hand corner of the plugin dashboard to save all of the updates that we just made.
The last setting we are going to change is in the Menu Buttons tab. Click on the Menu Buttons tab and head down to the Download PDF accordion menu and click it. We would like our travel blog audience to be able to download this flipbook so they can share it with their friends and view it offline. To allow this, we are going to click Enabled from the drop-down menu next to the Enabled menu item at the top of the Download PDF accordion menu.
There you have it, we have just created a stunning looking flipbook for our European travels to be displayed on our travel blog. You can see this entire flipbook creation process in the video below.
Getting the Most Out of the Plugin
In this article, we looked at how you can use the flipbook plugin to create a virtual book of travel photos. The Real3D FlipBook plugin has countless more uses though. Here are a few ideas for the different types of flipbooks that you can create with the plugin.
Catalogs
The Real3D FlipBook plugin is great for catalogs. They allow you to create a realistic catalog in the digital world that can be downloaded by your customers and potential customers. Having an online catalog is a must for today's internet-driven businesses and adding your products to a catalog created by Real3D Flipbook will give you complete control over how you want to present your products.
Books or Magazines
A book or magazine can easily be created with this plugin. The average attention span of your online audience is continually going down, so creating an eye-catching and interesting book or magazine is necessary. The Real 3D FlipBook gives you complete control over the customization of your book or magazine and makes it much more visually appealing to read your material as opposed to just reading a static looking PDF.
Other Customizations
The Real3D Flipbook plugin is completely customizable. In this article, we only had a chance to go over a few of the features offered by the plugin. Below I have listed three notable functions that can help you get the most out of this plugin.
Bookmarks
If you are creating a catalog, book, magazine, or any flipbook with a large number of pages, chances are your reader won’t finish viewing your flipbook in one sitting. Enabling the bookmark feature in the Menu Buttons tab on the plugin dashboard will allow your viewers to bookmark the exact page they were on so they can come back at another point in time and continue reading.
Camera Angle
When the WebGL display of the flipbook is enabled to show off the book's 3D capabilities, you will be able to edit the angle at which the flipbook is viewed. By changing the camera angle, you can create the illusion that the reader is actually reading a flipbook that is right in front of them. The options to adjust for this are the camera pan angle and the camera tilt angle under the WebGL tab. Adjust these settings to taste to create a realistic reading perspective for your flipbook.
Search
By default, the search function on the flipbook is turned off. If your flipbook contains a lot of information, then having this search function turned on is a must so your reader can find exactly what they are looking for. Enable this function under the Menu Buttons tab.
Conclusion
When displaying any type of content to your website's audience, you need to able to attract and maintain their attention. The use of galleries and other gallery-like displays can present your images to your audience, but don't quite have the appeal of flipbooks.
By using the Real3D FlipBook plugin you can easily create a visually appealing flipbook that gives your audience a fresh new experience when visiting your website.
Many businesses require their customers to book appointments. Whether you are a yoga instructor, barber, or a counselor, you will need to book appointments to ensure that all your customers are served in an orderly and timely manner. Posting a phone number to call to book appointments on your website is an absolute must. However, this should not be the only way for your customers to book an appointment.
In today’s internet-driven world, customers are now used to having the option to not only call your business to book an appointment but are used to being able to book an appointment at their convenience twenty-four hours a day, seven days a week. This makes having a way to book appointments from your website a necessity. Without a way for you to book appointments from your website, you will lose out on new and returning customers.
In the digital age, users are online 24/7. Everyone prefers to check availability and make appointments, reservations, or bookings online. They want to do...
Whether you need an event calendar plugin, a booking system with payments, or a Google Calendar widget, this list of plugins will have something to improve...
I'm going to show you how to use the Easy Appointments plugin for WordPress to create an appointment booking system. We’ll start by exploring the basic...
Build a schedule for your website, complete with Google Maps integration, call to action buttons, and a complete automated booking and ticketing system for...
In this post, we will review some of the most popular free WordPress calendar plugins that you can start using in your projects.
Thankfully, WordPress has a collection of booking plugins that you can easily integrate into your site. However, many of these booking plugins do not have all of the functions that you need to make it customizable to your business. The top-selling WordPress plugin, Booked, is a fully-featured appointment booking plugin that can be tailored to your specific business and help you grow your customer base. In this article, I am going to go over how you can use this plugin to create a booking system on your WordPress website.
What We Will Be Building
We will be building a booking system for our massage business. This business runs every Monday through Friday from 9 a.m. to 3 p.m. We will create a calendar that will allow our customers to sign up for one of the three types of massages that we offer during our business hours. Here is what the booking calendar that our customers will use to complete their massage bookings.
Creating a Booking Calendar
After you have installed the Booked plugin, select Appointments > Calendars from the WordPress admin menu. From here, we will create a massage booking calendar. Under the name text field, type Massage Bookings and click the Add New Custom Calendar button. This will create a custom calendar.
Next, we will begin adjusting the settings of the calendar. So head on over to Settings in the appointments plugin on the WordPress dashboard. We will first begin editing our calendar to fit our massage business by adjusting the settings under the general tab.
Under the Booking Options section, we would like to make sure we know the name of the person booking an appointment with us, so we will select the Require “Name” Only option.
Scrolling down, the general settings, we will come to the Time Slot Intervals section. This will allow us to choose how long each massage appointment will last. Each massage appointment will last one hour, so we will select the Every 1 hour option from the drop-down menu.
Now we will change the Cancellation Buffer. We want to make sure that appointments can’t be canceled too close to the appointment time, so we can charge customers if they don’t cancel early enough. We will select 2 hours in the drop-down menu here so customers can’t cancel their appointment within two hours of the appointment.
Next, we go to Display Options and check the Hide weekends in the calendar options as our business won’t be operating on the weekends, as there is no need to show weekends on the calendar.
Now that we are done with the general settings, we need to adjust the time slots available on the calendar. Click the time slots tab and you will be brought to the editing page. Under editing time slots, choose the Massage Bookings calendar so we edit our custom calendar.
We are running our business Monday through Friday from 9 am to 3 pm, so will need to reflect this in the time slots. Under Monday, click the Add Timeslots button. Next, click the Bulk button to allow us to create multi-time slots. Select 9 am in the Start Time dropdown menu, 3 pm in the End Time menu, and 1 space available in the last dropdown menu. Since there is only one massage practitioner, we will only allow one appointment to be booked.
Massage Types
We will be offering three types of massages for our business, a normal, deep tissue, and hot stone massage. We want to know what massage our customers will be signing up for when they book their appointments. To gather this information we are going to set up our own custom fields in the booking. Head on over the Custom Fields tab on top of the booked settings menu. Make sure to choose the right calendar to edit by selecting the Massage Bookings calendar from the drop-down menu.
Next, click on the + radio buttons button. From there, check the required field box to make sure that the customer lets us know what type of massage he wants to receive before their booking will be accepted. In the Enter a label text field, type in "Type of massage you would like to receive.” Next, we add in two more fields using the + radio button button and type in our three types of massages into these option fields. Here is what the custom field should look like.
Adding the Calendar to Our Website
Now that we have created the booking calendar, it is now time to add it to our website. Select the Shortcodes tab in the plugins setting and scroll down to the Display a Custom Calendar section and copy this shortcode to your clipboard. From there, create a new page and paste this shortcode into the text field. Now preview the page and the booking calendar that you just created will be ready to use!
To view all of the appointments that were made you can head on over to your WordPress dashboard and select Appointments > Appointments from the admin menu. You will then be taken to another calendar where you can click on each day and view the appointments booked and plan your business accordingly.
Feel free to view the video below to watch the calendar creation process in action.
Getting the Most Out of the Booked Plugin
In this article, we only covered a few of the features available on this complete booking WordPress plugin. As mentioned, this plugin allows you to fully customize the booking experience. Below are some other features that you can use to further customize the booking experience for your customers.
Pending Appointments
Depending on your business, you may need to review a booked appointment before you can accept this booking. With this plugin, you can easily set up manual approving of appointments in the General settings tab. In the New Appointment Default section, choose set as pending. Any custom information that you need to receive from your customer in order to review, you can add in the custom fields tab as you can create checkboxes, text fields, and much more.
Custom Emails
Through the various stages of the booking process, emails will be sent out to your customers. When an appointment is confirmed, cancelled, or approved, an email from your WordPress platform will send a custom email to the customer. In the plugin's settings, you can customize these emails to say anything you would like. Including anything that will make your customers more comfortable and excited about your business would be best here.
Editing Appointments
One important feature that must be mentioned is the ability to edit appointments. This will be incredibly useful when you need to change the date of the appointment. If you go into the Appointments tab in the WordPress dashboard, you will be brought to a calendar of all your appointments. From there, click on the specific date that you want to change the date or time in and select the appointment that you want to change. An edit appointment pop up will appear where you can update the time and date and notify your customer about this change.
Conclusion
When running a business that requires the booking of appointments, it is necessary to not only have a phone number for your customers to call and book an appointment but to also have a way your customers to make these bookings on your website.
By using the WordPress plugin Booked, you can easily add a fully customizable booking calendar to your website that fits your business needs. To give this plugin a try, head over to CodeCanyon and check out the Booked WordPress plugin. And while you're here, check out some of the other great WordPress plugins available from CodeCanyon.
Your local supermarket chain has its own supermarket brand products it offers to its customers. These supermarket brand products are cheaper compared to the same product sold under a fancy brand name. Does this mean that the supermarket manufactures its own products?
Not at all. The products are manufactured by third parties contracted by the supermarket chain to produce products under the supermarket brand name. The supermarket chain gives an impression that it has manufactured the products.
This is called white label branding. It is a worldwide phenomena. And it is not limited to supermarket chains. All industries and sectors practice it.
Think of big electronic manufacturers and retailers of your favorite desktops, laptops, mobile phones and so on. They too put their brands, logos, and serial numbers on white label products.
White label branding is not restricted to physical products. It is widely practiced in digital products too.
In this article II will explain how white label branding works in WordPress then I will explore some white label branding plugins for WordPress that are available on Code Canyon.
WordPress sites can have a cookie cutter appearance recognizable by many. The content management side especially. You can customize the appearance of the back-end to reflect your clients’ brands by using white label branding plugins.
How Does White Label Branding Work for WordPress?
Here is how white label branding works for digital products: you buy white label digital products and services, put your brand name on them, and resell them as your own.
But white label branding for WordPress works differently.
How White Label Branding Works for WordPress Developers
As a developer you have many clients. This means you have to create their websites—to reflect their unique brands. Coding a new WordPress website from scratch every time you have a new project is costly both in time and money.
Turnkey WordPress websites offer a simple solution. You can use the same website template—both front-end and back-end—for different clients. You only need to customize the website to reflect specific identity of each client.
This involves adding the brand name, logo, and specific graphics and content that identify and differentiate each clients. It means removing standard logo, graphics and information that comes with the WordPress and personalizing the website with clients’ content.
Most of the time what customers see when they visit a website is the front-end. This is the public image that represents the company.
But there is more to a website than the front-end. There is the back-end with the dashboard that customers don’t get to see.
People who run the website use the back-end every day. They want to manage their own content, inventory, images and so on. They do this using the dashboard. Every time they log in to the back-end they want to see their brand reflected and not the cookie cutter WordPress logo and messages.
Using White Label Branding Can Help Your Reputation as a Developer
Imagine every time clients log into the back-end they are greeted by the same standard WordPress dashboard message and WordPress logo. They wonder why am I not greeted by my own brand name? My own logo? My own messaging?
This is where using turnkey websites can reflect badly on you to your customers and ruin your reputation. If don’t do it right your clients will end up feeling you took them for their money and gave them a standard template you use with every client.
Full customization of both the front-end and the back-end of the WordPress website is important because it is a total reflection of the client’s business not only for their customers who only see the front-end but also for the business owners and employees who have to work with back-end tools. This kind of user experience and satisfaction reflects well on you as a developer.
How White Label Branding is Done
White label branding can be done manually or by using plugins.
The manual process involves making changes to your WordPress theme's PHP code by inserting snippets of code to perform the following tasks:
replacing WordPress logos with the client’s logo
replacing standard login images with client’s image
replacing the header
customizing the admin menu
replacing footer text like Powered by WordPress with your own wording
If you have no coding knowledge or little coding experience then manually white labeling is overwhelming. Same applies to the experienced developer pressed for time.
Of course, you don’t have to do all that manually. There are plugins you can use to do white labeling.
What Do White Label Branding Plugins Do?
They give you the ability to control and transform the appearance the back-end.
They help you customize the back-end of your WordPress without coding.
They come with extensive documentation that helps you do the customization by yourself.
You can completely transform the look of the dashboard, customize the appearance of the admin menu, logo, header, the width of the logo, the footer logo, and the login form, as well as replace standard WordPress messages with customized messages that reflect clients’ brands.
White Label Branding Plugins on CodeCanyon
On CodeCanyon you will find white label branding plugins that will help you customize your clients’ WordPress backend to reflect their brands.
White Label Branding for Multisite lets you control the branding of the main site and all sub-sites in a network of websites powered by WordPress Multisite.
It also allows you to:
give each sub-site the ability to do their own branding and customize their menus for the editor role
customize the menus and logos on each sub-site in your WordPress Multisite Network
replace the WordPress logo from the log-in screen and dashboard with your own identity or even your client’s
add custom dashboard meta box viewable only to editors or all users with your own welcome message or help
With the White Label Branding plugin you have the ultimate tool for customizing the WordPress admin and login screen.
It allows you to take full control over branding in the WordPress admin by:
customizing your login screen, menus and logos
changing the color scheme of the entire admin setion
creating your own advanced login templates
creating new user roles and assign capabilities
Not only that but, you can decide who has access to what features by hiding elements for other administrators.
You can even create a fake administrator account! This is useful if you want to give your clients “admin” access, but still limit what they have access to. The real administrator will also be hidden from the users list. This way a client with the “fake” administrator account will never know that they don’t have full access to all features.
White Label Login makes it easy to customize the default WordPress login.
It provides the following UI styles for login:
slide login
push login
modal login
In addition you can:
customize e-mails for registration and reset password
customize login and logout redirects by user role
insert dynamic login and logout links in the WordPress menu
insert dynamic buttons in your content with shortcodes
rewrite rules for wp-admin.php and wp-login.php
create social login support for logins using Facebook, Twitter, Google+, Linkedin and Microsoft Live
Also included in its list of dynamic features is a visual CSS editor for customizing colors and fonts for each screen. The plugin supports 600+ Google Fonts.
Ultra Admin is a combination theme and white label branding plugin that helps you design a WordPress site for your clients with your own company branding.
It comes with 30 built in theme templates. You can customize the admin menu, top bar, buttons, content boxes, typography, forms, text and background colors, logo and so on.
White Label Branding features will help you transform the back-end by:
This is by far the most full-featured WP admin white label plugin available. It is incredibly well built and the developer seems eager to solve any issues you may run into. Definitely recommend!
Bonus
Here's one more plugin that isn't specifically a white label branding plugin, but could be useful for any white label branding project.
Menu by User Role gives you complete control over the menus in your WordPress powered website. You have the ability to:
create public menu
create a menu for logged-in users
create a separate menu for each user role defined in your website
In addition you can create a custom navigation menu, which can be used instead of thw default menu. In order to use this feature it must be registered in the theme’s functions.php file.
You can easily add pages, posts, categories and custom links to the menu. And you can even create multi-level menus with just a few clicks and organize them by drag and drop.
Many businesses need to share event calendars with customers. For example, a restaurant can use an event calendar to advertise special musical events, or holiday menus. Similarly, schools can use event calendars on their websites to let students and teachers know about any upcoming activities in school related to sports, exams or other events.
Event calendar plugins are helpful for individuals as well if they want to keep track of different things they are supposed to do. For example, you could use an event calendar plugins to mark important meetings and events like birthdays of friends and family.
Displaying a calendar on your website is a must for many business owners. The Pro Event Calendar plugin makes it easy to add an event calendar to your posts...
Whether you need an event calendar plugin, a booking system with payments, or a Google Calendar widget, this list of plugins will have something to improve...
WordPress calendar plugins let users make bookings, schedule events, pay for appointments, and more. If your website does any of these things, you need a...
In this tutorial, you will learn how to use the free My Calendar WordPress event management plugin in order to create events. The plugin has a lot of amazing features that we will use in the tutorial.
What We'll Be Building
Our focus in this tutorial will be on creating a calendar that allows a company to mark all the events that they manage like parties, weddings, art exhibits etc. They will be able to see all the future and past events.
We will make the events color coded so that they are easy to identify. Users will be able to click on any specific event category and only see matched events in the calendar. Clicking on any event will show a pop-up with all the basic information about the event like its timing and location.
We will begin by installing the plugin. Then, we will change some settings to modify the input and output. After that, we will create some event categories, add some event locations and finally add the events to our calendar.
Also, there is a good chance that you will want to make some changes to the appearance of the event calendar so that it blends in with the rest of your website. Therefore, we will add some of our own CSS rules in the last step to make some cosmetic changes in the calendar.
Creating an Event Calendar
Setting Things Up
The first step towards creating our event calendar would be installing the My Calendar plugin. Once you have installed and activated the plugin, go My Calendar > Settings in the admin dashboard. You will see a bunch of tabs there.
Click on General and then specify the ID for the page where you want the event calendar to appear. In our case, it is 118. This step is optional and the plugin will automatically create an event calendar page for you when you publish your first event. However, it is good know know how to show the event calendar on a specific page.
Whenever you create a new event with this plugin, you will have to fill out some details about the events. This could include many things like event location, short description etc Not all of these input fields are activated by default. Therefore, you should now head to the Input tab and check the fields that you want to appear, as in the image below.
You have probably noticed that there are a lot of buttons and dropdown menus on the event calendar page besides the calendar itself. The order in which these buttons are displayed is controlled by settings in the Output tab. You can drag the elements up and down to display them in a specific order. Just drag an element below the Hide row in order to prevent it from displaying.
It is possible to control what information is shown to users in the pop-up once they click on an event by toggling some checkboxes under Single Event Details.
Creating Event Categories
Now that we have set everything up, it is time to create actual content for our events calendar.
We will begin by adding some categories that will be used to mark different events. This plugin gives users the option to only see events from specific categories. Events can be filtered this way once they have been assigned different categories.
To add a new category to the calendar, simply go to My Calendar > Manage Categories and then specify a name and label color for the category. You can also choose to display an icon before the category by selecting one from the Category Icon dropdown.
Once you have added all the details for a category, click on the Add Category button to add the category to the event calendar.
Adding Event Locations
Any events that you organize will take place somewhere. The plugin does a great job when it comes to specifying locations of different events.
You can add a new location to the calendar plugin by going to My Calendar > Add New Location. The next page will contain a lot of input fields that ask for different details of the location. This includes the usual things like street address, city, postal code and country etc. You don't have to fill in all these values. Some of these details can be skipped.
Make sure that you have entered a name for the location at the top. This will help you easily identify these locations in the dropdown menu when creating events.
In this example, we will add a location for an art exhibit that is taking place in Kentucky, USA. The address is fictional but it will give you an idea about filling out your own details.
The plugin will give users a link to Google Maps with the address that you specified. This makes it easier for people to figure out exactly where the event is happening. Any locations that you add to the plugin can be edited by clicking on My Calendar > Manage Locations.
Adding Events
We can now start adding events to our events calendar. To add an event, simply go to My Calendar > Add New Event.
Now, fill out the title and description of the event. The title is displayed within the dates on the event calendar. The description will be displayed on the event description page when users click on the Read More link in the pop-up. Set the event category to Exhibit from the dropdown menu.
You can now specify a date and time for the event. There is a good chance that at least a few events that you add to the calendar will be recurring events. In this case, it would be very time consuming to add all the repeated events to the calendar one by one.
To make things easier for you, the My Calendar plugin gives you the option to specify the repetition pattern for an event. This means that you can specify how many times an event will repeat and the frequency with which it will repeat.
At the beginning of the tutorial, we checked the box to enable a short description input field for events. This allows us to provide a short summary of the event which will be displayed in the pop-up whenever a user clicks on the event in the calendar.
You can specify a location for the event at the bottom of the Add New Event page. Simply choose Art Exhibit (Kentucky) for this example. After that, click on the Publish button at the top or bottom of the page.
Change the Styling of the Event Calendar
After following all the steps in this tutorial, your event calendar will look like the image below. If its styling is different from the following image, simply go to My Calendar > Style Editor and then pick the twentyeighteen.css file from the dropdown in the sidebar as the primary stylesheet for the calendar. There are a bunch of other themes that you can apply to the calendar. Just pick one that you like the most. Some of them like inherit.css are meant to provide the minimum possible styling so that most of the style rules from your theme are automatically applied to the calendar.
The style editor page shows all the CSS rules from the selected file that are applied to the calendar. You can make all kinds of changes here and they will be reflected on the event calendar page.
For now, we will simply adjust the spacing and fonts that are applied to different elements like the table caption, header and category legend at the bottom. We will also add some of our own style rules to adjust the appearance of the calendar to our liking.
Here are all the rules that we add to our event calendar. Simply place them at the bottom of the style editor and the changes will be reflected on the event calendar page once you click on Save Changes button at the bottom.
Now, go to the event calendar page and click on one of the events that you added. This should open a nice pop-up that shows all the basic details of the event like its timing, location and a short description.
Final Thoughts
In this tutorial, we learned how to use the My Calendar plugin in order to create a basic event calendar for our website. The plugin makes it really easy to create and add events along with a simple description.
However, there are still a couple of things missing from the plugin like widgets and a more advanced description page that provides extra features like payment options and the ability for users to add reviews about an event. The plugin is also a bit hard to style. If you want to use a more advanced event calendar plugin on your website, you should take a look at the WordPress event calendar plugins on CodeCanyon.
Visual engagement is an indispensable part of any website. Without it users won't engage with your content. It also means that you are not reaching any audience or grabbing attention, which in turn means you have no conversions and no revenue.
You need to create visual engagement that leads to satisfying user experiences that in turn create high conversions and high revenue.
But managing the large amount of images, audio, and videos you need to make your website function effective requires a lot of space and organization. You need plugins to save you time.
WordPress media is an umbrella term a large number of plugins including media library management plugins to interactive media plugins like audio, video, flipbooks, galleries, maps, countdown clocks, notifications, timelines, popups, and forms.
In this article I will show you some different types of WordPress media plugins available on CodeCanyon.
CodeCanyon has a wide range of best-selling WordPress audio and video players. No matter what your vision for your audio or video content, there is a player...
WordPress audio and video plugins are essential if you are looking to add video and audio players to your website. Discover the best plugins for 2019 that...
This tutorial will teach you how to quickly create a sticky music player for your WordPress website with continuous playback. This WordPress audio player...
Looking to add a beautiful video gallery or grid to your WordPress site? Figure out what you need, and then check out seven of the best video gallery plugins...
Websites for restaurants, retreat centers, country clubs, and many other businesses and organizations can benefit from a weather WordPress widget. Take a...
If you’ve been thinking of adding a video background to your WordPress site, here are the eight best plugins available at CodeCanyon.
Understanding WordPress Media Plugins
Visuals are the best way to optimize your pages and content. Visual elements are called media. Media includes but is not limited to images, audio, video, animation, and so on.
Countdown clocks, contact forms, timelines, buttons, maps, notifications, icons, avatars, popups are also all media and are crucial to the success of a website.
When it comes to understanding WordPress media you have to start from the Media Library where you manage images, audio, video, and documents. The media library allows you to upload and manage media files, add images to posts, and even do quick edits to your images. You can also create galleries and subfolders.
But Media Library has a limit. If you run a website that requires few images then the built-in WordPress Media Library is enough. However, if you run large websites that require a lot of images, videos, audio, and more then you will need to use a media library management plugin.You will also need to use plugins specific to each different media element, for example gallery plugins for images, audio plugins for audio, video plugins for video and so on.
Types of WordPress Media Plugins
WordPress media plugins help you create, upload, store, manage, and display different kinds of media. In short, provide tools for managing and displaying your media.
The list below is not exhaustive but it shows what is included under the umbrella of WordPress media plugins:
media library management plugins: organizing and processing images, video or other media
interactive media plugins: for creating interactive experiences on your site
image builder plugins: for designing and creating new images using layers and effects
map plugins: for creating and displaying maps
galleries plugins: for displaying images
audio or video plugins: for adding audio or video players to your site
iframe plugins: for embedding other content on your site in an iframe
social media plugins: for embedding content from social media
avatar plugins: for displaying or creating user avatars
icons plugins: make it easy to add icons to your site
button plugins: for creating eye-catching buttons like CTAs (call to actions)
countdown plugins: for showing a countdown to some important event
What Do WordPress Media Management Plugins Do?
Different WordPress plugins work differently and what they do varies. But in general they help you:
categorize items according to theme, size, and more
add, delete, arrange, and sort items in the media library
add titles to media
do batch upload and add many images quickly
provide external storage for your media
manage how users interact with your media for example users can click on images and open them in separate pages.
Why Should You Use WordPress Media plugins?
They extend the functionality of your website back-end so it can handle large volumes of media.
They make your website more attractive to bring in users.
They allow users to easily navigate images and media on your website.
They increase user engagement and as a result conversions and profits.
They improve the SEO ranking of your website on search engines.
Things to Consider When Choosing a Media Plugin
Speed: You want a lightweight plugin that won’t slow down your website.
Features: Think about storage, integration with social networks, email marketing platforms, and payment gateways
Responsiveness and mobile-friendliness: More than 70% of traffic to websites comes from mobile devices. Does your media plugin work on mobile browsers?
Ease of use: You shouldn't require coding knowledge to be able to use Mediaplugins. They should be easy to use and customize.
Security: Users trust you with their personal and financial data. Choose media plugins that have a great track record when it comes to security.
Regular Updates: Regular updates solve security vulnerabilities. Choose a plugin with a track record of updates and maintenance.
Cost: Compare the prices of other plugins and see what fits your budget.
Ratings and reviews: What other users say is proof of quality of the plugin and the trustworthiness of the developer.
Downloads: The number of downloads is proof of popularity of the plugin among users. It shows they trust the provider.
Support: You may run into some issues. Make sure that the seller offers support. See what other users say about the quality of support from the provider.
WordPress Media Plugins on CodeCanyon
On CodeCanyon, will find many popular and best-selling WordPress media plugins that will make your website engaging to visitors. To help with your selection, I’ve classified them according to the categories below.
Media Library Management Plugins
The Media Library is where you can manage your images, audio, videos, and documents all in one place. The default WordPress Media Library is sufficient to manage a limited number of images. But business, magazine, and large blogging websites that regularly upload large numbers of images need plugins for efficient management of media files.
These top media management plugins will help you manage your media library.
Gallery plugins have been covered extensively in other Envato Tuts+ posts. The articles below will lead you to an overview of gallery plugins available on CodeCanyon.
Image Builders and Virtual Tour Builders
Image and virtual tour building plugins make it easy to create new visual content for your site by combining other images.
These plugins will help you add interactive map features to your website so users can learn geography or find directions for locations where they need to be!
Surveys, quizzes, and polls are interactive forms. There are plugins that are specifically built to allow you to create your own engaging surveys, polls, and quizzes—all kinds of content that have been shown to be very popular with website visitors.
Digital flipbooks look and feel like printed publications. Their pages can be flipped and turned. They’re a perfect way to show reports, presentations, magazines, catalogs, brochures, books, photo essays, and portfolios. They offer a great interactive experience. Try the following plugins and find out for yourself.
There are many media plugins and each fulfills a specific function like counting likes, creating posters, embedding carousels of content from social media, streaming, and so on.
Avatars are used for user profile images and creating a connection with the audience. Avatar plugins allow users to upload custom avatar images and showcase additional information about content authors.
Icons are symbols that represent particular information. Icon plugins come with collections of symbols that help you choose the relevant icon for particular information.
These plugins will help you add avatars and icons to your pages.
Buttons are the most effective tools to get your users to take action. You can use buttons to redirect users to a desired action like buy now, sign up now, purchase, or to a promotions link. These button plugins will get your users to take action.
How to convert your visitors to subscribers is an ongoing question. Popup opt-ins have the highest conversion rate of all opt-ins. But for popups to be effective they have to well designed and used thoughtfully. These popup and opt-in plugins will help you gain more conversions.
If you have a sale, product launch, or event to sell tickets for, these countdown times plugins will create a sense of urgency for users on your website and increase your conversions.
Notifications have a greater rate of opt-in than emails. They grab attention by appearing directly on the browser. This results in increased engagement, high rate of return audience, increased conversions and revenues. If you're serious about engaging an audience you already have, these notification plugins will bring users back to your website for more.
Advertising is one of the main ways that websites generate revenue.
Perhaps you created a blog specifically to drive people towards your website’s Store page, and want to give visitors that extra little push? Maybe you run several websites, and want to promote your biggest-earner across your entire portfolio? Or maybe you don’t have anything to promote, but wouldn’t mind generating some cash by selling advertising space to third parties?
Despite the money-making potential, WordPress doesn’t support advertisements out-of-the-box. Most WordPress themes don’t even have space where you can display ads!
Creating a successful advertising campaign is a must in today's crowded eCommerce world. Once you have your website and products in place, you must have the...
Whether you want to show off customer testimonials, your latest blog posts, your best images, or just celebrate the members of your team, there is a...
In the digital age, users are online 24/7. Everyone prefers to check availability and make appointments, reservations, or bookings online. They want to do...
WooCommerce is an excellent platform for selling digital and physical products. Adding an affiliate system is an excellent way to increase your reach around...
If you dream of turning your website into an additional source of revenue, then you have two options: dig into your theme’s files and modify its code to support adverts,or let a plugin do all the hard work for you!
In this article, I’ll show you how to create a range of adverts and display them across your website, using the popular ADning Advertising plugin. To help ensure your ads generate as many click-throughs as possible, we’ll be using ADning to display customized ads based on factors such as the visitor’s geographical location, and the time of day. Finally, I’ll show how to monetize your website even if you don’t have anything to promote, by selling advertising space to third parties.
Getting Started With the ADning Advertising Plugin
The first step, is installing the ADning Advertising plugin:
If you haven’t already registered, create your free Envato Market account. Head over to the CodeCanyon website, click the little Sign In button in the upper-right corner, and then enter your Envato account details. Once you’re logged into your account, head over to the ADning Advertising listing, click Buy Now and then follow the onscreen instructions to complete your purchase.
When prompted, download the ADning plugin. Unzip the downloaded file; the subsequent folder should contain several folders and files, including angwp.zip, which you’ll need to upload to WordPress.
Adding a Third Party Plugin to WordPress
Once you’ve downloaded the ADning Advertising plugin, you’ll need to upload it to your WordPress account:
Log into WordPress, if you haven’t already. Select Plugins from WordPress’ left-hand menu, followed by Add New. Select the Upload Plugin button.
Now scroll to the If you have a plugin in a .zip format section, and select Choose file. Select your angwp.zip file and click Install Now.
ADning will now be uploaded to your WordPress account. After a few moments, a new ADning item should appear in WordPress’ left-hand menu.
Activating the ADning Advertising Plugin
Next, you’ll need to active ADning, by entering your license key:
Head over to the CodeCanyon website and log into your account. Select your username in the upper-right corner, followed by Downloads. Find the ADning Advertising item, and select its accompanying Download button. Choose License certificate & purchase code from the dropdown menu.
Once your license has downloaded, open it and find your Item purchase code. You'll need to copy this information then, in your WordPress account, select ADning from the left-hand menu. Select the Product License tab and paste your purchase code into the Add your license key here field.
Finally, click Activate ADning. After a few moments, you should see a Plugin activated successfully message. Your plugin is now ready to use!
Placing Adverts on Your Website
In this section, we’ll be placing four different styles of adverts on our WordPress website:
A banner ad that’ll run along the top of the page.
An embedded banner that’ll be displayed inside the page’s content.
A popup ad.
An “injected” advert that’ll be displayed on a line specified by you.
To create these ads, I’ll be using a graphic that promotes Envato Elements, but you can use any graphic you want.
Creating Your First ADning Ad
To display an advert, we need to create:
A banner, which is essentially the graphic that we want to use.
A campaign, which sets a start and an end date for your advert.
An Ad Zone, which defines where your banner will appear on the page, and the kind of advert that’ll be displayed to the visitor, such as a popup or a vertical banner.
We then need to link these three components together, and insert the finished advert into our website using either shortcode or a widget.
While this may seem like a lot of setup just to display a single ad, you can re-use these elements multiple times, for example you may decide to run multiple adverts as part of the same campaign, or use the same Ad Zone for all your banners.
Turn Any Image Into a Banner
Let’s start by creating a banner, using a graphic of your choice. Note that depending on the dimensions of your chosen graphic, you may need to play around with the common advertisement settings in order to create an advert that looks good and functions correctly.
Select Banner from WordPress’ left-hand menu and click Add New Banner. Under Title give this banner a descriptive name; I’m using Elements banner. In Add a banner link, enter the URL that your banner should link to; I’m using the Elements website.
Now open Target and specify the window where the destination URL should load, for example in a new tab or inside the current advertising frame. If you’re linking to an external website, then you’ll typically load the URL in a new tab or window, because you don't want to encourage visitors to navigate away from your website.
Find the Select one of the common banner sizes section and open its accompanying dropdown. Here, you’ll find some of the most commonly used advertising styles and sizes, such as vertical banner, pop under and full banner. Select the banner style and sizing that best represents the advertisement you want to create, or select Custom and then specify an exact size in pixels. Note that this step may require some trial and error!
Select Click here or Drag file to upload and then choose the graphic that you want to use. Find the Auto Positioning section and specify where your banner should appear on the page. Since I want to display this banner along the top of the screen, I’m selecting Above content.
Scroll to Alignment and then choose from left, right or center alignment; I’m using Center.
When you’re happy with the information you’ve entered, select Save Banner.
Create Your First Advertising Campaign
Next, we need to create a campaign. This campaign will dictate the date and time when the advertisement will first appear on your website, and when it’ll disappear:
Select Campaigns from WordPress’ left-hand menu, then select Add New Campaign. Give this campaign a descriptive Title; I’m using Elements campaign.
In the Start Date section, enter the month, day, year and time when this campaign should start. To make it easier to test your advert, you should choose either the current date and time, or backdate the advert so it’ll appear on your website immediately. Click to expand the End date section, and then choose the date and time when this campaign should end, at which point the associated advert(s) will disappear from your website.
When you’re happy with your changes, select Save Campaign.
Make Space for Your Advert: Creating an AD Zone
Finally, we need to create an AD Zone, which is the region of the page where we’ll display our advert. Once we’ve created an AD Zone, you can re-use that zone for subsequent adverts:
Select AD Zones from WordPress’ left-hand menu and click Add New AD Zone.
Give the AD Zone a descriptive Title; I’m using Elements AD Zone.
Find the Select one of the common banner sizes section, and open its accompanying dropdown. Here, you’ll find some common advertisement sizes, such as vertical banner, pop under and full banner. Select the option that best represents the banner you’re placing within this AD Zone. Alternatively, you can select Custom and then specify the exact dimensions.
Now, open the Linked banners dropdown and select the banner we created in the previous step. Open the Campaign dropdown and select the campaign. Scroll to the Alignment section and choose how you want to position this AD Zone onscreen; I’m selecting Center.
Once you’re happy with the information you’ve entered, select Save AD Zone.
Connect Your Components
Now we've created all three components, we just need to link our banner to our campaign and AD Zone:
Select Banners from WordPress’ left-hand menu.
Find the banner that you previously created and click its accompanying Edit link.
Open the Campaigns dropdown and select your campaign.
Open Adzones and select the AD Zone you created in the previous step.
Select Save banner.
Displaying Your Advert
Now we have all three of our components, we’re ready to place the advert on our website using either an ADning widget or shortcode. Let’s explore both options:
1. Use a Widget
One option, is to place a widget on your website and then assign it an appropriate AD Zone and banner:
In WordPress’ left-hand menu, select Appearance > Widgets. Click to expand the ADning ADS section and select Add widget.
Open the Select a banner dropdown and choose the banner that you want to display. Open Select an Adzone and then select the AD Zone that we created earlier. Click Save.
Now, load any WordPress page or post, and your banner should appear at the top of the screen.
Give this banner a click to make sure it links through to your chosen URL in either a new tab, window or within the current advertisement frame, depending on how you’ve configured your banner.
Note that at this point you may need to spend some time tweaking your banner style and sizing, depending on your original graphic, how you chose to position that graphic, and your website’s theme.
2. Copy and Paste the Shortcode
Alternatively, you can display the finished advert using shortcode. I'll use a shortcode to display the advert in a widget.
Select AD Zones from WordPress’ left-hand menu. Then find your AD Zone and click its accompanying Edit link.
Scroll to the Export section; this should contain a block of shortcode. Copy all of this code.
In WordPress’ left-hand menu, select Appearance > Widgets. Click to expand the ADning ADS section. Select Add widget. Paste your shortcode into the Or add the adzone shortcode section.
When you're done, click Save.
Once again, load any page or post that makes up your website, and your banner should appear onscreen.
What Other Ad Styles Can I Use?
ADning Advertising supports a wide range of different advertising styles. In this section we’ll be exploring a few simple ways that you can modify our existing banner to create a completely different style of ad.
Creating Embedded Ads
Let’s start by moving our banner from the top of the page and embedding it within our webpage’s content.
Every time you create an embedded ad, you have the option to repeat this advertisement at regular intervals, for example once every five paragraphs.
If your website contains large amounts of text, then an occasional embedded advert can be more appealing than a solid wall of words—just don’t get carried away! Remember that some visitors may be viewing your website on the smaller screen of a smartphone or tablet, where each advert could potentially take up their entire screen, forcing them to scroll to find the content they’re actually interested in.
To turn our banner into an embedded ad:
Select ADning > Banners from WordPress’ left-hand menu. Find the banner that you want to edit and select its accompanying Edit link.
Scroll to the Auto Positioning section and select the Inside content thumbnail, which will give you access to a new Custom Placement Settings section. Specify where your advert should appear, using the After x paragraphs field. Optionally, you can turn this advert into a repeating advert by clicking the Repeat slider so that it changes from No to Yes. If you select Yes, then your advert will repeat at the interval defined in the After x paragraphs field.
When you’re happy with your changes, click Save Banner.
Custom Classnames: Control Exactly Where You Ad Appears
Would you like more control over where each advert appears? Perhaps you want to position an advert next to a relevant paragraph, or maybe pick-and-choose which advert appears on each webpage?
You can control the page, paragraph, and even the line where your advert appears, by creating one or more custom classnames, and then assigning each classname to an advert. Then, you just need to insert the correct custom classname into your website’s HTML, and the associated advert will appear in that exact spot.
Using the Widget Options Plugin
You can create custom classnames quickly and easily using a dedicated plugin; I’m opting to use the free Widget Options plugin.
You can install this plugin from the WordPress plugin directory. To setup it up, just select Plugins > Add New from WordPress’ left-hand menu. Search for Widget Options. When the correct plugin appears, select Install Now.
Once the plugin has been installed, click Activate.
Creating Custom Classnames
Next, we need to create a custom classname. Depending on your setup, you might decide to create a single classname for a specific advert, a different classname for each advert, or a single classname that you’ll use across all of your adverts.
To help keep things simple, we’ll be creating a single classname:
In WordPress’ left-hand menu, select Settings > Widget Options.
Find the Classes & ID section and select Configure settings. Select the Enable ID Field checkbox.
You can now use the Predefined Classes field to create a list of all the custom classnames that you want to use. Type each classname into the field and then press the + button.
When you’re happy with the information you’ve entered, click Save Settings.
Next, select Appearance > Widgets from WordPress’ left-hand menu. Click to expand the Adning ADS section.
Select the little cog icon, which opens the Settings tab.
Select the Class & ID tab. The Class & ID tab should contain a list of all the custom classnames that you can use with ADning; select the classname that you just created and click Save.
Assigning Custom Classnames
Next, we need to assign this custom classname to our advert:
Select ADning > Banners from WordPress’ left-hand menu. Find our advert, and then select its accompanying Edit link. Scroll to the Default AD placements section and select Inject before/after class.
In the Custom Placement Settings section, open the Where dropdown and specify whether your advert should be placed Before or After the point where you insert the classname into your HTML. Note that it may not be immediately clear which option will work best for your particular website, but you can always return to this page and modify the Before/After setting later.
In the Element field, type the classname that you want to associate with this advertisement and when you're done you can click Save Banner.
Editing Your Website's HTML
Now, we can place this advert anywhere on our website, by inserting the custom classname into our HTML:
Find the page or post where you want to display your advert, and open that item for editing.
Click to select the block where you want to place your ad; a little floating toolbar should appear.
Select the three-dotted icon, followed by Edit as HTML.
You can now add your custom classname to any of the page or post’s HTML tags. For example, imagine I’d created an elementsAd custom class and wanted to place my advert before the following block:
<p>Lorem ipsum dolor sit amet, consectetur adipiscing elit.
Duis id tincidunt turpis. Pellentesque neque magna, egestas
quis orci a, luctus pretium tellus. Donec egestas enim massa,
sed pellentesque massa tempus in.</p>
In this scenario, I’d add class="elementsAd" to the opening <p> tag:
<p class="elementsAd">Lorem ipsum dolor sit amet,
consectetur adipiscing elit. Duis id tincidunt turpis.
Pellentesque neque magna, egestas quis orci a, luctus
pretium tellus. Donec egestas enim massa, sed
pellentesque massa tempus in.</p>
Insert the custom classname in your chosen location, then save your changes and navigate to the page or post in question. Your advert should have appeared, at the point where you inserted the custom classname.
Create a Popup Ad
ADning Advertising also supports popup advertisements, which by default appear every time a visitor navigates to a new page.
To convert our banner ad into a popup:
Select ADning > Banners from WordPress’ left-hand menu.
Find the banner that you want to modify and click its accompanying Edit link.
Scroll to the Auto positioning section, and then select Popup/Sticky.
In the Custom Placement Settings section, use the thumbnails to select where this popup should appear onscreen; I’m using Bottom/Center.
Click Save Banner.
Now, whenever you navigate to a new webpage, a popup advertisement will appear.
Immediately, this poses a problem: no-one wants to be confronted by a popup every single time they navigate to a new page! Conveniently, this leads us onto our next topic.
Control Where Your Ads Appear
If a visitor encounters the exact same ad on every single post and page across your site, then in the best case scenario that advert is quickly going to become invisible to them.
In the worst case scenario, the visitor will get so frustrated that they’ll navigate away from your website, especially if you’re using intrusive adverts such as popups.
Often, you’ll want to set some restrictions about where each advert can appear, and ADning gives you several options:
Select ADning > Banners from WordPress’ left-hand menu.
Find the banner ad that you want to edit, and then click its accompanying Edit link.
From here, you can set the following restrictions.
Ban This Advert From Your Home Page
Your home page is often a visitor’s first impression of your website, and a page full of adverts isn’t exactly a great first impression!
To prevent this advert from appearing on your home page, find the Home page section and click its accompanying Show/Hide button, so that it displays Hide.
Don’t Display This Ad on Smartphones or Tablets
The smaller screen of a smartphone or tablet can make a webpage feel much more ad-heavy than it actually is. Since mobile users typically have a much lower tolerance for ads, you may want to reduce the number of adverts that appear on mobile devices.
You can block this advert from smartphones or tablets, or both, using the Show/Hide toggles in the Device Filters section.
For example, if you wanted to prevent this advert from appearing on smartphones, then you’d find the Mobile section and toggle its accompanying button to read Hide.
Block This Ad From Specific Pages and Posts
You may want to ensure that a few webpages remain completely ad-free, for example if there’s a page where an ad would be inappropriate, or you simply want to give your visitors a break!
You can use ADning to name specific pages and posts where this advert should never appear:
Scroll to the For page section.
Click the Show/Hide button so that it reads Hide.
In the accompanying field, start typing the name of the page or post in question, and then select it from the dropdown menu when it appears.
Display This Ad on the Named Page Only
If you only want to display this advert on a small number of pages and posts, then it may be easier to simply name the webpages where this advert should appear:
In the For page section, click the Show/Hide button so that it reads Show.
Enter the name of the page or post where this advert should appear, and then select it from the dropdown menu.
You can repeat the final step, until you’ve named all the webpages where this ad should make an appearance.
Drive User Engagement With Customized Ads
You can encourage visitors to interact with your ads by delivering customized content. ADning gives you the option to tailor your ads based on the visitor’s geographical location, and the date and time when they’re viewing the advert.
Filter Content by Country
There’s lots of reasons why you might display different adverts, depending on the visitor’s location.
You may be able to encourage visitors to engage with your ads, by targeting their location, for example displaying ads that relate to national holidays such as Canada Day, Chinese New Year or St. Patrick’s Day. Since your website has the potential to reach a global audience, you should also consider that some of your ads may be deemed inappropriate, or even offensive in certain parts of the world.
To display ads based on the visitor’s location:
Select ADning > Banners from WordPress’ left-hand menu.
Find the banner that you want to edit, and then click its accompanying Edit link.
Scroll to the Country filters section.
From here, you can block this advert for specific countries:
Press the Show/Hide button so that it changes to Hide.
In the accompanying text field, enter the country, or countries where your advert shouldn’t be displayed.
Alternatively, if this ad is only relevant for a small number of countries, then it may be easier to simply name these locations:
Toggle the Show/Hide button so that it reads Show.
Specify every country where you want to display this ad.
Display Ads Based on Date and Time
Your visitors may be more likely to interact with an advert at a certain date or time. For example, you may have more success displaying entertainment-focused ads on a Friday afternoon, and job adverts on a Monday morning.
If you’re an organized person, then you could even schedule ads to go live months in advance, for example creating a campaign that’ll kick in at midnight on Black Friday.
To control the date and time when an advert is visible on your website, you’ll need to edit the campaign associated with that ad:
Select ADning > Campaigns from WordPress’ left-hand menu.
Find the campaign that you want to edit, and then click its accompanying Edit button.
Click to expand the Advanced date options.
In this expanded panel, you’ll have access to a range of different date and time settings, including the ability to display this advert on a specific day of the week, during the weekend only, or at a certain time.
How to Sell Ad Space to Third Parties
Just because you don’t have anything to advertise, doesn’t mean you can’t generate money from advertisements! Once you’ve created some advertising space on your website, you can use ADning to sell this space to third parties, who will then run their ads on your website.
If you’ve already setup the popular WooCommerce eCommerce plugin, then you can sell this space and receive payments via your existing WooCommerce checkout.
To take advantage of ADning’s WooCommerce integration, you’ll need to setup the ADning WooCommerce plugin, which is included as part of your ADning license.
To setup ADning WooCommerce, select ADning from WordPress’ left-hand menu.
Select the Add-ons tab. Adning WooCommerce will be listed under Included Add-Ons. Give this plugin a click, and it should be installed automatically.
Now select ADning > General Settings from WordPress’ left-hand menu and choose the Sell tab.
Click to expand the WooCommerce Settings section. Find the Create Adning Ads WooCommerce Product and give it a click. To start accepting payments via your WooCommerce checkout, select the Activate toggle so that it turns from No to Yes.
Click Save changes.
You should now be able to setup and manage all of your third party ads, via ADning’s Frontend AD Manager:
Navigate to the Sell screen, if you haven’t already (ADning > General Settings > Sell.)
Click to expand the Frontend AD Manager Settings section.
Click the Frontend AD Manager link, and the AD Manager should open in a new tab, ready for you to configure your third party ads.
Conclusion
In this article, I showed you how to setup and use the popular ADning Advertising plugin. If you’ve been following along, then you’ll have created a selection of ads, and then customized these ads in several different ways, including displaying different ads based on the visitor’s location, and the time of day. Finally, I showed how you to start selling advertising space to third parties, using the ADning WooCommerce plugin and AD Manager.
You can learn more about creating, displaying and managing WordPress ads, over at the official ADning website, or by taking a look at the plugin’s documentation.
Moving code from development to production doesn't have to be as error-prone and time-consuming as it often is. By using Buddy, a continuous integration and delivery tool that doubles up as a powerful automation platform, you can automate significant portions of your development workflow, including all your builds, tests, and deployments.
Unlike many other CI/CD tools, Buddy has a pleasant and intuitive user interface with a gentle learning curve. It also offers a large number of well-tested actions that help you perform common tasks such as compiling sources and transferring files.
In this tutorial, I'll show you how you can use Buddy to build, test, and deploy a Node.js app.
Prerequisites
To be able to follow along, you must have the following installed on your development server:
Before you dive into Buddy, of course, you'll need a web app you can build and deploy. If you have one already, feel free to skip to the next step.
If you don't have a Node.js app you can experiment with, you can create one quickly using a starter template. Using the popular Hackathon starter template is a good idea because it has all the characteristics of a typical Node.js app.
Fork the template on GitHub and use git to download the fork to your development environment.
It's worth noting that Buddy is used with a Git repository. It supports repositories hosted on GitHub, BitBucket, and other such popular Git hosts. Buddy also has a built-in Git hosting solution or you can just as easily use Buddy with your own private Git servers.
Once the clone's complete, use npm to install all the dependencies of the web app.
cd hackathon-starter/
npm install
At this point, you can run the app locally and explore it using your browser.
node app.js
Here's what the web app looks like:
2. Creating a Buddy Project
If you don't have a Buddy account already, now is a good time to create one. Buddy offers two premium tiers and a free tier, all of which are cloud based. The free tier, which gives you 1 GB of RAM and 2 virtual CPUs, will suffice for now.
Once you're logged in to your Buddy account, press the Create new project button to get started.
When prompted to select a Git hosting provider, choose GitHub and give Buddy access to your GitHub repositories.
You should now be able to see all your GitHub repositories on Buddy. Click on the hackathon-starter repository to start creating automations for it.
Note that Buddy automatically recognizes our Node.js app as an Express application. It's because our starter template uses the Express web app framework.
3. Creating a Pipeline
On Buddy, a pipeline is what allows you to orchestrate and run all your tasks. Whenever you need to automate something with Buddy, you either create a new pipeline for it or add it to an existing pipeline.
Click on the Add a new pipeline button to start creating your first pipeline. In the form shown next, give a name to the pipeline and choose On push as the trigger mode. As you may have guessed, choosing this mode means that the pipeline is executed as soon as you push your commits to GitHub.
The next step is to add actions to your pipeline. To help you get started, Buddy intelligently generates a list of actions that are most relevant to your project.
For now, choose the Node.js action, which loads a Docker container that has Node.js installed on it. We'll be using this action to build our web app and run all its tests. So, on the next screen, go ahead and type in the following commands:
npm install
npm test
4. Attaching a Service
Our web app uses MongoDB as its database. If it fails to establish a connection to a MongoDB server on startup, it will exit with an error. Therefore, our Docker container on Buddy must have access to a MongoDB server.
Buddy allows you to easily attach a wide variety of databases and other services to its Docker containers. To attach a MongoDB server, switch to the Services tab and select MongoDB. In the form shown next, you'll be able to specify details such as the hostname, port, and MongoDB version you prefer.
Make a note of the details you enter and press the Save this action button.
Next, you must configure the web app to use the URI of Buddy's MongoDB server. To do so, you can either change the value of the MONGODB_URI field in the .env.example file, or you can use an environment variable on Buddy. For now, let's go ahead with the latter option.
So switch to the Variables tab and press the Add a new variable button. In the dialog that pops up, set the Key field to MONGODB_URI and the Value field to a valid MongoDB connection string that's based on the hostname you chose earlier. Then press the Create variable button.
Our pipeline is already runnable, even though it has only one action. To run it, press the Run pipeline button.
You will now be taken to a screen where you can monitor the progress of the pipeline in real time. Furthermore, you can press any of theLogs buttons (there's one for each action in the pipeline) to take a closer look at the actual output of the commands that are being executed.
You can, of course, also run the pipeline by pushing a commit to your GitHub repository. I suggest you make a few changes to the web app, such as changing its header by modifying the views/partials/header.pug file, and then run the following commands:
When the last command has finished, you should be able to see a new execution of the pipeline start automatically.
6. Moving Files
When a build is successful and all the tests have passed, you'd usually want to move your code to production. Buddy has predefined actions that help you securely transfer files to several popular hosting solutions, such as the Google Cloud Platform, DigitalOcean, and Amazon Web Services. Furthermore, if you prefer using your own private server that runs SFTP or FTP, Buddy can directly use those protocols too.
In this tutorial, we'll be using a Google Compute Engine instance, which is nothing but a virtual machine hosted on Google's cloud, as our production server. So switch to the Actions tab of the pipeline and press the + button shown below the Build and test action to add a new action.
On the next screen, scroll down to the Google Cloud Platform section and select the Compute Engine option.
In the form that pops up, you must specify the IP address of your VM. Additionally, to allow Buddy to connect to the VM, you must provide a username and choose an authentication mode.
The easiest authentication mode in my opinion is Buddy's SSH key. When you choose this mode, Buddy will display an RSA public key that you can simply add to your VM's list of authorized keys.
To make sure that the credentials you entered are valid, you can now press the Test action button. If there are no errors, you should see a test log that looks like this:
Next, choose GitHub repository as the source of the files and use the Remote path field to specify the destination directory on the Google Cloud VM. The Browse button lets you browse through the filesystem of the VM and select the right directory.
Finally, press the Add this action button.
7. Using SSH
Once you've copied the code to your production server, you must again build and install all its dependencies there. You must also restart the web app for the code changes to take effect. To perform such varied tasks, you'll need a shell. The SSH action gives you one, so add it as the last action of your pipeline.
In the form that pops up, you must again specify your VM's IP address and login credentials. Then, you can type in the commands you want to run. Here's a quick way to install the dependencies and restart the Node.js server:
pkill -HUP node #stop node server

cd my_project
npm install  #install dependencies

export MONGODB_URI=
nohup node app.js > /dev/null 2>&1 &  #start node server
As shown in the Bash code above, you must reset the MONGODB_URI environment variable. This is to make sure that your production server connects to its own MongoDB instance, instead of Buddy's MongoDB service.
Press the Add this action button again to update the pipeline.
At this point, the pipeline has three actions that run sequentially. It should look like this:
Press the Run pipeline button to start it. If there are no errors, it should take Buddy only a minute or two to build, test, and deploy your Node.js web app to your Google Cloud VM.
Conclusion
Being able to instantly publish new features, bug fixes, and enhancements to your web apps gives you a definite edge over your competition. In this tutorial, you learned how to use Buddy's pipelines, predefined actions, and attachable services to automate and speed up common tasks such as building, testing, and deploying Node.js applications.
There's a lot more the Buddy platform can do. To learn more about it, do refer to its extensive documentation.
In this tutorial we will create lightweight wishlist functionality for WooCommerce using AJAX, WordPress REST API, and SVG graphics. WooCommerce doesn’t come with wishlist functionality as standard, so you’ll always need to rely on an extension to do the work for you. Unless you build it yourself for complete control..
Wish Upon a Star
Wishlist functionality will allow users to mark certain products, adding them to a list for future reference. In some eCommerce stores (such as Amazon) multiple wishlists can be created, and these can be shared with others, which makes them ideal for birthdays or weddings. In our case, the WooCommerce wishlist we’re going to create will enable customers to easily revisit products they’re considering.
Our wishlist functionality will add a heart icon to the product thumbs, which when clicked will add the product to a wishlist in a table.
Click the heart icon to add a product to the wishlist
Let’s start by building our plugin. Create a folder with
the name “wishlist” and a PHP file with the same name. Add the following snippet to the
PHP file:
We won’t go into detail about the plugin creation process, but if you are new to plugin development I highly recommend this amazing new course by Rachel McCollin:
Let’s sketch out our plan so we know what to build:
Add wishlist toggle to products in loop and single pages
using WooCommerce hooks
Create wishlist table shortcode to hold the products added
to the wishlist
Create wishlist custom option in the user profile
All the plugin code will go inside the init action for the plugin, as we first need to make sure that the WooCommerce plugin is active. So
right after the plugin details add the following code:
add_action('init','plugin_init');
function plugin_init(){
    if (class_exists("Woocommerce")) {
    // Code here
    }
}
And now let’s enqueue our plugin scripts and styles.
Add the following code to the main plugin file:
function wishlist_plugin_scripts_styles(){
    wp_enqueue_style( 'wishlist-style', plugins_url('/css/style.css', __FILE__ ), array(), '1.0.0' );
    wp_enqueue_script( 'wishlist-main', plugins_url('/js/main.js', __FILE__ ), array('jquery'), '', true);
    wp_localize_script(
        'main',
        'opt',
        array(
            'ajaxUrl'        => admin_url('admin-ajax.php'),
            'ajaxPost'       => admin_url('admin-post.php'),
            'restUrl'        => rest_url('wp/v2/product'),
            'shopName'       => sanitize_title_with_dashes(sanitize_title_with_dashes(get_bloginfo('name'))),
            'inWishlist'     => esc_html__("Already in wishlist","text-domain"),
            'removeWishlist' => esc_html__("Remove from wishlist","text-domain"),
            'buttonText'     => esc_html__("Details","text-domain"),
            'error'          => esc_html__("Something went wrong, could not add to wishlist","text-domain"),
            'noWishlist'     => esc_html__("No wishlist found","text-domain"),
        )
    );
}
add_action( 'wp_enqueue_scripts', 'wishlist_plugin_scripts_styles' );
Here we enqueue the main style.css file and the main.js
file for the plugin, also we pass some parameters to the main.js file to work
with:
ajaxUrl– required to fetch some data from WordPress, like current
User ID
ajaxPost– required to update user wishlist
restUrl– required to list the wishlist items in the
wishlist table
shopName– required to add wishlist items to the session
storage for non-registered or non-logged-in users
And some strings instead of hardcoding them into the js file, in case
they need to be translatable.
So for now create a css, and js folder and put the corresponding
files inside those folders: style.css in the css folder and main.js in the js folder.
2. Hook the Wishlist Toggle
Right inside the init action add the following code:
// Add wishlist to product
add_action('woocommerce_before_shop_loop_item_title','wishlist_toggle',15);
add_action('woocommerce_single_product_summary','wishlist_toggle',25);
function wishlist_toggle(){

    global $product;
    echo '<span class="wishlist-title">'.esc_attr__("Add to wishlist","text-domain").'</span><a class="wishlist-toggle" data-product="'.esc_attr($product->get_id()).'" href="#" title="'.esc_attr__("Add to wishlist","text-domain").'">'.file_get_contents(plugins_url( 'images/icon.svg', __FILE__ )).'</a>';
}
Here we add a wishlist toggle to each product in the loop and
to each single product layout, using the woocommerce_before_shop_loop_item_title
and woocommerce_single_product_summary
hooks.
Here I want to point out the data-product attribute that
contains the product ID–this is required to power the wishlist functionality.
And also take a closer look at the SVG icon–this is required to power the
animation.
3. Add SVG Icons
Now create an images folder in the plugin folder and put the
following icon.svg in it:
When the user clicks on it we will hide the heart path
and show the loading path.
Once the loading finishes we will show the checkmark
indicating that the product was successfully added to the wishlist.
We will toggle the loading state via JavaScript later; the loading animation is a simple transform rotate. So for now if you refresh the page (don’t forget to clear the browser cache as sometimes old styles are cached) you will see a nice heart icon with each product.
This toggle currently does nothing, so we’ll sort that out. But for now let’s keep with our plan.
4. Create Wishlist Table Shortcode
Add the following code in the init plugin action:
// Wishlist table shortcode
add_shortcode('wishlist', 'wishlist');
function wishlist( $atts, $content = null ) {

    extract(shortcode_atts(array(), $atts));

    return '<table class="wishlist-table loading"><tr><th><!-- Left for image --></th><th>'.esc_html__("Name","text-domain").'</th><th>'.esc_html__("Price","text-domain").'</th><th>'.esc_html__("Stock","text-domain").'</th><th><!-- Left for button --></th></tr></table>';

}
This is a very simple shortcode that you can add to any page,
and the wishlist items will appear inside it. I won’t describe the shortcode
creation process, but if you are new to this, I highly recommend reading this
amazing tutorial:
Now from inside the WP admin create a page called “Wishlist” and put the [wishlist] shortcode inside it. Now if you go to the wishlist page you will see an empty table.
Did you notice the loading class on the table? We will
remove the loading class with JavaScript later, once the wishlist items are ready to be
appended to the table. But for now open the style.css and add the following
code:
This is the same loading SVG separated from the main icon.svg.
We could use SVG sprites, but I decided to stick with a separate loading
SVG.
Now, if you go to the wishlist page and refresh it you will
see an empty table with loading on it. Nice, let’s move further.
5. Wishlist Custom Option in the User Profile
Our wishlist functionality will work both for logged-in users
and guest users. With logged-in users we’ll store the wishlist information in the user’s metadata, and with guest users we’ll store the wishlist in the
session storage.
You can also store the guest users’ wishlist in local
storage, the difference being that session storage is destroyed when the user closes
the tab or browser, and local storage is destroyed when the browser cache
is cleared. It is up to you which option you use for guest users.
Again, in order to remain within the scope of this tutorial, I won’t explain how to work with user metadata. If you are new to this I highly recommend reading
this amazing tutorial:
All we do here is create a text field input that will hold
the wishlist items comma-separated IDs. With show_user_profile and edit_user_profile
actions we add the structure of the input field, and with personal_options_update and edit_user_profile_update
actions we power the save functionality.
So once the wishlist is updated it
will save to the database. I you go to your profile page you will see a
new text field added to it. Add whatever value you want and hit save to test if the
update functionality works. With admin CSS you can hide this field if you don’t
want users to see it. I will leave it as is.
6. Turn it On!
Now we are ready to power everything up!
Open the main.js file and put the following code in it:
(function($){
    "use strict";
})(jQuery);
All our code will go inside this function.
Now let’s gather the required data and create some variables:
var shopName   = opt.shopName+'-wishlist',
    inWishlist = opt.inWishlist,
    restUrl    = opt.restUrl,
    wishlist   = new Array,
    ls         = sessionStorage.getItem(shopName),
    loggedIn   = ($('body').hasClass('logged-in')) ? true : false,
    userData   = '';
As you might remember when we enqueued our main.js script we passed
some parameters to it. Here, with JavaScript, we can collect these parameters.
Next, we will create an empty wishlist array that will
contains wishlist items. We will need the session storage data with our shop
name (the ls variable stands for local storage), and we will need to know if the
user is guest or logged-in.
Let me explain the logic here: whenever the user visits the
shop page we will need to know if he or she is logged-in or is a guest-user. If the user is logged-in we will need to check if he or she has wishlist items, and
if so highlight these items. If not we need to see if there are any items in the session/local
storage and highlight those.
Why this is done like this? Imagine,
if the user first visits the website as a guest, adds items to the wishlist, and then decides to login. If the user does not have items registered in
the profile wishlist, we will need to show the ones that he or she added before
login, that are stored in the session/local storage.
So let’s do that step by step:
If User is Logged-in
Fetch current user data with AJAX
If success update the wishlist
Highlight the wishlist items
Remove the session/local storage
If fail show error message in the console for the developer
else {
    if (typeof(ls) != 'undefined' && ls != null) {
        ls = ls.split(',');
        ls = ls.unique();
        wishlist = ls;
    }
}
As you may have noticed here we have double-AJAX and some helper functions.
So first let’s create the actions of the AJAX requests, and after that I will explain
our helper functions. I won’t describe in detail the AJAX functionality in
WordPress, but if you are new to AJAX and WordPress, I highly
recommend reading this amazing tutorial on it:
Our first AJAX request gets the user id and the user
wishlist data from WordPress. This is done with a custom AJAX action added to the
plugin code file:
// Get current user data
function fetch_user_data() {
    if (is_user_logged_in()){
        $current_user = wp_get_current_user();
        $current_user_wishlist = get_user_meta( $current_user->ID, 'wishlist',true);
		echo json_encode(array('user_id' => $current_user->ID,'wishlist' => $current_user_wishlist));
    }
    die();
}
add_action( 'wp_ajax_fetch_user_data', 'fetch_user_data' );
add_action( 'wp_ajax_nopriv_fetch_user_data', 'fetch_user_data' );
The most important part here is the action name (fetch_user_data)–make sure it is the same for AJAX and for functions wp_ajax_fetch_user_dataandwp_ajax_nopriv_fetch_user_data.Here we’re preparing JSON formatted data with user ID and user
wishlist data.
Our next AJAX request updates the user wishlist if there were already wishlist items from session/local storage. Take a close look at the url
option–see it is different.
The logic is the same
as for the first action–the difference is that here we don’t return or echo
any data, but we update the wishlist option for the current user.
And if our user is a guest we will need to check if there are any wishlist details in the session/local storage.
Helper Functions
Before we move to the events part I want to explain our
helper functions
Array.prototype.unique = function() {
  return this.filter(function (value, index, self) {
    return self.indexOf(value) === index;
  });
}

function isInArray(value, array) {return array.indexOf(value) > -1;}

function onWishlistComplete(target, title){
    setTimeout(function(){
        target
        .removeClass('loading')
        .addClass('active')
        .attr('title',title);
    },800);
}

function highlightWishlist(wishlist,title){
    $('.wishlist-toggle').each(function(){
        var $this = $(this);
        var currentProduct = $this.data('product');
        currentProduct = currentProduct.toString();
        if (isInArray(currentProduct,wishlist)) {
            $this.addClass('active').attr('title',title);
        }
    });
}
The first helper function makes the array unique, by removing duplicates,
the second one checks if the given value is present in the given array. The next
function executes when an item is added to the wishlist and the last
one shows items that are in the wishlist.
Add Toggle
Now let’s add a click event to the wishlist toggle to power
the actual functionality. On each toggle click event the
animation is triggered and if the user is logged-in the wishlist update action
fires with AJAX. If the user is a guest the item is added to the
session/local storage.
Now if you go to the shop page, refresh the browser, and
click on any wishlist toggle you will see it is working!
$('.wishlist-toggle').each(function(){

    var $this = $(this);

    var currentProduct = $this.data('product');

    currentProduct = currentProduct.toString();

    if (!loggedIn && isInArray(currentProduct,wishlist)) {
        $this.addClass('active').attr('title',inWishlist);
    }

    $(this).on('click',function(e){
        e.preventDefault();
        if (!$this.hasClass('active') && !$this.hasClass('loading')) {

            $this.addClass('loading');

            wishlist.push(currentProduct);
            wishlist = wishlist.unique();

            if (loggedIn) {
                // get user ID
                if (userData['user_id']) {
                    $.ajax({
                        type: 'POST',
                        url:opt.ajaxPost,
                        data:{
                            action:'user_wishlist_update',
                            user_id :userData['user_id'],
                            wishlist :wishlist.join(','),
                        }
                    })
                    .done(function(response) {
                        onWishlistComplete($this, inWishlist);
                    })
                    .fail(function(data) {
                        alert(opt.error);
                    });
                }
            } else {

                sessionStorage.setItem(shopName, wishlist.toString());
                onWishlistComplete($this, inWishlist);

            }

        }


    });
});
7. List Items in Wishlist Table
Now it is time to list our wishlist items in the wishlist
table we created earlier.
Add the following code into main.js at the very bottom of
our wrapper function:
Here we are using the
WordPress REST API to get the products by ID in the wishlist array.
For
each of the products we get we are adding a table row with the required data to
display. We need the product image, title, stock status, button and price.
Here we have two options for the REST API:
using the WordPress REST API
using the WooCommerce REST API.
The difference here is that product data is already present
in the Woocommerce REST API, but an API key is required. With the default
WordPress REST API product data is absent by default, but can be added, and no
API key is required. For such a simple task as a wishlist I don’t think that an API
key is needed, so we will do it by extending the default WordPress REST API to return our product price, image code and the stock level.
Go to the main plugin file and at the very bottom add the
following code:
// Extend REST API
function rest_register_fields(){

    register_rest_field('product',
        'price',
        array(
            'get_callback'    => 'rest_price',
            'update_callback' => null,
            'schema'          => null
        )
    );

    register_rest_field('product',
        'stock',
        array(
            'get_callback'    => 'rest_stock',
            'update_callback' => null,
            'schema'          => null
        )
    );

    register_rest_field('product',
        'image',
        array(
            'get_callback'    => 'rest_img',
            'update_callback' => null,
            'schema'          => null
        )
    );
}
add_action('rest_api_init','rest_register_fields');

function rest_price($object,$field_name,$request){

    global $product;

    $id = $product->get_id();

    if ($id == $object['id']) {
        return $product->get_price();
    }

}

function rest_stock($object,$field_name,$request){

    global $product;

    $id = $product->get_id();

    if ($id == $object['id']) {
        return $product->get_stock_status();
    }

}

function rest_img($object,$field_name,$request){

    global $product;

    $id = $product->get_id();

    if ($id == $object['id']) {
        return $product->get_image();
    }

}

function maximum_api_filter($query_params) {
    $query_params['per_page']["maximum"]=100;
    return $query_params;
}
add_filter('rest_product_collection_params', 'maximum_api_filter');
All this does is create new fields for REST API and extends the
maximum items limit per request. Again, if you are new to this subject I highly recommend reading this series.
For now, if you go to your wishlist table and refresh the
page you will see the list of items that are added to your wishlist.
8. Removing Items From Wishlist
We are almost
done; only the remove functionality remains. So let’s create that! Add the
following code at the very bottom of the wrapper function in the main.js file
$(document).on('click', '.wishlist-remove', function(){

    var $this = $(this);

    $this.closest('table').addClass('loading');

    wishlist = [];

    $this.closest('table').find('tr').each(function(){

        if ($(this).data('product') != $this.closest('tr').data('product')) {

            wishlist.push($(this).data('product'));

            if (loggedIn) {

                // get user ID
                if (userData['user_id']) {
                    $.ajax({
                        type: 'POST',
                        url:opt.ajaxPost,
                        data:{
                            action:'user_wishlist_update',
                            user_id :userData['user_id'],
                            wishlist :wishlist.join(','),
                        }
                    })
                    .done(function(response) {
                        $this.closest('table').removeClass('loading');
                        $this.closest('tr').remove();
                    })
                    .fail(function(data) {
                        alert(opt.error);
                    });
                }
            } else {
                sessionStorage.setItem(shopName, wishlist.toString());
                setTimeout(function(){
                    $this.closest('table').removeClass('loading');
                    $this.closest('tr').remove();
                },500);
            }
        }

    });

});
Once the remove icon is clicked (make sure you have a remove.svg in the images folder, you can use whatever
icon you want), we need to check if the user is logged-in. If so, we then remove the
item ID from the wishlist using AJAX with the user_wishlist_updateaction. If the user is a guest we need to remove the item ID from the
session/local storage.
Now go to your wishlist and refresh the page. Once you click
on the remove icon your item will be removed from the wishlist.
Conclusion
That was quite a project! A simple, but comprehensive wishlist feature for your WooCommerce stores. You are free to use this plugin in any project; you can
extend, modify it and make suggestions. I hope you liked it. Here is the link to the source files on GitHub. And here is the demo.
Learn More WooCommerce Theme Development
At Tuts+ we have a great collection of tutorials and courses to learn WooCommerce development. Check out these four great courses to get started!


.png)
.png)


.png)
.jpg)